Boats and Thru-hull Holes

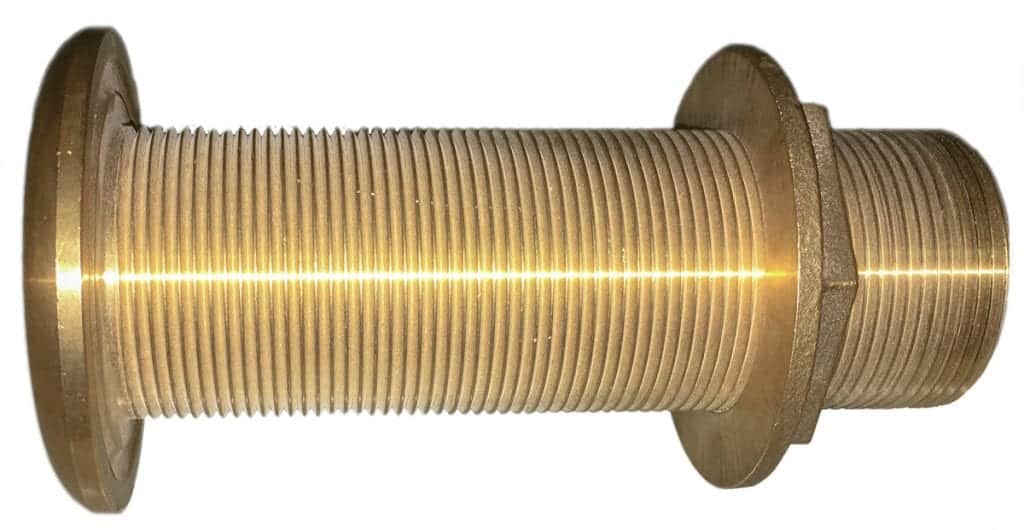
When you have to install thru-hull holes, do it right the first time.

Most any boat maintenance guru worth his Veda will advise you to avoid adding additional
thru-hull holes if at all possible. Tapping into an existing discharge or intake thru-hull is often recommended but may not always be an option. While drilling a hole in your boat’s hull is not ideal, the actual process to install a new thru-hull is pretty straightforward.

Let’s walk through a hypothetical installation of an air conditioning system that requires two new thru-hulls, one that’s below the waterline intake and the other above the waterline discharge.

Preparation

American Boat & Yacht Council (ABYC) standards call for the installation of a seacock on thru-hulls located below the vessel’s maximum heeled waterline. For the purpose of this
article, we’ll say the discharge thru-hull does not require a seacock; however, the raw water intake thru-hull (located below the waterline) does.

The discharge thru-hull for our example will be bronze. The seacock will be a typical flanged bronze unit with a compatible bronze thru-hull, although Marelon polymer seacocks and thru-hulls would be another option. Just keep in mind that the seacock and thru-hull must always be of the same material.

When planning the installation, choose a location that provides good access to the thru-hull. For our intake thru-hull, verify that the seacock can be accessed quickly in the event of an emergency and that the handle can be fully operated (i.e., no frames, bulkheads, etc., that block the throw of the handle).

In addition, avoid locating the thru-hull in front of a depth transducer or knot log, both of which could be affected by the turbulence a thru-hull generates.  Once you’ve identified a suitable location, mark the center of the thru-hull and drill a small pilot hole from inside the vessel. This gives you one last chance to check the location on the outside of the hull to verify all is well prior to cutting the hole.

Hole saw time

Select a hole saw the same diameter or slightly larger than your thru-hull, one with a pilot drill bit, which prevents the hole saw from walking when drilling. Using the small location hole you drilled as a guide, start drilling from the outside of the hull and be sure to keep the drill perpendicular to the hull surface. Drill until the pilot bit of the hole saw penetrates the hull, then move inside and finish drilling the hole. Smooth any rough edges of the hole with sandpaper.

For a cored hull, excavate the coring around the hole to a depth that encompasses an area at least as large as the thru-hull or seacock flange. Then fill the void with thickened
epoxy and allow it to cure before proceeding. This epoxy compression ring provides a solid base for the thru-hull and prevents water from entering the core.

Backing plates

A backing plate provides additional support to the hull and a flat mounting surface for the thru-hull nut or seacock flange should there be any hull curvature. A fiberglass backing plate glassed into the hull is the ultimate solution, however, marine-grade plywood is commonly used and perfectly acceptable.

Backing plates should be two to three inches larger in diameter than the thru-hull nut or seacock flange. Cut a circular backing plate from ¾-inch marine plywood, then drill
a hole in the center with the hole saw used to drill the thru-hull hole in the hull. Use a sander or wood rasp to shape the backing plate as needed to match the curvature of the hull. Once fitted, mark the backing plate so you can properly orient it later.

Test run

Always dry fit the thru-hull/seacock prior to final installation. Remove the backing nut and insert the discharge thru-hull from the outside. On the inside, fit the backing plate over it,
then install and snug up the flange nut. The intake thru-hull will screw directly into the seacock. Remove the thru-hull nut, insert the thru-hull into the hull, fit the backing plate, thread the seacock onto the thru-hull, and tighten until snug.

For bronze thru-hulls, a special tool called a step wrench is used to grip the ears inside the unit and hold it securely during tightening. A wedge of plywood inserted in the thru-hull also works well in a pinch.

WHEN IS A SEACOCK NOT A SEACOCK?

Many builders utilize inline valves attached directly to the thru-hull. However, there are a number of problems associated with this approach. To start with, in-line valves use NPT (National Pipe Taper) threads, which are not compatible with the NPS (National Pipe Straight) used in most thru-hull fittings (unless the thru-hull fitting is machined with “combination thread”).

Installing an in-line valve onto an NPS thru-hull fitting creates a mismatch of threads resulting in a weaker, less waterproof joint (due to less thread engagement). As it has no mounting flange, an in-line valve can turn or loosen from the thru-hull fitting due to vibration or through normal use. Finally, unlike proper seacocks, in-line valves are not fitted with grease nipples, bonding wire tabs or drains, each of which can create potential maintenance and winterization issues.

Once inserted into the seacock and moderately tightened, there should be a sufficient length of thru-hull inside the seacock but not enough that the thru-hull bottoms out.

If the thru-hull is too long, cut it to length. If the thru-hull is too short, use thinner plywood (½ inch, for example) to construct the backing plate. Most flanged seacocks have three mounting holes to prevent the seacock from turning once installed. There are two acceptable methods to secure the seacock. The first is to drill holes through the backing plate and hull (using the flange as a guide), then install bolts through the hull and secure everything together.

The second is to screw the seacock flange to the backing plate only. This is the option we’ll go with for our example. Regardless of the method chosen, ensure the mounting bolts or screws are of the same material as the seacock. Either stainless steel or bronze is acceptable when mounting nylon seacocks.

Installation

Once the dry fit is complete, disassemble everything and seal both backing plates with three to four coats of epoxy and allow to dry. You’ll need a second set of hands to hold the thru-hull in place during installation and while tightening. Apply a generous amount of marine-grade sealant (polyurethane or polysulfide) to the thru-hulls mushroom
flange, then insert it into the hull.

On the inside, apply sealant to the hull (around the inserted thru-hull) and hull side of the backing plate. Slide the backing plate over the thru-hull, orient as required and press down, bedding it to the hull.

For our discharge thru-hull, the next step is to add a thick bead of sealant to the top of the backing plate hole around the thru-hull, install the thru-hull nut and tighten snugly. You should see a ring of sealant ooze from beneath the thru-hull nut. For the intake thru-hull, apply sealant to the seacock’s flange (again, enough to see “squeeze out” all around once tightened), and then thread the seacock onto the thru-hull and tighten.

Once the seacock is properly positioned and tightened, use the flange as a template to drill the mounting holes into the backing plate. Be sure to drill into the backing plate only,
not into the hull (use a drill stop or piece of tape attached to the bit to prevent this). Clean the mounting holes of debris, add sealant to the holes and threads of the mounting screws, then install.

Once the installation is finished, fit the seacock with an appropriately sized tailpiece/hose barb (using thread sealant) and attach the cooling system intake hose to it. Attach the air
conditioning discharge hose to the hose barb of the overboard thru-hull, and it’s pa’u hana!

By Frank Lanier, Southern Boating March 2019

Return to the Haul Out Guide

Great Loop Waterways

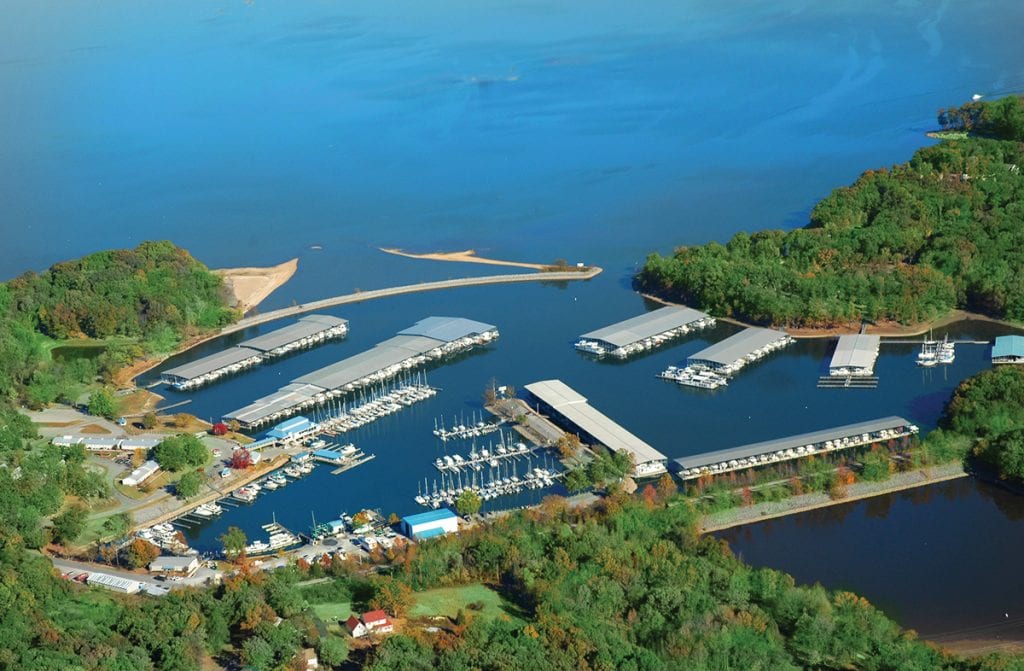
Great Loop Waterways

If you’re in the midst of planning your own Great Loop adventure, take note of these river-lakes on or accessible from these Great Loop waterways.

All who have cruised the Great Loop Waterways—the system comprising the eastern half of the United States that enables one to circumnavigate by water—have a list of their favorite spots they added for a variety of reasons: picturesque views, fascinating history, friendly people, fabulous food, or simply serene cruising areas.

We’ve compiled a list of some of the notable expanses of water, where the river transforms into a lake that’s long and broad. Check out these Great Loop Waterways.

Kentucky Lake and Lake Barkley, Kentucky

From the Ohio River at Paducah, Kentucky, southbound Loopers have the option of taking the Tennessee River or Cumberland River, both of which require passing through a lock. Although it adds several miles to the journey, many cruisers opt for the Cumberland River due to the potential for lock delays from commercial traffic on the Tennessee River.

Barkley Lock opens up on the south side to Lake Barkley. Just past the lock to starboard is Green Turtle Bay Resort & Marina, with all the services cruisers need plus great dining options for a break from the galley, including not-to-be-missed Patti’s 1880s Settlement; order the pork chop and pie.

Lake Barkley and Kentucky Lake are connected by the Barkley Canal that enables cruisers to enjoy boating on both lakes. The canal that separates the two lakes is on the north end of a long peninsula called Land Between the Lakes National Recreation Area.

Check your charts and depth gauge and explore the coves; some have waterfalls inside. This beautiful area is best in the fall when the hardwoods explode with color and southbound cruisers can extend their enjoyment of peak fall foliage for several weeks. Don’t miss this scenic spot on the Great Loop Waterways.

Lake Champlain, Vermont

Northbound cruisers transiting from the Atlantic to the Great Lakes have several route options depending on their bridge clearance requirements, time schedule and what they want to see, and there are pros and cons for each. The route through New York Harbor and the Hudson River to Waterford, New York, continues through the Champlain Canal and leads to Lake Champlain, also known as the Adirondacks’ Great Lake.

Lake Champlain is a boating mecca, but its large size leaves plenty of room for everyone (125 miles long, 14 miles wide, 64 feet average depth). Even so, there are many bays and coves to anchor for a quiet evening, while on shore, quaint towns offer dining options galore plus farmers markets to provision locally grown produce and products nearly any day of the week.

In towns and villages on both sides of the lake—New York and Vermont—lovers of history, art and music will find a wealth of events and venues to pique their interest, including
museums, art galleries, concerts, antique shops, festivals, and celebrations.

Lake Pepin, Minnesota

Although the upper Mississippi is not part of the Great Loop route, there are a fair number of Loopers from the upper Midwest who start their Great Loop cruise in Minnesota.
There are also some who want to cruise all five of the Great Lakes, so they cruise to the far western end of Lake Superior and have their boat hauled in Duluth and transported to the Mississippi River south of the Twin Cities to continue their Great Loop journey. In addition to bragging rights of cruising all five of the Great Lakes, Loopers will also pass through all the locks on the Mississippi River, providing they choose that route rather than the Tenn-Tom Waterway.

Lake Pepin is the widest, naturally occurring expanse of the entire Mississippi River and is located south of the Minnesota town of Red Wing (Lock 3). Lake Pepin is a favorite boating destination and cruising ground for many, and picturesque in all seasons, especially the fall when both sides of the lake are flaming with autumn colors. Sailing is common in the summer months, and the Lake City municipal marina welcomes transient cruisers. Pepin City, Wisconsin, hosts a small theater group, and the Mediterranean-style winery, Villa Bellezza, is close by.

Trent-Severn Waterway, Canada

This chain of lakes, rivers, and locks really deserves a feature article of its own—look for this in a future issue—but it would be a disservice not to include it here, too. Loopers on
the northern part of the counter-clockwise route who choose to bypass Lake Erie enter the Trent-Severn Waterway at Trenton on the Bay of Quinte on the east end of Lake Ontario, and they exit at Port Severn on Georgian Bay of Lake Huron.

The 240-mile-long waterway offers a plethora of experiences too lengthy to include here, but those who have experienced this route report they’re eager to repeat their Loop experience if only to spend more time exploring this area alone.

There are, of course, many more lakes, rivers, channels, and detours on the Great Loop waiting to be explored. If you’ve completed or are in the process of cruising the Great Loop, we’d love to hear about your favorite Great Loop Waterways. Email sbletters@southernboating.com.

By Liz Pasch, Southern Boating January 2019

Sacrificial Anodes

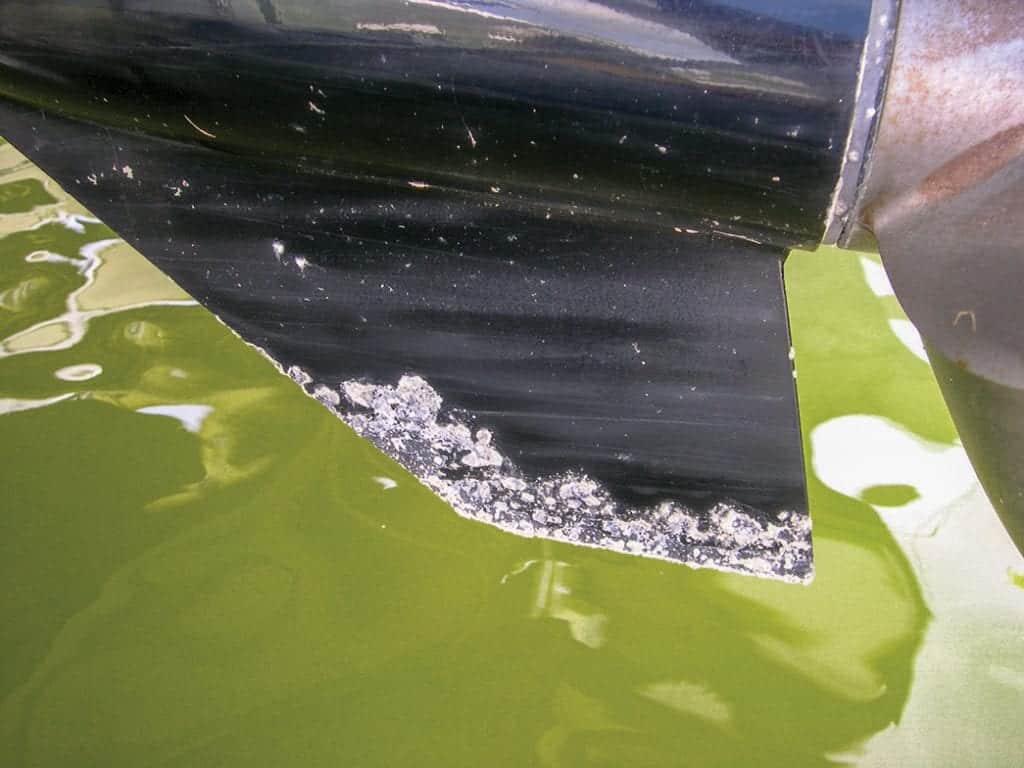
Sacrificial Anodes

Sacrificial anodes die so your underwater gear may live.

A war is raging under your boat. High-priced running gear and outboard lower units made of aluminum, copper, and steel face galvanic corrosion. Corrosion occurs when dissimilar metals connect under water. The solution involves connecting an even more “active” negatively charged material to the copper and steel—the sacrificial anode. The anodes are made of aluminum, zinc, and magnesium and connected to the boat’s underwater engine and propulsion parts to take the brunt of the corrosion. They are “sacrificed” to protect the more valuable metals.

How do anodes work?

“Anodes have to be underwater to work,” explains Martin Wigg, vice president of Anode Business at Performance Metals. “The anodes work by providing a supply of electrons to lower the voltage of the protected metal. That is only half the circuit though. The other half is the flow of ions in the surrounding water. No water equals no ion flow and no circuit and, therefore, no protection. There are companies that market ‘corrosion grenades’ to protect metal in air, but they are a scam.”

Aluminum has become a recommended metal for anodes in salt water, and magnesium anodes work best in fresh water. In fresh water, a zinc anode forms a chemical coating that stops it from working; however, zinc anodes are a favorite of many boat owners in salt water despite the advantages of aluminum. “Zinc is still used in the majority of cases,” says Wigg. “It’s fine for use on inboard boats in salt water but that’s really all.

However, people are slow to change. They have been using zinc for years and are hesitant to change to something new, especially if zinc is working fine.” When boaters take the leap and try aluminum anodes, they find that they work better than the old zinc anodes and never go back. This is especially true for aluminum-hulled boats and outboard motors.

How long do anodes last?

“Zinc doesn’t really protect aluminum components that well even in salt water,” Wigg explains. “Many boaters also don’t realize that zinc doesn’t work for long in fresh or brackish water. I have heard people say, ‘My anodes have lasted for years.’ Yes, because they stopped working.” Anodes dissolve over time and, eventually, must be replaced.

Martin Wigg’s Top Tips for Anodes.

Two factors are important. First, to provide good protection, there must be enough anodes to bring the full potential of the vessel down by 0.2V to an acceptable range. The lower the measured voltage, the less likely the metal will corrode. This is where zinc anodes have a problem protecting aluminum components. Zinc anodes sit at -1.05V and aluminum components sit at around -0.75V, a difference of 0.3V, not much more than the required 0.2V drop. Aluminum anodes—a special alloy—sit at -1.1V, a difference of 0.35V, which is much better.

“The second factor is that the protection offered is proportional to the surface area,” Wigg says. “So as the anodes wear away, that surface area is reduced. The general guide is to replace the anodes after they have worn down by one half.” Performance Metals’ range of aluminum alloy anodes has a Red Spot plastic indicator that appears on the surface when it is time to change.

Which boats need anodes?

A 50-foot fiberglass cruising vessel has metal components that need protecting. With bonded thru-hulls, use a transom anode at a minimum. Wigg suggests the Performance Metals’ Divers Anode or HYAA (ribbed anode with extra surface area). “Viking uses these on its vessels. There should also be anodes on the engine’s drive shaft to protect the propeller and shaft. The bonding system is not well connected to the shaft since it goes through the gearbox.”

There are various shapes and sizes of anodes that have a variety of purposes.

Outboard-powered boats need anodes to protect the engines. Install the main aluminum anodes on the outboards. A transom anode for any other metal components is also advisable and should be aluminum. A zinc transom anode would reduce the protection provided by the aluminum ones on the outboard and speed up their use.

Also, outboards are unique because the midsection and lower unit are almost always aluminum. Back in the early 1990s, as the outboard makers saw galvanic corrosion as a huge issue, they sought a better solution than zinc anodes and went to aluminum. Some outboard manufacturers void warranties if anodes are zinc.

By Doug Thompson, Southern Boating February 2019

Install a Stereo on Your Boat

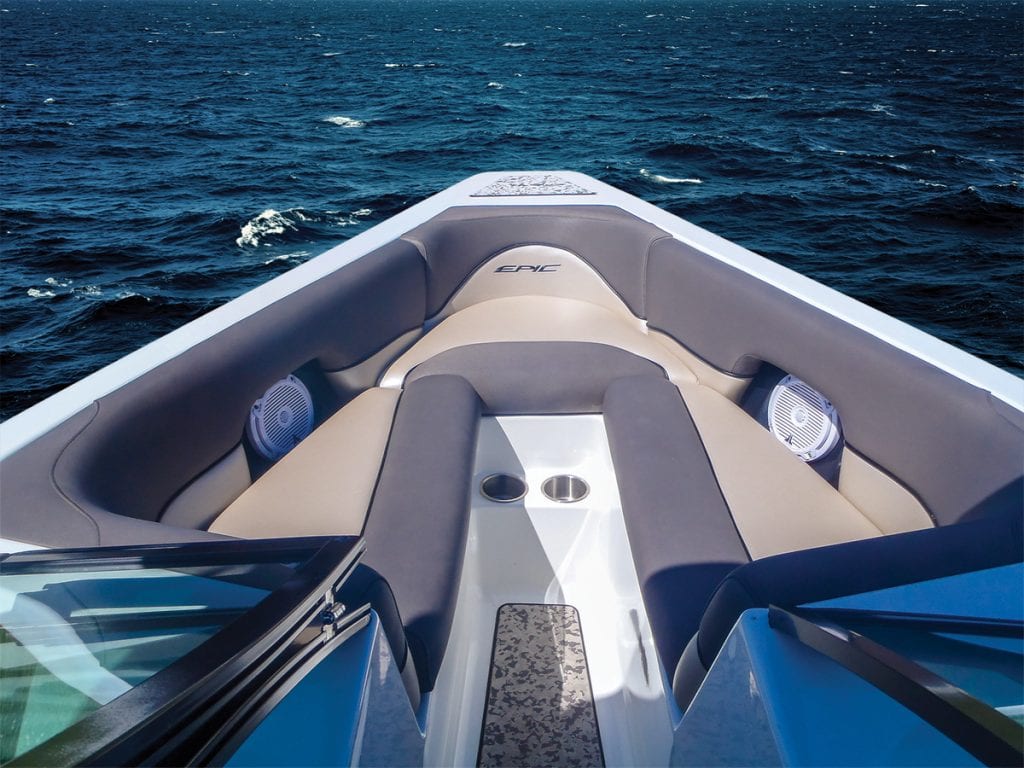
Install a Stereo on Your Boat

Everyone likes tunes while on the water, but if your boat didn’t come with a factory-installed stereo, you don’t have to suffer the sound of silence. Let’s take a look at what’s involved to install a stereo on your boat.

Stereo receiver

When choosing a stereo to install on your boat, you need to consider both the unit and mounting options. Back in the day, the standard stereo was a 7×2-inch box that included a CD player. Today’s trends are stereos designed exclusively to play music from strictly digital media sources: MP3 players, iPods, and smartphones. As no CD player is required, the design and size of today’s stereos vary greatly from traditional units, and most have a smaller cutout.

Back in the day, stereos on your boat took up a lot more space.

The “black box” type of stereos add yet additional dimension to the mix. These units consist of a small box housing the amplifier, radio and all the wiring connections. They’re controlled by a waterproof, hockey puck shaped, wired remote that’s mounted in a convenient location (helm, swim platform, etc.).

These remote units can also be sized to fit easily into a dashboard to take up less real estate at the helm. When shopping for a new stereo, you might logically assume that all “marine” stereos are waterproof, but surprisingly, that’s not the case. Some units are fully waterproof, but others may be splash resistant or waterproof only when the faceplate is sealed. Partially waterproof units can have an open chassis that is prone to water intrusion should moisture find its way past the faceplate gasket. Thoroughly read the information on any potential stereo purchase to ensure you know just how protected it is against moisture.

Unless the unit is completely waterproof, you’ll want to choose a dry location for your stereo that provides as much protection against the elements as possible. Dry may be a relative term for smaller, open boats (center consoles and the like), but even then, there will be some locations that provide better protection than others. When you install a stereo on your boat, choose a waterproof stereo or remote control. It’s always a good option, especially when mounting choices are less than ideal.

Speakers

Speakers will either be flush mounted or box speakers, both of which have their own set of pros and cons. Flush-mount speakers can be installed in tight, out-of-the-way spaces and present a cleaner looking installation. As to downsides, they require you to cut a hole in your boat to install. For best frequency response, flush-mount speakers must have sufficient air space around the cone. You also don’t want an open-air path behind the speaker, which can reduce the bass response. The speaker installation instructions should spell out minimal space requirements and other such requirements for best performance.

Box speakers are an attractive option for a number of reasons. They don’t require you to cut holes for mounting, and the box enclosure is already designed and set for optimal performance. This means you don’t have to worry about the required air space around the speaker. The only real downside to box speakers is that they take up more space than flush-mount units.

Speaker position

When planning to install a stereo on your boat, keep in mind that speakers are directional, meaning they project sound in the direction they are pointed. As such, you want them to be directed to where your ears will be. This isn’t as critical in your car or home because there are numerous surfaces for the sound to bounce off of, but when they ate installed in an open boat, the sound they produce can easily be lost.

Make sure your speakers are angled so that the music is possible to hear.

Select speaker locations that not only optimize sound but also minimize exposure to water as much as possible. Stereo sound is way better than mono sound, so choose locations that allow you to hear at least two speakers at the same time. Otherwise, you’ll only be getting half of the
music experience.

Before you cut the hole

You’ve chosen an ideal location for the stereo, but is it really all that? Take a moment to step back and visualize the installation as a whole. Mentally walk through it to head off any potential problems. For example, you’ve found the perfect spot for the stereo or remote head, but is there a path to run the control cable or wire bundle? You’ll also want to be doubly sure of what’s on the other side of the selected mounting location. Drilling into hoses or electrical cables or even the hull itself is never conducive to a good stereo install.

This mental walk-through also provides a good opportunity to make a list of tools and materials needed to complete the job and prevent extra trips to the chandlery. For many, the most daunting part of any stereo installation is routing the wires and cabling. It doesn’t have to be that way, however, if you plan the run first and have the proper tools. One of the handiest tools for pulling wires and cables is an electrician’s “fish tape” or wire snake. Snakes must be stiff enough to maintain their shape while pushing, yet supple enough to twist around curves and bends. Those made of tempered wire are commonly used, although newer, more flexible units of fiberglass or other composite materials are also popular.

Regardless of the one you choose, you’ll want to be able to twist the snake to better make turns and bends, reducing or eliminating the number of additional holes needed to facilitate installation.

Installing a stereo system is a satisfying day or weekend project that’s within the ability of most any DIYer. Just take a little time to plan out the installation beforehand to help ensure you’ll enjoy the sweet sound of success for years to come.

Cable Pulling 101

  • When pulling wire or coax, use a firm, steady motion and always pull at the flattest angle possible to reduce friction. This approach puts less stress on the wire while reducing the chances of tears or damage to insulation or wiring.
  • ­When using a snake, feed it through first with nothing attached, then attach the cable or wire bundle to the end of the snake and pull everything back through slowly. Make this attachment as small as possible for easier pulling (covering the joint with a few tight wraps of electrical tape will make it more streamlined).
  • When pulling larger wire bundles, stagger the wires where attached to the snake, which both reduces the profile of the joint and makes it easier to pull around tight bends. Include and leave an extra pull string in place when pulling wire or coax to assist with future installations.

By Frank Lanier, Southern Boating January 2019

Need more marine stereo equipment?

Swimsuit 2019: Behind the Scenes

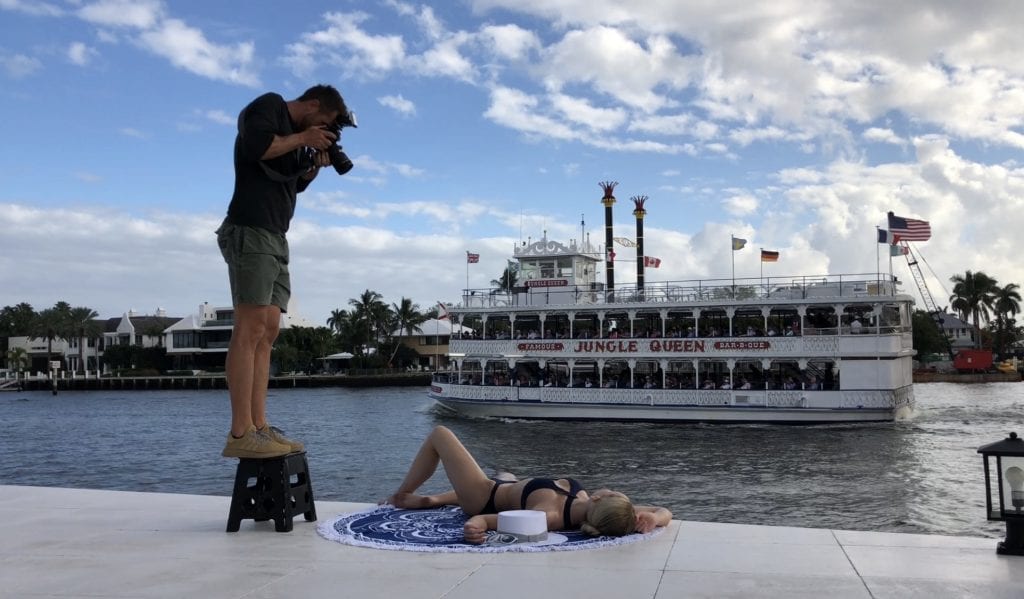
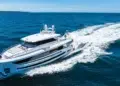
Swimsuit 2019: Behind the Scenes

Fort Lauderdale’s expansive waterway lends perfectly to leisurely cruising for locals and serves as a dream destination for visitors. More than 300 miles of waterway weaves through Broward County, where anchorages, full-service marinas, hotels, restaurants, and extravagant waterfront homes line its banks.

Southern Boating has indulged in this water wonderland since 1972, it’s our lifestyle, and we felt it was high time to highlight Fort Lauderdale’s waterway landscape in our annual swimsuit issue. When the opportunity to showcase the glamourous Bontona Peninsula property arose, there wasn’t a doubt that this was the perfect backdrop for our 32nd annual swimsuit photo shoot. How could we say no to a newly redesigned home in the Las Olas Isles with 700 feet of dockage along the New River just off the famed Las Olas Boulevard and a short boat ride to the Atlantic Ocean? We didn’t.

The home highlights Fort Lauderdale’s best assets: sweeping waterway views, ample sunshine, and lavish accommodations. Around every highly stylized corner was another opportunity to photograph stunning swimwear and ravishing resort wear, and no Southern Boating photoshoot could go without a dock, a yacht, and water—luxury at its finest.

But we had some fun too. Check out these behind the scenes photos and videos.


We’d like to give a special shoutout to all who helped produce this shoot.

Sponsors

Bontona Peninsula: Tom & Katia Bates

Sunny courtesy of Michael Joyce & Hargrave Custom Yachts 

Production Team

Photographer: Joey Wright

Assistant to Photographer: Angelo Lumas

Production: Erin Brennan & Ashley Grace

Hair & Makeup: Michele Winters

Food: Farm to Fork *use code SB30 to receive 30% off your order!

Models

Alexandra @alexandrabaron

Reagan @reagan_wray

Raquel @raqqmilla

Swimwear

Jypsea Local jypsealocal.com

Z-Supply zsupplyclothing.com

Lulus lulus.com

Kulani Kini kulanikinis.com

Mott50 mott50.com

Resortwear & Accessories

Koy Resort koyresort.com

Malvados malvados.com

Abaco Sunglasses abacopolarized.com

Chuchka chuchka.com

Provisioning

Farm to Fork farmtoforkmeals.com

Five Easy Ways to Improve Your Dock

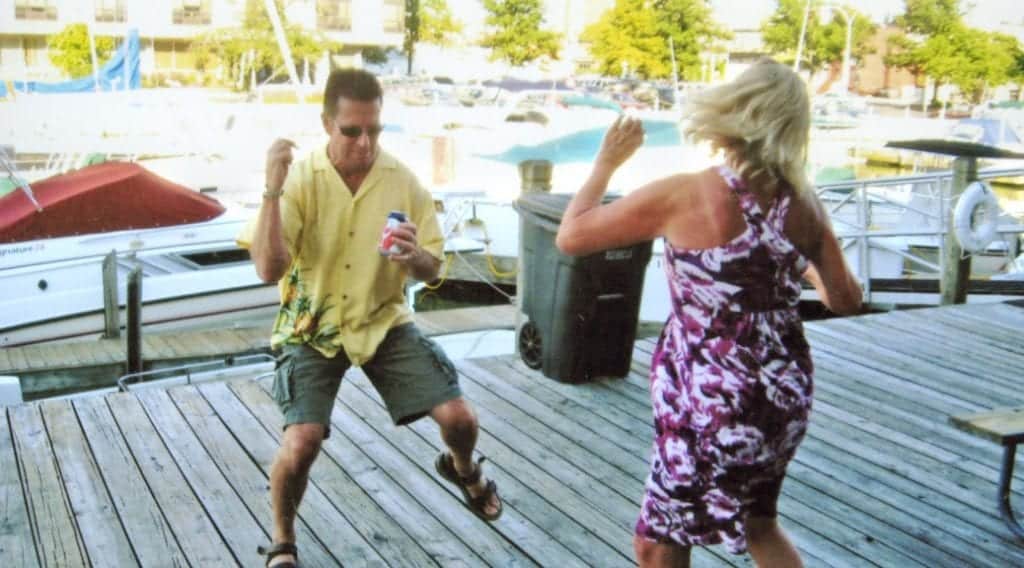
Five Easy Ways to Improve Your Dock

Is your dock looking a bit lackluster? Maybe it’s lacking in some additional safety features or it’s just not comfortable. Either way, it’s high time you made some improvements to your dock and the surrounding area. Here are five easy ways to improve your dock.

Waterside Lounger Dockbox


Store your stuff and look good doing it! Makesocial times on the dock more comfortable with the Waterside Lounger from Better Way Products. Built with a heavy-duty fiberglass sandwich core construction, a UV-resistant gelcoat finish and stainless-steel hinges, the 14-cubic foot dock box withstands the elements. A unique EZ Drain system keeps seats clear of standing water.

MSRP $1,019
dockbox.com

DockGrip

One safety product to add to your dock is DockGrip. The hand-welded aluminum frame provides a secure grip to safely step from the dock into your boat (or PWC, kayak, canoe, or SUP) and back to the dock for people of every age and supports up to 300 pounds. It mounts to docks of any surface through six heavy steel screws.

MSRP $275

dockgrip.com

Semco Teak Sealer

Furniture looking dull? This is the ideal time to spruce it up. Semco teak sealer provides long lasting natural looking protection. Lasts through the season and can be renewed without deep cleaning or stripping for years! Repels water without being slippery. Relieves the drudgery of constant teak maintenance. Known the world over as the best protection for teak.

MSRP $39.95

chicteak.com


Ocean Series Speakers

Turn up the music! You can host a bumpin’ dock party with poly-planar, a marine audio products manufacturer who recently released its new Ocean Series high-performance speakers. Available in 6.5-inch (shown) and 8-inch models, the two-way, waterproof (IPX6 rated), low-profile, blue LED-lit coaxial speakers are sun, salt and corrosion-resistant. Power rated at 480 watts and 500 watts respectively, the speakers feature high power, long-excursion woofer.

MSRP $399.95 for 6.5-inch speakers

polyplanar.com

Sport-a-seat

Stay comfortable with Sport-a-seat. It’s great for lounging on and off your dock. Resembling a cushion with a carrying handle, the seat has a steel frame embedded within the foam, which allows it to ratchet to 6 different positions.

MSRP $149.95

sportaseat.com

Sargo 31

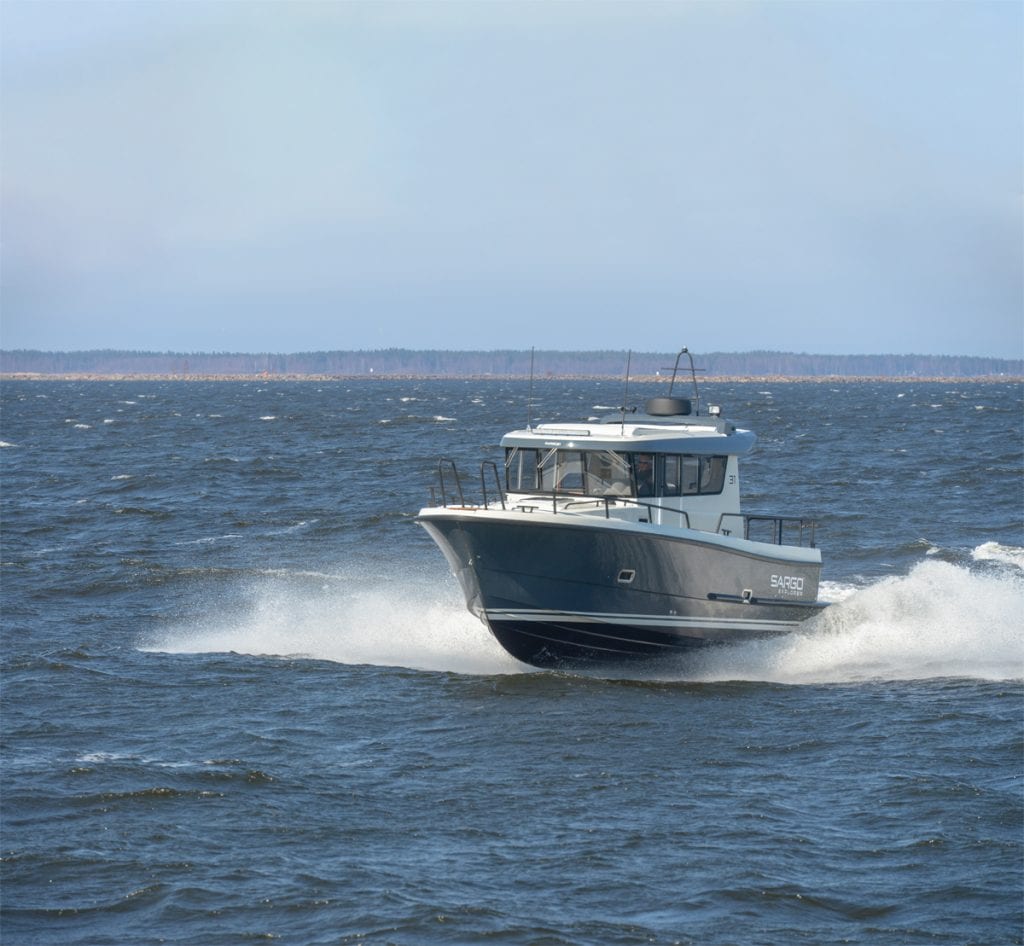
The Sargo line of sterndrive family cruisers is designed for comfort and performance throughout the year. The Sargo 31 is no exception.

Remember those weekends, particularly during the early or late weeks of the typical prime boating season, when you canceled your boating plans because the weather forecast was less than pleasant for one of the two (or three) days? An all-season design like the Sargo 31 has the features to help optimize your comfort and protection for that forecast, and the performance gives you a wide range of options for fuel efficiency and schedule-keeping speed.

Keep on Keepin’ On

The idea that the Sargo line of family cruisers might add weeks or even months of on-the-water good times makes great sense for your return on investment and especially for your ability to spend the maximum amount of time together on the water with friends and family.

Sargo boats are created by the Sarin family, three generations of boat builders in the industry since 1967. From its factory on the western shore of Finland, the company has produced three distinct ranges of boats, including a line of vessels for professional government, law enforcement, and life-saving users. The Sargo line and its related Sargo Explorer line are well known to European boat owners ranging from Greenland to Italy, and the company has been active in the U.S. market since 2008. Suffice it to say, Sargo boats are meant for use in some of the more extreme, short-season climates around the globe.

The interior of the Sargo 31 is surprisingly spacious.

There’s nothing even remotely Eurostyle about the Sargo 31. Its design lines flow from Scandinavian workboat traditions, with bows well flared for good buoyancy and lift in a seaway as well as for a drier ride. The sheer springs higher from about amidships and the stem is sharp and shaped for speed. The angled-forward pilothouse reduces glare looking forward, and the wide side decks connect the fore and aft decks on a single level. Bulwarks are high and handrails are plentiful. For those times when a little family fishing is planned, safety is a given.

There’s a built-in bench on the forward edge of the coach roof, and a very handy split bow pulpit can be equipped with a ladder for beach boarding. Large cleats are positioned atop the bulwarks, and the amidships cleats make it easy to get a line on the dock when you’re single-handing.

Upgrades Available

The model I reviewed was a 31 Explorer Aft Door, and it included an appearance package upcharge ($11,000) that packaged a gray hull, black powder-coated rails and on-deck hardware (even the antenna) for a very contemporary look. Walnut graces the interior of the salon in this package, a nice change from the standard teak panels and furniture, and you have to see the brushed aluminum, leather-covered handrails used throughout to appreciate what they add to the clean, stylish Scandinavian interior design.

For foul weather cruising, the Sargo 31 provides shelter and ample space for a family.

The aft door option ($14,168) opens from the salon directly to the aft deck. All of the Sargo models I’ve inspected have standard sliding forward doors for access to the side decks, but the aft door is a convenience all will appreciate. The typical Sargo 31 layout includes a U-shaped dinette across the back of the salon and a mini-galley forward and to port, but the optional aft door layout features a C-shaped dinette to port (with electrically adjustable hi-low dining table and a forward convertible seat back that shifts aft to create forward facing passenger seating) and a very well-equipped galley (three-burner gas stove, gas oven, fridge, and large sink) abaft the helm. A pair of fold-down wood countertops hide the range and sink when not in use for a clean, contemporary look, and there’s plenty of storage beneath the sink, under the cabin sole, and inside the dinette settee.

The salon is blessed with an abundance of windows for near 360-degree visibility. This includes a swing-up window opening on the aft deck. A wide, manual sliding sunroof locks open in two different positions to flood the salon with natural light and ventilation. One option includes three clear panels set into the sunroof for excellent light, even when it is closed on rainy days.

Baby, it’s Wet Outside

When conditions outside are less than hospitable, Sargo offers Webasto heating and air conditioning (12,000 BTU) options to keep the climate in the salon family friendly. The Webasto units get power from either an optional Fisher Panda genset at anchor or an inverter drawing down the house batteries while underway. A 4kW diesel-fired heater is available for those who do their cruising in more northern climes.

Forward, down near-centerline stairs, accommodations include a V-berth cabin in the bow (each side measures six feet, six inches long, and a filler cushion converts the berth into a double), a wet head to starboard, and a storage cabinet to port. The amidships cabin is located under the salon sole and dinette and is accessible through a lifting hatch in the dinette bench. You’ll find storage in the forward cabin is beneath the berth. However, some room is lost to the bow thruster and battery. There is space under the deck, and storage in the amidships cabin includes two big storage lockers with shelves. Natural ventilation forward is well thought out with two portholes and an overhead hatch. All of the openable windows have mosquito screens, even in the head.

Choose your own propulsion adventure

Propulsion choices include three single-engine and two twin-engine Volvo Penta installations with Duoprop sterndrives. Single-engine power is based on the D6 engine with outputs of 330, 370 or 400 horsepower and top speeds of approximately 32, 35 and 37 mph respectively. Twin-engine power is based on the D4 engine with total outputs of 450 and 600 horsepower. Top speeds, in this case, are 38 and 42 mph. Twin engine installations are available with larger fuel tankage, 154 gallons versus 110 gallons.

Some boat owners insist on twin engines when headed out into long stretches of open water, and the Sargo 31 has the room for a brace of Volvo Penta in-line D4 diesels in a massive space beneath the aft deck. The lockable, gas strut-supported hatch allows easy access to the main engine(s) and the genset for daily inspection and maintenance. A water-separating diesel fuel filter is standard. There’s a fire extinguisher in the engine room…just in case.

Driving the D6-400 equipped Sargo 31 was a breeze, thanks to the flawless hydraulic steering. The boat is powerful yet agile. With a transom deadrise angle of 19.5 degrees, the deep-V bottom made short work of the heavy wind chop we encountered. At the helm, the leather-covered stainless steering wheel included a knob to make fast directional changes possible, a real convenience when backing a single stern drive. Both the binnacle and the 4-hp bow thruster were within easy reach for minute adjustments in tight quarters. A 12-inch Garmin 7412 chartplotter is standard, although Sargo offers an upgrade to either two 7412s or a larger 16-inch 7416 screen.

Taken all together, all the features and performance of the Sargo 31 Explorer Aft Door make it well suited for a family of four, who doesn’t want to give up their time on the water for a less than sunny forecast.

Specifications

LOA: 32’7″
Beam: 10’8″
Draft: 3’4″
Displacement: 11,244 lbs. (dry)
Fuel/Water: 110/26 gals.
Power: 1x Volvo Penta D6-400 DP sterndrive (tested)
Cruise/Top Speed: 15-34/37 knots
Range: 225 nm at 26 knots
MSRP (base w/single D6): $276,187

Contact

Skarne Marine, LLC
164 Rogers Avenue
Milford, CT 06460
(203) 283-5300
info@sargousa.com
sargousa.com

By John Wooldridge, Southern Boating December 2018

Cobia Boats

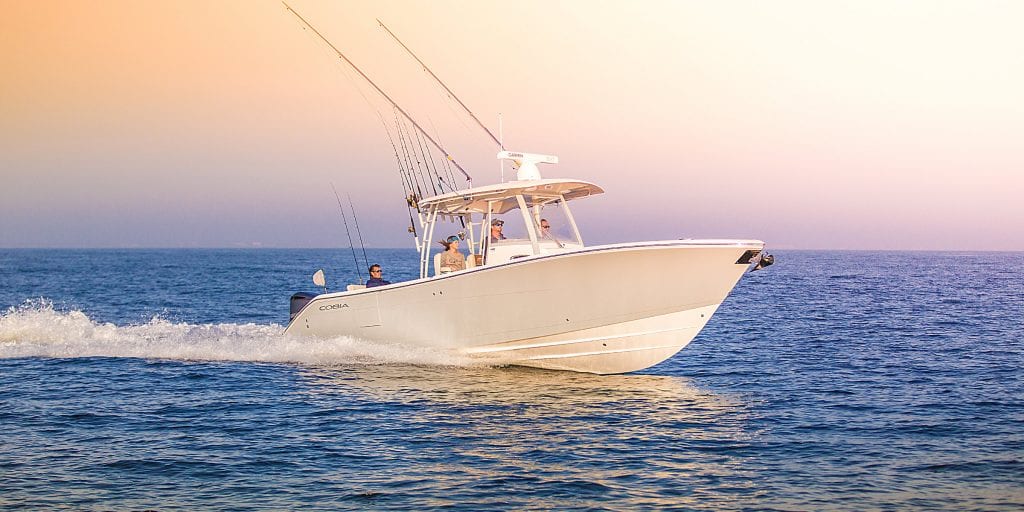
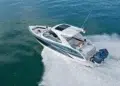
Cobia Boats

In the 26 to 34 foot range, Cobia Boats are the top-selling center consoles in the county.

Surprised? Spend any time on a new Cobia and you’ll see and feel why it’s the top-selling brand. Each model is crafted with an explicit goal in mind. Whether you’re looking for a center console for fishing, a family day cruiser, a bay boat or a dual console, Cobia Boats has a perfect model that will suit your needs without compromising space or speed.

With smart designs, build quality second to none, and tournament-grade performance, there’s no better lineup of center consoles that mesh family comfort and fishing smarts. Do yourself a favor this boat show season and take the opportunity to step aboard a new Cobia. You’ll quickly see why Cobia is changing the game in center consoles.

Comfort  & Stability

Cobia hulls are designed for peak running performance, comfort and efficiency. Forward bow entries extend running surfaces to utilize nearly the full length of the boat, meaning a more stable and comfortable rude,

Intuitive Layouts

Deck layouts depend on the model, but all are designed as ‘smart layouts’, which means spacious decks, items within reach, and intuitive layouts. This all lends nicely to watersports or fishing, as does the ample freeboard. Helm and dash vary from by model,  but all electronics and inputs are clearly labeled as such, making upkeep and maintenance a breeze.

Take the Cobia 320CC, for example. 320 CC is a spacious fishing platform with a range that can still be easily trailered to fishing tournament locations or inland lakes. Twin 35-gallon pressurized livewells, more than enough tackle storage, and holders for more than 20 rods mean you’ll be ready when you reach the long-distance fishing grounds where the big ones are biting.

See how Cobias set themselves apart in construction, quality assurance, and performance, in their expansive video gallery with videos on everything from exactly how we laminate our boats (No Wood!), to the proper layout for a family friendly center console to detailed model walkthroughs. You’ll be impressed!

Check out Cobia’s video lineup and see for yourself.

cobiaboats.com

Erin Brennan, Southern Boating March 2019

Simple Shrimp Vindaloo Recipe

Shrimp Vindaloo Recipe

It may sound complicated, but this simple shrimp vindaloo comes together very quickly, even if you are cruising. Most of the ingredients can be stored for a long time in your pantry or onboard storage. Rice, for example, would make an excellent substitute for naan.

No shrimp? No problem. Shrimp vindaloo can quickly become chicken vindaloo in a pinch. But this meal can be addicting, fair warning, and fairly spicy.

Ingredients: 

1 Tbsp. oil
2 lbs. shrimp, peeled and deveined (or substitute with beef, pork, chicken, or fish)
4 Tbsp. jarred vindaloo curry paste (or see recipe below)
2 -14 oz. cans diced tomatoes
1 Tbsp. hot sauce or 1 tsp. crushed red pepper or 1 whole jalapeño pepper, minced (optional)
½ tsp. salt and pepper
4 whole naan, pita or flatbread, warmed
Bottled chutney (optional)
Bottled hot Indian pickle (optional)

Directions: 

Heat oil in large skillet. Stir fry shrimp, moving it constantly around the pan until just cooked. Remove from skillet and place in a serving bowl. In the same skillet, add vindaloo paste and stir fry for 30 seconds. Add tomatoes, crushing to break them up. Add the hot sauce or pepper. Bring to a simmer and cook for 3-4 minutes or until the sauce thickens. Add salt and pepper. Return shrimp to the sauce and allow to heat through. Place in serving bowl and eat with warm naan or flatbread, kachumber salad, and raita.

Jarred chutney and hot Indian pickle add a lovely piquancy to this meal.

Vindaloo Paste Recipe

Ingredients: 

1 tsp. garlic, peeled and chopped (substitute jarred)
1 Tbsp. ginger, peeled and minced (substitute jarred) or 1 tsp. ground ginger
1 cup cilantro, washed and chopped
2 Tbsp. curry powder
2 Tbsp. ground cumin
3 Tbsp. oil

Directions:

Mix in food processor or blender or by hand in a mortar and pestle for coarser paste.

By Lori Ross, Southern Boating February 2019

More Indian food-inspo:

Kachumber Salad

Mango Bellini

Quick and Easy Mango Bellini Recipe

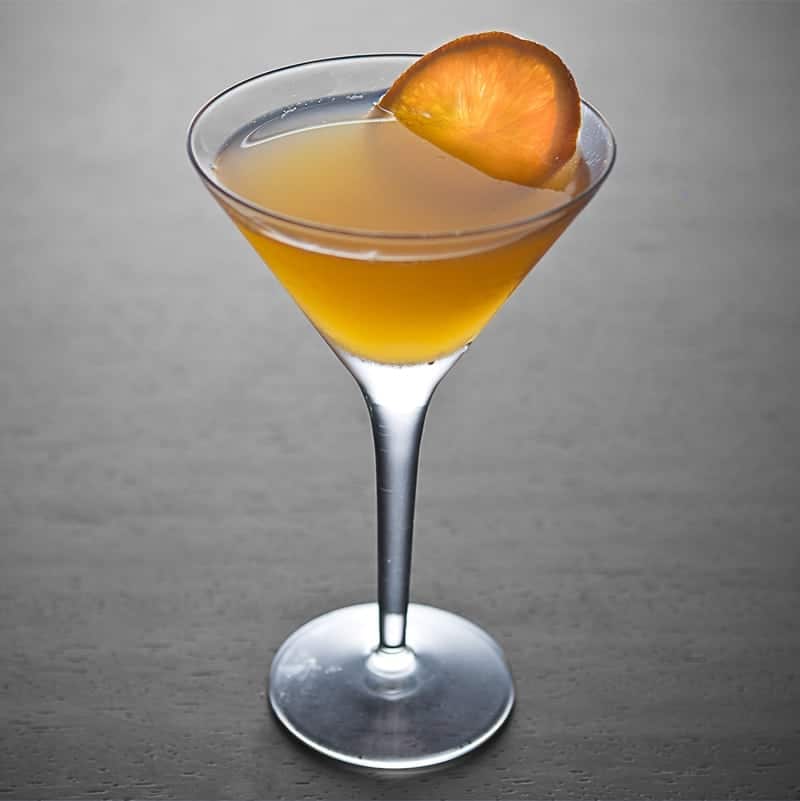
Mango Bellini

Feel the sun on your face and welcome spring in all her glory. Start with this quick and easy mango bellini.

Spring has sprung! Or if it hasn’t quite bloomed in your neck of the woods, you can at least fake it and celebrate with an exotic dinner party to celebrate India’s colorful Holi Festival on March 21st.

Recipe serves four but is easily doubled…or tripled.

Ingredients: 

1 mango, peeled and flesh chopped fine or pureed (or use bottled mango puree)
1 bottle of Prosecco, chilled
1 lime, cut into 4 wedges

Directions:

Spoon one tablespoon of mango puree into a champagne glass. Squeeze in juice from a lime wedge. Gently pour in the Prosecco to fill the glass, and stir just before serving.

By Lori Ross, Southern Boating February 2019

More Indian food-inspo:

Kachumber Salad

Shrimp Vindaloo

Outboard Cruisers Roundup

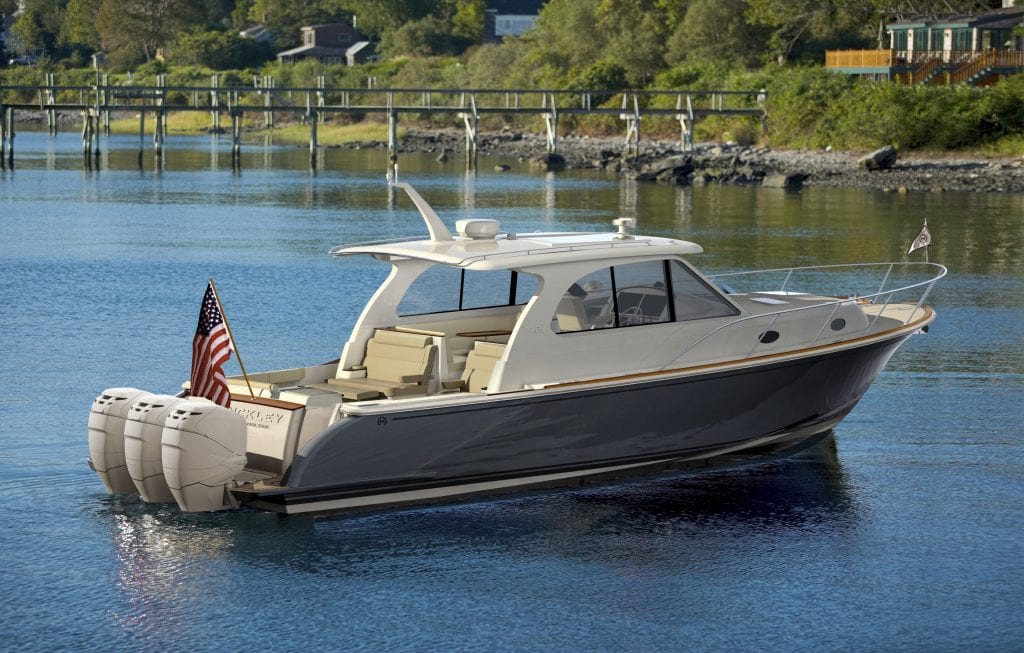
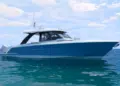
Outboard Cruisers Roundup

Outboard cruisers are truly the best of both worlds. What are these boats like? It’s like speed and maneuverability met comfort and space to make the most useful of boats.

The first tryst resulted in a goldmine: larger-than-life center consoles. But their second rendezvous created something that seems like it should have been here all along: outboard cruisers. It’s a winning combination.

Outboard cruisers create more interior room and offer plenty of space for the coastal cruising family without sacrificing shoal accessibility or speed. It should come as a surprise to absolutely no one that this segment of the market is here. And it’s here to stay.

Whether out for an overnight or a week along the coast, here’s a “baker’s dozen” to consider.

Formula 400 Super Sport Crossover

MJM 53Z

Regal 33 XO

Cutwater C-242 SE

Sealine S330V

Pursuit OS 385

Back Cove 34O

Jeanneau NC 1095

Sea Ray SLX 400 OB

Monterey 385SE

Boston Whaler 380 Realm

Hinckley Sport Boat 40X

Antares 27 

By Steve Davis, Southern Boating December 2018

Kachumber Salad

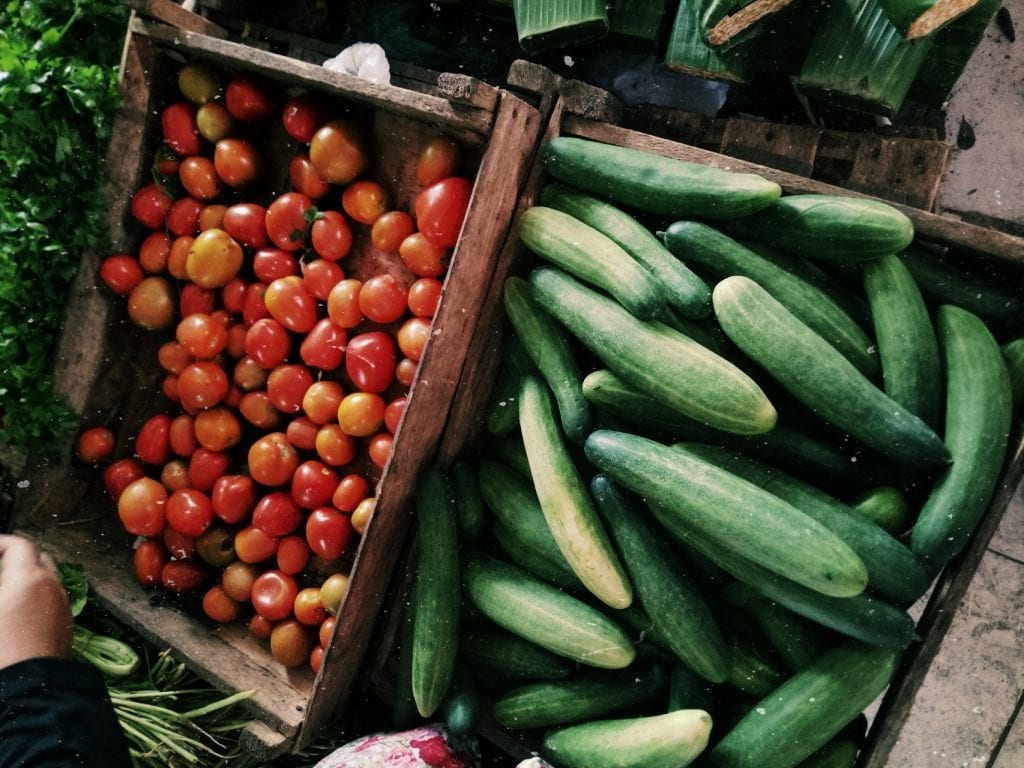
Kachumber Salad

This kachumber salad, a fresh chopped salad made from cucumbers and tomatoes, is an easy option for cruisers looking to add a healthy side dish to their lunch or dinner.

It also creates a cooling aspect to spicier Indian-inspired dishes you may like to try out, particularly if served with raita on the side.

Kachumber Salad Recipe

Ingredients: 

1 cup diced tomatoes
1 cup diced cucumber
½ cup chopped onions
½ cup chopped cilantro or parsley leaves
1 Tbsp. lime juice
1 Tbsp. chopped mint leaves or pinch of dried mint
¼ tsp. each of salt and pepper

Directions: 

Toss all ingredients together in a large bowl. Let salad sit for 15-20 minutes before serving. Seve with raitia (recipe below).


Raita Recipe

Ingredients: 

½ cup diced tomato
¼ cup diced onion
½ cup diced cucumber
1 cup chopped cilantro
½ tsp. cumin
2 cups plain yogurt
¼ tsp. each salt and pepper

Directions: 

Stir together the tomato, onion, cucumber, cilantro, cumin. Add yogurt, salt, and pepper and combine.

By Lori Ross, Southern Boating February 2019

More Indian food-inspo:

Mango Bellini

Shrimp Vindaloo 

What’s a Wave?

Every boater needs to know the surface condition of the water they are traversing. This condition is referred to as the “seas” and is the result of both waves and swells.

But what’s really going on here and what’s a wave?

What’s a wave? Time for some physics. A wave is a packet of energy that moves away from its source. Waves of energy are emitted from the sun, move through the vacuum of space, reach the earth, and heat it. If these waves of energy are moving through some substance, a disturbance is created. Waves on the ocean are packets of energy moving along and give the illusion that the water itself is moving. In reality,  it’s the wave energy that moves and causes the water level to progressively rise and fall as the wave passes, but the water actually moves in a circle with little forward motion.

The most common cause of typical surface waves is the wind. Friction between the water surface and the air just above it allows some of the wind energy to transfer down into the water. Although we typically only see the wave on the surface, the disturbance and water movement extend downward generally to half of the wave’s wavelength.

Geological Disturbances

In previous articles, I’ve discussed storm surges with hurricanes, tsunamis due to geological influences, and meteotsunamis associated with atmospheric pressure changes. In these cases, the sea level is actually elevated locally when the disturbance reaches the coast. When an oceanic wave approaches the coast, its structure changes. The bottom of the wave begins to slow due to frictional effects with the increasingly shallow ocean floor.

As the lower part of the wave slows, water converges, and compression forces water upward, building the height of the wave. With the top of the wave outracing the bottom, eventually, the wave becomes unstable and breaks toward the shoreline. The most significant aspect of a wave is its height, the distance from the trough to the crest. A wave’s size depends on wind speed, wind duration and the area over which the wind is blowing (the fetch). This will determine the total amount of energy transferred to the water.

Large waves are only produced when all three factors combine: strong winds, long duration and a long fetch over open water. Even under similar conditions, waves of varying heights are generated due to wave interactions. In standard descriptions of current or forecast conditions, the term “significant wave height” is used. By definition, this is the average height of the highest third of the waves. In my article on rogue waves, I noted, and official forecasts warn, that individual waves can be twice the size of the significant wave height.

Cascading Effects

Under extreme conditions, even larger waves can occur. There are other aspects of waves to note. The wave length is the distance between successive wave crests. The wave period, usually given in seconds, is the time it takes for successive waves to reach the same point. Swell waves, or just swell, refers to waves originally produced by wind that are now out of the generating wind field. They are more consistent and have a longer period than wind waves. These self-maintaining waves can propagate across the ocean for many miles and can move in directions that differ from the current wind field.

Reports on ocean conditions often include the swell direction, the direction from which the swells are coming. Don’t underestimate swell waves. In early March 2018, a powerful winter storm developed off the New England coast. Hurricane-force winds generated 40-foot seas over the North Atlantic. Swells generated by the storm propagated southward toward the Greater Antilles, more than 1,500 miles to the south. Buoys off the north coast of Puerto Rico recorded swell wave heights of 15-20 feet, record or near-record wave heights for March. Wave heights increased to as much as 30 feet and impacted the north coasts of Puerto Rico and the U.S.V.I. Widespread coastal flooding and beach erosion occurred.

A History of Waves

An interesting combination of wind speed and sea condition is the Beaufort Scale, named for Sir Francis Beaufort, an admiral in the British Navy. His original scale from 1805 related wind speed to sea condition and the ability to predict wind speed from sea condition and vice versa. For example, calm winds were associated with a “smooth and mirror-like” sea surface. On the other extreme, hurricane-force winds of 64 knots or greater were associated with “waves over 45 feet, a completely white sea due to spray and greatly reduced visibility.”

Current sea conditions are always available through the National Weather Service (NWS). You can also check out the National Data Buoy Center. Some buoys report wave height, wave period and wave direction. The NWS also provides marine forecasts that include sea conditions out to five days. There are numerical models that also utilize forecast weather conditions to predict wave heights. The Nearshore Marine Forecast or Coastal Waters Forecast covers a specific given area from the coastline out to 20 nm.

This is followed by an Offshore Marine Forecast or Offshore Waters Forecast that goes out from 20 to 60 nm, and finally the High Seas Forecasts for farther reaches. These forecasts will include wind wave and/or swell, or a combined seas or seas wave height along with the wave period for the near shore.

By Ed Brotak, Southern Boating February 2019

Caribbean Regattas

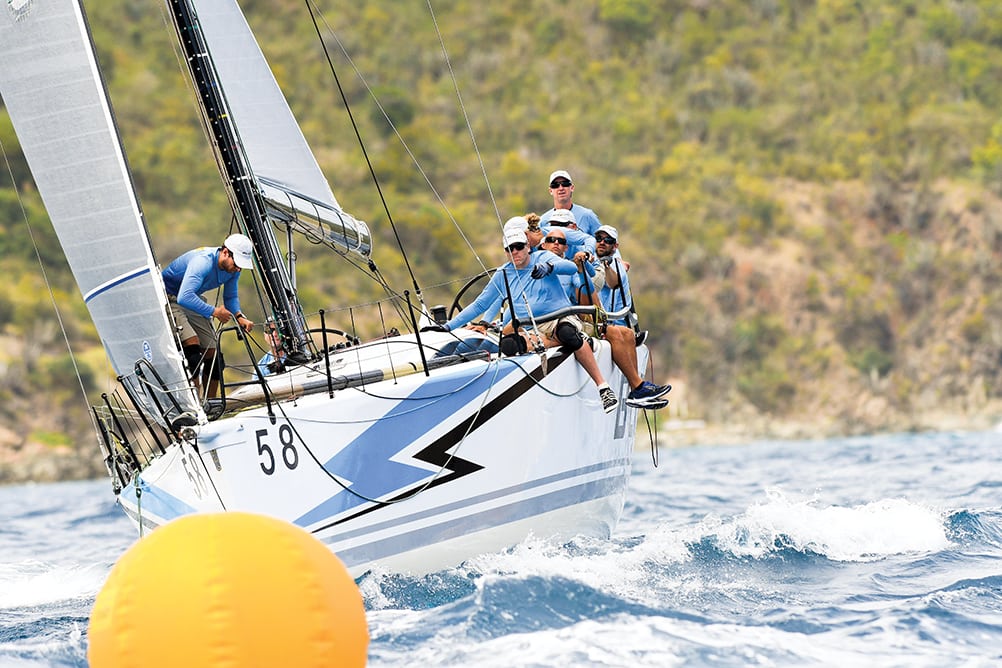
Caribbean Regattas

 If you’ve never tried it, participating in a Caribbean sailing regatta is a thrilling experience and one that we highly recommend.

No matter how much you love your powerboat, there’s no denying the beauty and draw of sailboats, especially when they’re racing on a clear day, their colorful sails filled with the wind.

Sailing schools can be found in nearly any coastal city in the U.S. as well as in the Caribbean, and course programs are offered to accommodate all levels of interest. If you’re not ready to fully jump in the deep water but simply want to dip your toe in the shallow end of sailing, a great option is to join one of the many Caribbean regattas in which you pay to play. Based on Antigua, Ondeck Sailing lets guests reserve a spot (for a fee) on one of the yachts in the regattas. (Prices range depending on the event, yacht, and other factors.)

Foilers, dinghy sailors, superyacht owners and crew, sport boat enthusiasts, racer-cruisers and race charterers will all find something to love in the Caribbean this month. The fun starts off with Martinique International Sailing Week March 1-5. Hosted by the Nautical Center of Schoelcher, located near the French island’s capital of Fort-de-France, this event features large European participation with a focus on small boats, such as Optimist, Laser, and Sunfish. New this year is the addition of windfoils.

The next weekend, March 8-10, the St. Croix International Regatta takes place in the Buck Island Channel off the northeast shore of this U.S. Virgin Island. There’s a highly competitive Rhodes 19 fleet plus classes for racers and cruisers. The winning skipper earns his or her weight in island-made rum.

Over 60 Optimist dinghies will sail in the shadow of cruise ships on San Juan Bay in Puerto Rico for the Pan Pepin International Regatta March 17-18. This highly competitive event offers a Laser class too.

Yachts at the opposite end of the size spectrum are the focal point of the St. Barths Bucket Regatta March 21-24. Entries include the 220-foot Baltic Yachts-built, Dykstra/Reichel/Pugh-designed Hetairos, the 154-foot Perini Navi Aquarius and the 111-foot Royal Huisman-constructed, Frers-planned, Spiip. The prize-giving Bucket Bash is at the Hotel Collectivité.

Racers, cruisers and beach cats cast off in the St. Thomas International Regatta March 22-24. The one-day warm-up Round the Rocks Race, a circumnavigation around the
neighboring U.S. Virgin Island of St. John, takes place March 21st. Nearly a dozen race charter companies based in Europe and the U.S. are offering yachts for both events.

Finally, March Madness Caribbean regattas wrap up with the BVI Spring Regatta & Sailing Festival March 25-31 at Nanny Cay Resort & Marina. The Round Tortola Race on March
26th and Scrub Island Invitational on March 27th preface the traditional three-day regatta. Over a dozen bareboat charters from companies such as The Moorings and Sunsail are expected to race in a class of their own. While March is likely to be the busiest month, Caribbean regattas take place every month of the year.

caribbean-sailing.com

By Carol Bareuther, Southern Boating February 2019

Spring Boating

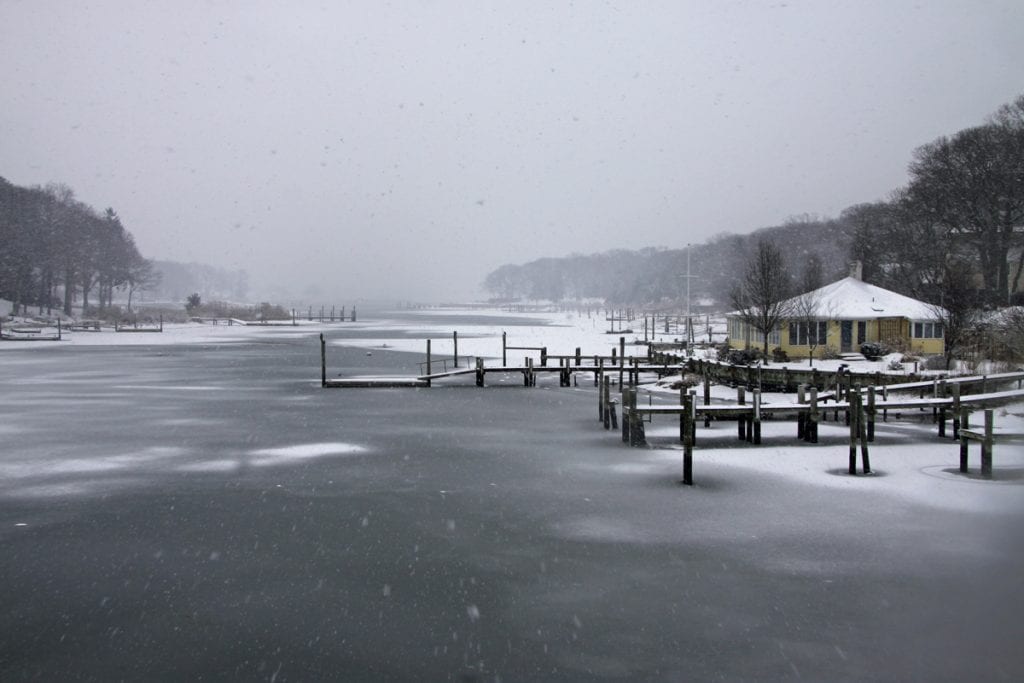
Spring Boating

Put the throttle back with spring boating season

Northeast boaters looking to get an early start to the 2019 boating season would do best to back off the throttle coming out of the gate. Going back a few decades, a March kick-off was commonplace for skippers sailing anywhere between New Jersey and Rhode Island. That first launch time frame was often scheduled to coincide with a solid run of tasty winter flounder or open water for clamming, the latter a welcome job for part-time baymen.

As early spring fishing fortunes and shellfish populations have faded in recent years, most northeast boaters have pushed back initial forays into April or even May, especially those
who have second homes near the coast or enjoy cruising and water sports more than wetting a line. That makes it even more important than ever for early launchers to be on their toes because there are fewer eyes on the water during the early season.

Now, where did that shoal come from?

Safety Reigns

Naturally, you’ll want to start that first trip on the water with a standard pre-launch checklist to make sure there are no mechanical issues before leaving the dock or ramp. Ensure you have a full set of life preservers aboard that are Coast Guard approved, properly fit your crew and are in good working condition. It also makes sense to file a boating float plan with a responsible family member or friend. If you plan to cross any big or rough water, you might want to consider wearing a survival suit because northeast water temperatures can remain fatally cold well into May.

“Be sure that you’ve replaced your fuel filters, checked that water pumps are working properly and have fully charged all batteries because those are three things that can fail quickly after being out in the cold all winter,” says Capt. Tony DiLernia, a Manhattan, New York, charter skipper. He also notes that buoys, or lack thereof, can be a problem on some waters. “On the eastern end of Long Island, for example, some buoys that are removed for the winter months might not be returned until late April,” says the experienced skipper. “You’d better know your course ahead of time to stay in the channel and avoid possible groundings.”

Where did that channel marker go?

Capt. Ramsey Chason, a Massachusetts Sea Tow skipper whose coverage area includes Cape Cod and The Islands, notes that the further north you head up the coast, the more likely it is that markers will be lifted. “That’s because winter ice floes can grab and drag them a considerable distance,” he says. What’s more, points out Chason, is that rough seas and winter storms often shift sand, so even if a buoy is in the correct location, it’s possible the channel may have moved.

“We see this happen frequently in areas that get a lot of winter storms, like Chatham, Massachusetts,” explains Chason. “The channel there definitely moves a lot during the winter months.

The same goes for Stage Harbor where a small channel skirts Morris Island. Some years it’s wider in the spring; other years it’s completely closed off. In general, if things don’t look right, they probably aren’t, so keep an eye on your depth recorder and trust your instincts as to appearances above the water.”

Hazard Watch

Watch out!

You’ll also need to watch out for floating debris, especially loose pilings, logs, pieces of dock, or other substantial objects that may have been in the water for a prolonged period of time. Many of these potential widow-makers will be partially submerged, difficult to spot at high speeds and nearly unavoidable unless noticed well in advance.

“You are especially likely to cross paths with larger debris during full and new moon tides when more water and strong currents can dislodge such items from their resting places,”
cautions DiLernia.

Should you find any serious hazards, or inconsistencies with aids to navigation, report them immediately to the Coast Guard. They’ll issue a safety alert and see that the matter is appropriately addressed.

By Tom Schlichter, Southern Boating March 2019

Exit mobile version