Boats and Thru-hull Holes

When you have to install thru-hull holes, do it right the first time.

Most any boat maintenance guru worth his Veda will advise you to avoid adding additional
thru-hull holes if at all possible. Tapping into an existing discharge or intake thru-hull is often recommended but may not always be an option. While drilling a hole in your boat’s hull is not ideal, the actual process to install a new thru-hull is pretty straightforward.

Let’s walk through a hypothetical installation of an air conditioning system that requires two new thru-hulls, one that’s below the waterline intake and the other above the waterline discharge.

Preparation

American Boat & Yacht Council (ABYC) standards call for the installation of a seacock on thru-hulls located below the vessel’s maximum heeled waterline. For the purpose of this
article, we’ll say the discharge thru-hull does not require a seacock; however, the raw water intake thru-hull (located below the waterline) does.

The discharge thru-hull for our example will be bronze. The seacock will be a typical flanged bronze unit with a compatible bronze thru-hull, although Marelon polymer seacocks and thru-hulls would be another option. Just keep in mind that the seacock and thru-hull must always be of the same material.

When planning the installation, choose a location that provides good access to the thru-hull. For our intake thru-hull, verify that the seacock can be accessed quickly in the event of an emergency and that the handle can be fully operated (i.e., no frames, bulkheads, etc., that block the throw of the handle).

In addition, avoid locating the thru-hull in front of a depth transducer or knot log, both of which could be affected by the turbulence a thru-hull generates.  Once you’ve identified a suitable location, mark the center of the thru-hull and drill a small pilot hole from inside the vessel. This gives you one last chance to check the location on the outside of the hull to verify all is well prior to cutting the hole.

Hole saw time

Select a hole saw the same diameter or slightly larger than your thru-hull, one with a pilot drill bit, which prevents the hole saw from walking when drilling. Using the small location hole you drilled as a guide, start drilling from the outside of the hull and be sure to keep the drill perpendicular to the hull surface. Drill until the pilot bit of the hole saw penetrates the hull, then move inside and finish drilling the hole. Smooth any rough edges of the hole with sandpaper.

For a cored hull, excavate the coring around the hole to a depth that encompasses an area at least as large as the thru-hull or seacock flange. Then fill the void with thickened
epoxy and allow it to cure before proceeding. This epoxy compression ring provides a solid base for the thru-hull and prevents water from entering the core.

Backing plates

A backing plate provides additional support to the hull and a flat mounting surface for the thru-hull nut or seacock flange should there be any hull curvature. A fiberglass backing plate glassed into the hull is the ultimate solution, however, marine-grade plywood is commonly used and perfectly acceptable.

Backing plates should be two to three inches larger in diameter than the thru-hull nut or seacock flange. Cut a circular backing plate from ¾-inch marine plywood, then drill
a hole in the center with the hole saw used to drill the thru-hull hole in the hull. Use a sander or wood rasp to shape the backing plate as needed to match the curvature of the hull. Once fitted, mark the backing plate so you can properly orient it later.

Test run

Always dry fit the thru-hull/seacock prior to final installation. Remove the backing nut and insert the discharge thru-hull from the outside. On the inside, fit the backing plate over it,
then install and snug up the flange nut. The intake thru-hull will screw directly into the seacock. Remove the thru-hull nut, insert the thru-hull into the hull, fit the backing plate, thread the seacock onto the thru-hull, and tighten until snug.

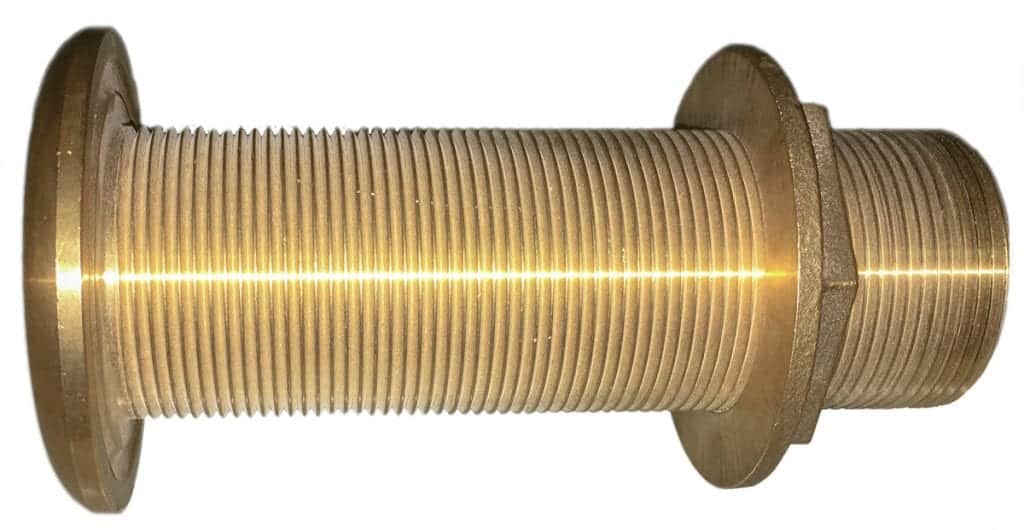
For bronze thru-hulls, a special tool called a step wrench is used to grip the ears inside the unit and hold it securely during tightening. A wedge of plywood inserted in the thru-hull also works well in a pinch.

WHEN IS A SEACOCK NOT A SEACOCK?

Many builders utilize inline valves attached directly to the thru-hull. However, there are a number of problems associated with this approach. To start with, in-line valves use NPT (National Pipe Taper) threads, which are not compatible with the NPS (National Pipe Straight) used in most thru-hull fittings (unless the thru-hull fitting is machined with “combination thread”).

Installing an in-line valve onto an NPS thru-hull fitting creates a mismatch of threads resulting in a weaker, less waterproof joint (due to less thread engagement). As it has no mounting flange, an in-line valve can turn or loosen from the thru-hull fitting due to vibration or through normal use. Finally, unlike proper seacocks, in-line valves are not fitted with grease nipples, bonding wire tabs or drains, each of which can create potential maintenance and winterization issues.

Once inserted into the seacock and moderately tightened, there should be a sufficient length of thru-hull inside the seacock but not enough that the thru-hull bottoms out.

If the thru-hull is too long, cut it to length. If the thru-hull is too short, use thinner plywood (½ inch, for example) to construct the backing plate. Most flanged seacocks have three mounting holes to prevent the seacock from turning once installed. There are two acceptable methods to secure the seacock. The first is to drill holes through the backing plate and hull (using the flange as a guide), then install bolts through the hull and secure everything together.

The second is to screw the seacock flange to the backing plate only. This is the option we’ll go with for our example. Regardless of the method chosen, ensure the mounting bolts or screws are of the same material as the seacock. Either stainless steel or bronze is acceptable when mounting nylon seacocks.

Installation

Once the dry fit is complete, disassemble everything and seal both backing plates with three to four coats of epoxy and allow to dry. You’ll need a second set of hands to hold the thru-hull in place during installation and while tightening. Apply a generous amount of marine-grade sealant (polyurethane or polysulfide) to the thru-hulls mushroom
flange, then insert it into the hull.

On the inside, apply sealant to the hull (around the inserted thru-hull) and hull side of the backing plate. Slide the backing plate over the thru-hull, orient as required and press down, bedding it to the hull.

For our discharge thru-hull, the next step is to add a thick bead of sealant to the top of the backing plate hole around the thru-hull, install the thru-hull nut and tighten snugly. You should see a ring of sealant ooze from beneath the thru-hull nut. For the intake thru-hull, apply sealant to the seacock’s flange (again, enough to see “squeeze out” all around once tightened), and then thread the seacock onto the thru-hull and tighten.

Once the seacock is properly positioned and tightened, use the flange as a template to drill the mounting holes into the backing plate. Be sure to drill into the backing plate only,
not into the hull (use a drill stop or piece of tape attached to the bit to prevent this). Clean the mounting holes of debris, add sealant to the holes and threads of the mounting screws, then install.

Once the installation is finished, fit the seacock with an appropriately sized tailpiece/hose barb (using thread sealant) and attach the cooling system intake hose to it. Attach the air
conditioning discharge hose to the hose barb of the overboard thru-hull, and it’s pa’u hana!

By Frank Lanier, Southern Boating March 2019

Return to the Haul Out Guide

Synthetic Teak

New synthetic teak decking keeps feet cooler.

The beauty of real teak wood on boat decks is undeniable, but look-alike decking made of synthetic teak substances has become a popular trend for many reasons.

Those reasons include its affordability, low maintenance, nonskid appeal, uniform appearance, and soft feel underfoot.

The downside has been its tendency to absorb heat, which makes the product uncomfortable for bare feet in southern boating locales that have continuous sun exposure (e.g. Florida). Technological improvements have enabled today’s product offerings to be cooler underfoot. They also to benefit greatly from the type of materials used, manufacturing processes, color options, and ease of installation.

Some DIYers may have the skills and patience to tackle installing new synthetic teak decking themselves. But an annual haul-out is the ideal time to add new decking to your boatyard’s project list.

If your boat is overdue for new decking, take a look at some of the hottest, cool-comfort synthetic teak decking offerings on the market.

Flexiteek

This company has offered synthetic teak boat decking material since 2000. Flexiteek is the OEM supplier for many boat builders and has distributors in 38 countries. The company’s newest advancement is Flexiteek 2G, which was in development for two years and is the
manufacturer’s “Next Generation of Decking” for its lighter weight and ability to cool 30 percent faster than traditional composite decking. Flexiteek comes in eight wood colors with black, white or gray caulking.
flexiteek.com 

Isiteek is made for DIY install on small areas.
isiteek.com

PlasDECK

PlasTEAK, Inc. introduced its synthetic boat decking PlasDECK in 2005. Its been popular ever since. With 25 colors and custom variations, the new PlasDECK Eco Series utilizes leftover scraps from manufacturing that are recycled for the bottom layer and makes the product even more affordable as well as eco-friendly.

PlasDECK Eco Series has an identical look and feel of the standard PlasDECK boat decking, but the family-owned, Made-in-America company passes on the manufacturing cost savings directly to the customer. Product cost is further reduced by offering it in large sheet form. This is advantageous for resurfacing large deck spaces like houseboats, pontoons or boats with large decks.

PlasDECK Eco Series won the Innovation Award at the 2018 Miami Boat Show. PlasDECK CoolTEAK remains cooler than other PVC decking materials, which makes it ideal for swim platforms. CoolTEAK is currently only available in premade mats from templates and is not for DIY applications.
plasdeck.com

Dek-king

Dek-king 2G is the company’s next-generation premium synthetic teak decking that’s 30 percent cooler underfoot and 32 percent lighter than previous 1G product offerings. Dek-king’s lifelike graining that differs between planks replicates natural wood to provide a finish that’s nearly indistinguishable from real teak.

Wilks is the British family-owned manufacturer and supplier of Dek-King synthetic teak decking. Flexiteek International announced in a press release earlier this year that an agreement has been reached to acquire Wilks, and the merger is planned to finalize later this year. Flexiteek plans to retain the Wilks manufacturing premises in Essex, northeast of London, England, along with all employees, combining the skillset of both companies to serve the international marine market.

The acquisition will facilitate the supply of synthetic teak and fendering to a list of OEM clients that include Royal Huisman, Hanse Group, Jeanneau Beneteau Group, Princess
Yachts, Gulf Craft, Sunseeker International, and X-Yachts.
dek-king.com

By L.N. Evans, Southern Boating March 2019

Return to the Haul Out Guide

Ground Tackle: to refit or not to refit?

That is the question. The answer is that ground tackle is an essential component to boating.

As you prepare for the change in seasons, don’t forget to inspect a very important safety item—the ground tackle. “There are three safety things on board—a life jacket, fire extinguisher, and anchor,” says John Lynch, COO of Anchorlift in Cape Coral, FL. Lynch advises that when inspecting the anchor (particularly at the weld points) and chain, “Look to see if any of the galvanizations has been corrupted and if any rust has started to form in those areas where the galvanization has disappeared or rubbed off.”

The Skinny on Ground Tackle

Ground tackle that uses a combination of chain and rope can create rust where the rope is connected to the chain. This is because it rubs off the galvanization. Lynch suggests cutting the link attachedto the splice end and to reconnect the rode using a D-connecting link. This would be the only time he recommends using a connecting link and suggests using a thread lock product, such as Loctite, on the screw pin.

Rust is the worst enemy and may initially be cosmetic. A thorough cleaning along with an anti-corrosion coating will provide protection but only temporarily. Use a galvanizing compound spray for galvanized anchors and chain.  “Once corrosion starts, you can’t stop it,” says Lynch. The application of a coating doesn’t restore the anchor and chain, nor does the process return the ground tackle to its original strength. If the gear shows signs of pitting or flaking of the metal, or if the links appear thinner in width, then it’s time to replace it.

The Rode

When inspecting the anchor line, look for signs of abrasion, cuts, broken or frayed yarns, variations in strand size or shape, burns, dry rot, and even rust (on nylon). Look closely at splices. “A splice should be eight to ten inches back into itself,” says Lynch. He points out that the splice between rope and chain should be no larger than the link of the chain it’s attaching to. If it’s larger, it can easily jam in the windlass.

If necessary, Lynch recommends replacing the rode with either 8-strand nylon or double braid 8- to 24-plait polyester. “Three-strand nylon is inexpensive. But does not work well in a windlass because it’s slick, more so when wet,” explains Lynch. “Eight-strand nylon has better grip because of the weave, [and] double braid is smooth to the touch, holds up longer in a marine environment and gives terrific grip when going through a gypsy.”

The Windlass

“Windlasses are very forgiving, but they are abused endlessly. A little care pays dividends,” says Jonathan Neeves, published technical writer specializing in anchoring. If the rode or chain is slipping through the gypsy, “Check the clutch cones and make sure they are greased properly,” adds Lynch.

“Check the pressure fingers that provide the pressure put on the chain and rope so it grips going through the gypsy. Those are spring loaded, and sometimes the spring can wear out.” Check the motor and gearbox exterior to make sure no corrosion is forming, check the gearbox oil and check the electrical connections. If there’s corrosion, terminals are loose or wire jackets are compromised, follow Lynch’s directions.  “Fix it, don’t patch it,” Lynch recommends. “Replace it.”

“A major issue is that many windlasses are commonly made from a cross-section of metals. The bolts are usually stainless with the castings aluminum,” says Neeves. He suggests checking the original installation, and subsequent servicing that the stainless bolts are isolated from the alloy with some form of protection, such as Duralac.

The Locker

A clean anchor and chain won’t last long if the anchor locker is a mess. “Unblock the drain hole,” says Neeves. “If the locker drain is above the locker base, make sure your chain does not sit in a puddle of water, or worse, mud. … Some muds are anaerobic and will be acidic which will corrode the galvanizing off the chain. Wash the locker out with fresh water as often as possible as it’s commonly full of salt. If sitting in the sun, the perfect condition for accelerated corrosion.”

The anchor system is an important safety feature. Care for ground tackle properly. Remember, it keeps you attached to the seabed floor while fishing, diving or weathering out a storm.

By Steve Davis, Southern Boating March 2018

See more from the Annual Haul Out Guide

Exit mobile version