Hey, There! Subscribe to Our Daily Newsletter

Get exclusive recipes, ingredients lists, and amazing fitness food tips everyday in your inbox.


You have subscribed successfully!

Some error occured

Please fill all the required * fields.

Maintenance Check

Time for a maintenance check. Don’t skip these oft-forgotten items

There’s a lot of terrestrial-based wisdom that just doesn’t ring true when it comes to boats. “Out of sight, out of mind,” “What you don’t know can’t hurt you” and “Let sleeping dogs lie” are all perfect examples of advice not to heed when planning your boat’s maintenance. In an effort to protect you from old wives and their tales, here are three often neglected items that can ruin your boating day quicker than stepping on a crack can cause you to cry over spilled milk. Just do a maintenance check.

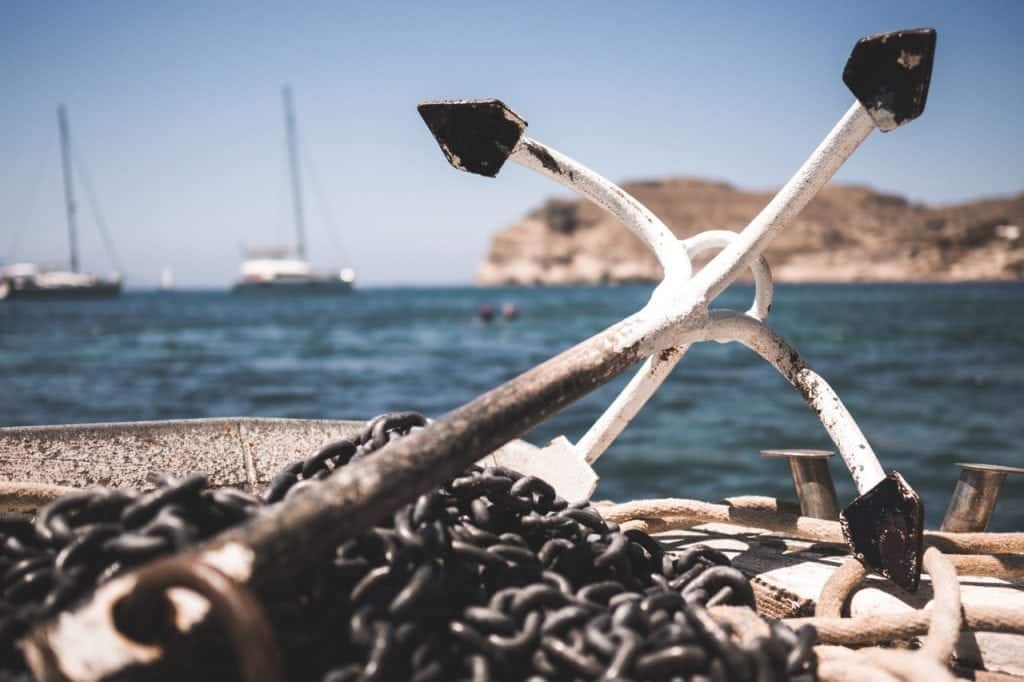
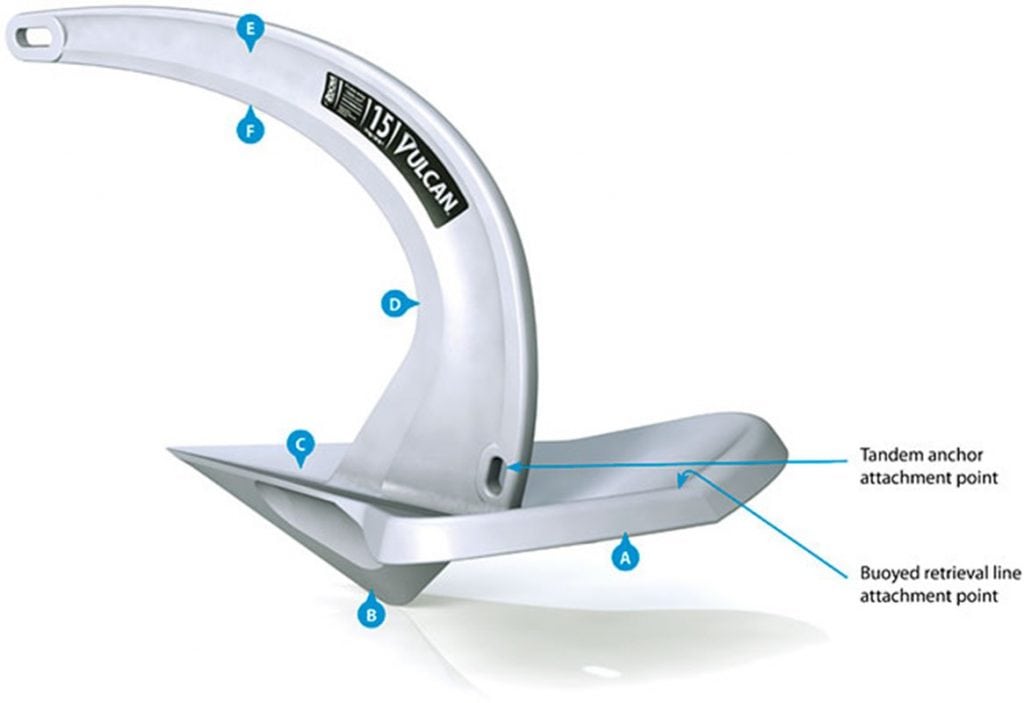
Maintenance Check  #1: Anchor rode and connections

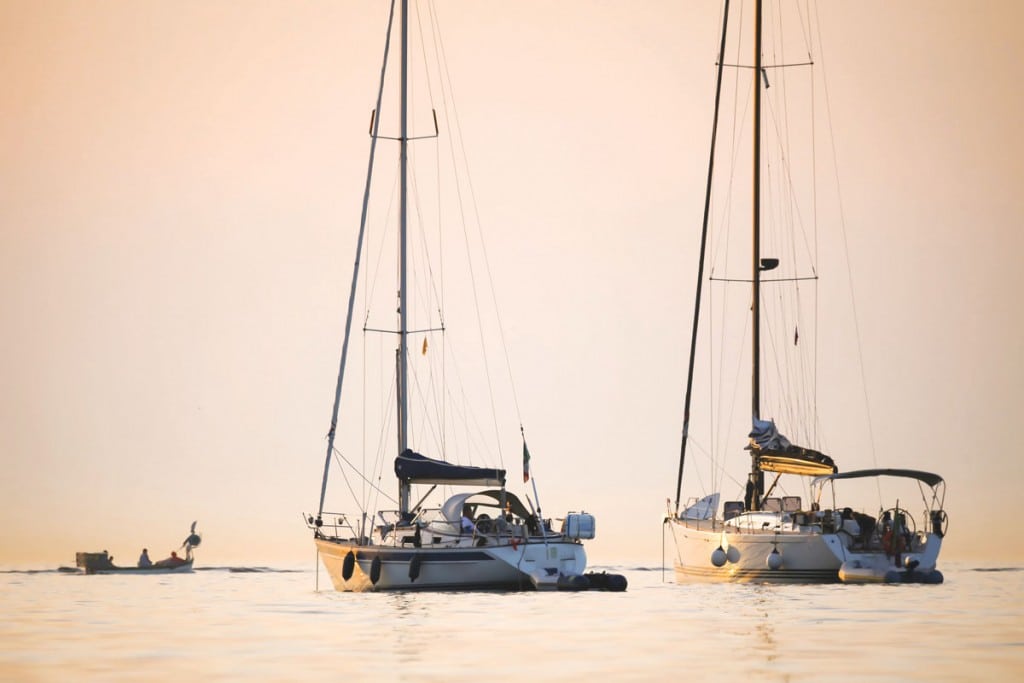
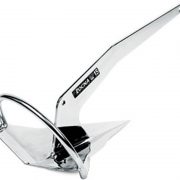
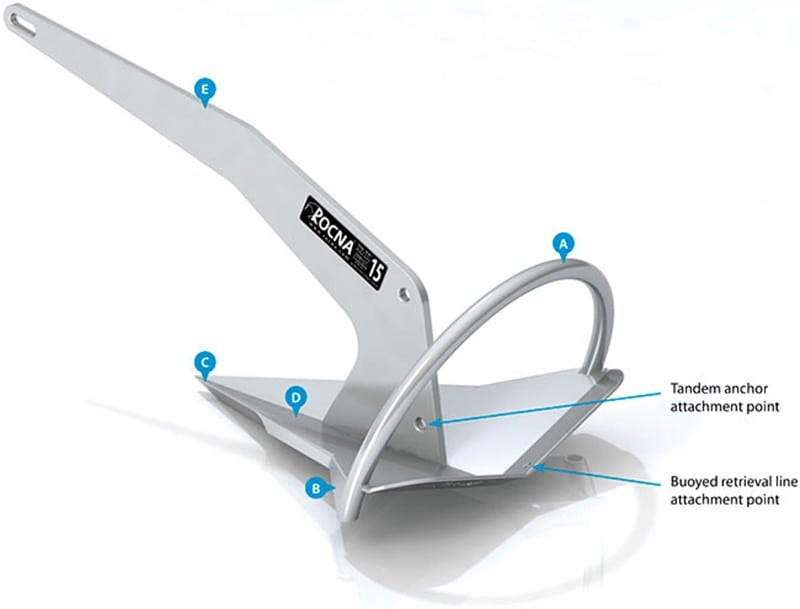
No matter what you enjoy doing on the water, there’s one need all boaters have in common: the ability to anchor safely and securely. Unfortunately, the other thing they often have in common is poorly maintained or unserviceable ground tackle.

The splice is NOT right.

While the anchor typically enjoys a place of prominence at the bow, the anchor rode is relegated to the dark, dank recesses of the anchor locker. In a nutshell, its purpose is to connect the boat to the anchor.

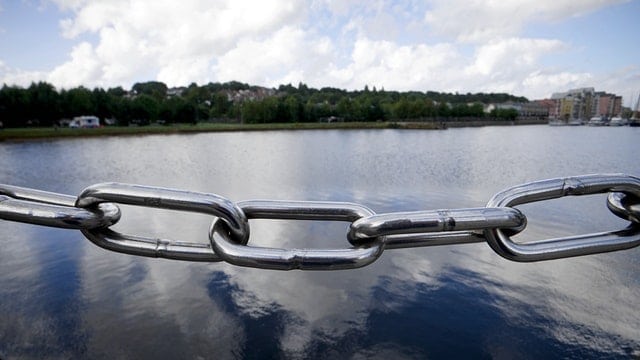
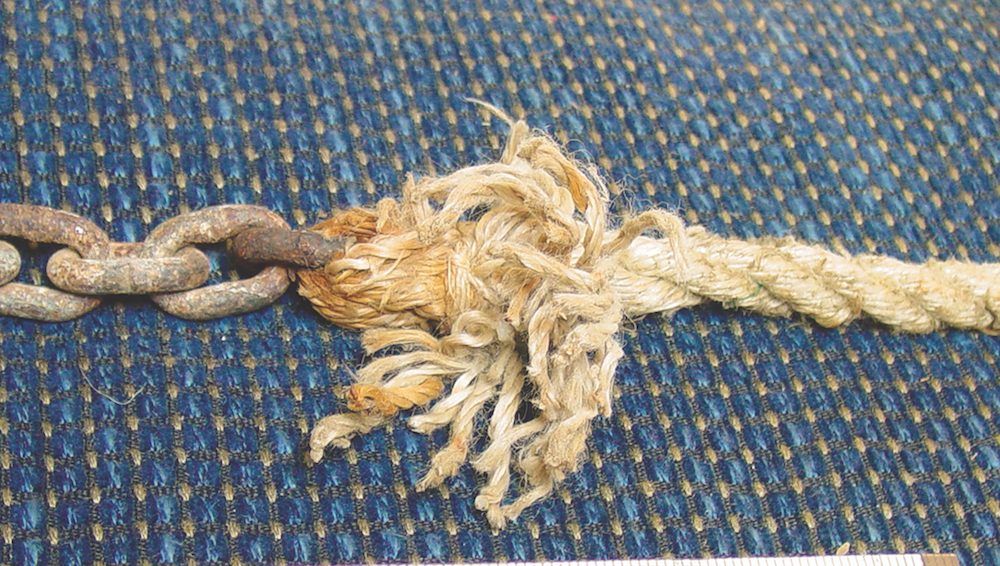
Most boats use a combination rode, which is simply a rope rode with a length of chain between it and the anchor. The chain protects the rope portion of the rode from chafe along rough seabeds and adds weight that increases horizontal pull and helps the anchor remain set. Three-strand nylon is most commonly used for anchor rode. It’s strong, provides more elasticity than a braided line (which absorb the sudden loads and jerks of a bouncing boat), is more easily spliced, and is less expensive.

Your anchoring system is only as strong as its weakest component, which includes not only the rode, but also shackles, splices, chains, mooring bitts, cleats, and, in short, any gear used to secure your boat while at anchor. Proper maintenance includes inspection of these items as well as pulling the rode from the anchor locker and inspecting it at least annually. Check rope rodes for wear, hard spots, cut strands, aging, discoloration, etc. Chafe is rope’s worst enemy, so you’ll also want to inspect hawseholes, chocks, cleats, and windlasses for burrs, sharp edges or anything else that can cause rope damage.

Maintenance Check #2: Stuffing box

Stuffing boxes (aka packing glands) are victims of their own reliability. They carry on so well with such little attention that many boat owners don’t realize they need regularly scheduled maintenance.

Warning: leaking stuffing box

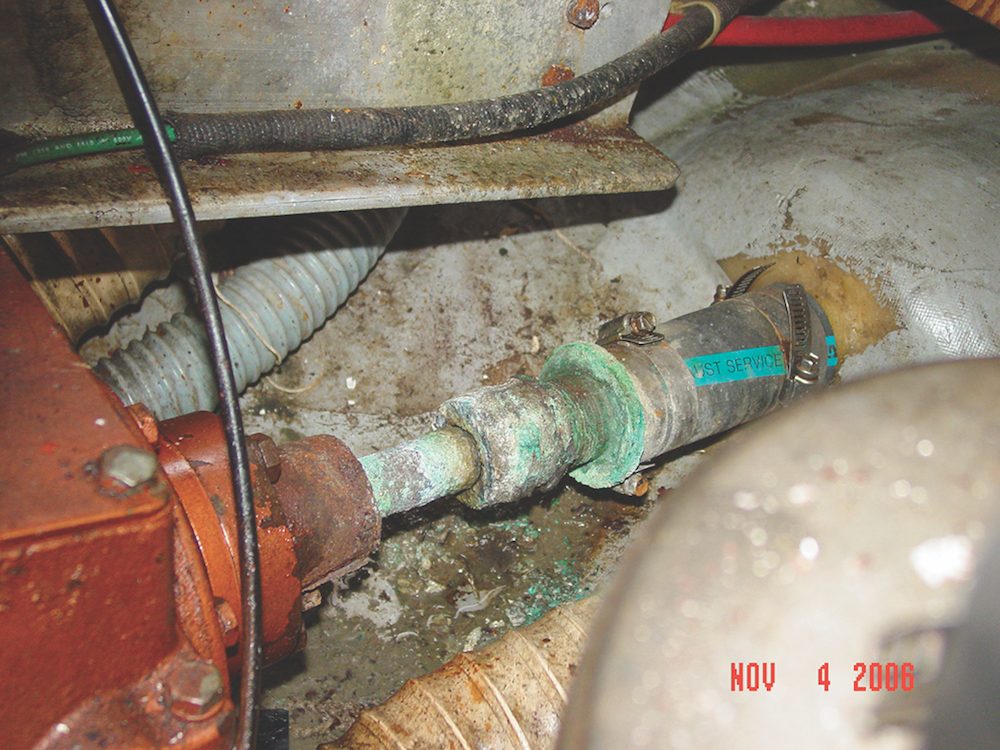
The purpose of the stuffing box is to allow the propeller shaft to exit the hull while keeping water out. The shaft is sealed by compressing packing material against it, most often by using a hollow nut that screws onto the inboard side of the shaft tube or a tightening arrangement that uses a plate secured by nuts and studs on either side of the shaft. The more you tighten either type of gland, the more the packing material gets compressed against the shaft. Most packing consists of a square plaited material and comes either as traditional greased (or waxed) flax or a more modern version impregnated with Teflon.

Water helps lubricate the packing material, so it’s okay for a stuffing box to leak a few drips (three to four per minute) while the vessel is underway. More than that amount (say 10 drops per minute) or any drips while the shaft isn’t turning indicate the need for maintenance. A stuffing box leak can cause everything from corrosion (the spinning shaft slings excess water all over the engine compartment) to sinkings, particularly if the boat is left unattended in the water for long periods of time.

Maintenance Check #3: Packing Material

Packing material hardens over time (as the lubricant dries out) and gets worn away by shaft rotation, allowing water to pass and enter the vessel. When this happens, most boaters simply tighten the packing gland to compress the packing material and stop or reduce the leak. This works to a point; however, as the packing gets smaller, it also gets harder. Keep compressing it, and it will eventually score the propeller shaft, which will then have to be replaced before the stuffing box will seal properly.

The simplest answer here is to replace the packing material on a regular basis. This bit of routine maintenance should only take about 30 minutes and normally costs less for materials than you’d spend on a mocha-frappu-latte-whatever and a free-range muffin. How often you repack typically depends on the number of hours your boat is used. As the vessel has to be hauled, many owners simply repack annually as part of their haul-out or spring commissioning routine.

Maintenance Check #4: Fuel tank fill hose

You’d be hard-pressed to come up with a more out-of-sight, out-of-mind item than your fuel tank fill hose. Fill hoses are attached to the underside of the fuel fill fitting, connecting it to your fuel tank.

All hose has a limited lifespan, and fuel fill hose is no exception. Recommended replacement timeframes will vary between fuel hose manufacturers, but some call for replacement as often as every five years. The American Boat and Yacht Council standards also call for flexible fuel fill hose to be double clamped at each end with marine-grade stainless steel (if there is sufficient hose barb to allow it) as well as marked with the manufacturer’s name or trademark, year of manufacture and application on the outermost cover.

Access and inspect fuel tank fill hoses regularly for leaks and deterioration as part of your vessel’s maintenance program. Check that each end of the hose is double clamped and that the clamps are tight and free from corrosion. Replace older hose (regardless of appearance) as per the manufacturer’s recommendations.

Story and photos by Frank Lanier, Southern Boating September 2018

Ground Tackle: to refit or not to refit?

That is the question. The answer is that ground tackle is an essential component to boating.

As you prepare for the change in seasons, don’t forget to inspect a very important safety item—the ground tackle. “There are three safety things on board—a life jacket, fire extinguisher, and anchor,” says John Lynch, COO of Anchorlift in Cape Coral, FL. Lynch advises that when inspecting the anchor (particularly at the weld points) and chain, “Look to see if any of the galvanizations has been corrupted and if any rust has started to form in those areas where the galvanization has disappeared or rubbed off.”

The Skinny on Ground Tackle

Ground tackle that uses a combination of chain and rope can create rust where the rope is connected to the chain. This is because it rubs off the galvanization. Lynch suggests cutting the link attachedto the splice end and to reconnect the rode using a D-connecting link. This would be the only time he recommends using a connecting link and suggests using a thread lock product, such as Loctite, on the screw pin.

Rust is the worst enemy and may initially be cosmetic. A thorough cleaning along with an anti-corrosion coating will provide protection but only temporarily. Use a galvanizing compound spray for galvanized anchors and chain.  “Once corrosion starts, you can’t stop it,” says Lynch. The application of a coating doesn’t restore the anchor and chain, nor does the process return the ground tackle to its original strength. If the gear shows signs of pitting or flaking of the metal, or if the links appear thinner in width, then it’s time to replace it.

The Rode

When inspecting the anchor line, look for signs of abrasion, cuts, broken or frayed yarns, variations in strand size or shape, burns, dry rot, and even rust (on nylon). Look closely at splices. “A splice should be eight to ten inches back into itself,” says Lynch. He points out that the splice between rope and chain should be no larger than the link of the chain it’s attaching to. If it’s larger, it can easily jam in the windlass.

If necessary, Lynch recommends replacing the rode with either 8-strand nylon or double braid 8- to 24-plait polyester. “Three-strand nylon is inexpensive. But does not work well in a windlass because it’s slick, more so when wet,” explains Lynch. “Eight-strand nylon has better grip because of the weave, [and] double braid is smooth to the touch, holds up longer in a marine environment and gives terrific grip when going through a gypsy.”

The Windlass

“Windlasses are very forgiving, but they are abused endlessly. A little care pays dividends,” says Jonathan Neeves, published technical writer specializing in anchoring. If the rode or chain is slipping through the gypsy, “Check the clutch cones and make sure they are greased properly,” adds Lynch.

“Check the pressure fingers that provide the pressure put on the chain and rope so it grips going through the gypsy. Those are spring loaded, and sometimes the spring can wear out.” Check the motor and gearbox exterior to make sure no corrosion is forming, check the gearbox oil and check the electrical connections. If there’s corrosion, terminals are loose or wire jackets are compromised, follow Lynch’s directions.  “Fix it, don’t patch it,” Lynch recommends. “Replace it.”

“A major issue is that many windlasses are commonly made from a cross-section of metals. The bolts are usually stainless with the castings aluminum,” says Neeves. He suggests checking the original installation, and subsequent servicing that the stainless bolts are isolated from the alloy with some form of protection, such as Duralac.

The Locker

A clean anchor and chain won’t last long if the anchor locker is a mess. “Unblock the drain hole,” says Neeves. “If the locker drain is above the locker base, make sure your chain does not sit in a puddle of water, or worse, mud. … Some muds are anaerobic and will be acidic which will corrode the galvanizing off the chain. Wash the locker out with fresh water as often as possible as it’s commonly full of salt. If sitting in the sun, the perfect condition for accelerated corrosion.”

The anchor system is an important safety feature. Care for ground tackle properly. Remember, it keeps you attached to the seabed floor while fishing, diving or weathering out a storm.

By Steve Davis, Southern Boating March 2018

See more from the Annual Haul Out Guide

Storm Anchoring Plan

Storm Anchoring Plan: Preparation is Key

Images of vessels lost during the recent Hurricanes Harvey and Irma are still fresh in the minds of many. These catastrophic storms galvanize the need to have an anchoring plan in place, even for those whose boats are on inland lakes. Fortress Marine Anchors offers free resources to assist owners in developing the skills needed to keep a boat safely anchored during a storm. Focused more on education than product, they provide a wealth of information.

Surviving a Storm at Anchor by noted author Tom Neale is a comprehensive look at the techniques and equipment needed to safely ride-out a storm. It covers topics every boater should be familiar with, such as anchor selection and how many to set, the importance of the rode, foredeck gear, chafe protection, reducing windage and storm hole selection. The document can be downloaded at fortressanchors.com/SSA.pdf.

A Safe Anchoring Guide is an easily understood primer that guides the reader through the fundamentals of anchoring and creating a storm anchoring plan. It’s available online in an animated format or for download at fortressanchors.com/resources/safe-anchoring-guide.

Manufactured in the USA of marine-grade aluminum-magnesium alloy, Fortress Marine Anchors are adjustable for specific seabed conditions. Incredibly efficient, the 69 lb. FX-125 model was chosen as the primary anchor for the US Coast Guard’s 154′ Sentinel-class of cutters. It offers eight models for recreational and commercial vessels.

Contact:
Fortress Marine Anchors: 1386 W McNab Rd., Ft Lauderdale, FL 33309
Toll-free US only 800-825-6289, 954-978-9988.
fortressanchors.com

Want more? Southern Boating has tons of additional anchoring tips.

MrCuff Nautical Cufflinks

These nautical cufflinks from MRCUFF feature a SHIP WHEEL AND PROPELLER BOAT CUFF LINKS in a lovely presentation gift box. These two pairs of cufflinks are rhodium-plated over base metal and come with a lifetime warranty on tarnishing. They’re the perfect accouterment to any boating enthusiast’s dress shirt.

MSRP $60;
mrcuff.com

Anchoring in The Bahamas

Sitting Pretty
Anchoring in strong tidal currents

Many areas in The Bahamas make tricky work of anchoring, especially where reversing currents can break out an anchor and set you adrift. The Bimini Channel, Normans Cay Cut in the Exumas and the North Current Cut near Eleuthera are three notorious places that wreak havoc with anchored boats as the tides turn. If you want to sleep well at night, review your technique, your choice of anchorages and your ground tackle before your next anchoring adventure.

Bahamian Moor

S/V Kai Kanani II Photo credit: Tavis Jacobs

A popular two-anchor technique that works well in reversing currents is the appropriately named Bahamian moor. Two bow anchors are set 180 degrees apart with the bow of the boat as the midpoint. Drop the first anchor up-current, motor back and set it, letting out double the rode you’ll need for a 7:1 ratio of rode to depth. Drop the second anchor down current, then fall back to the midway position and snug up both lines. Take care not to wrap the line in the props when backing down on the second anchor. If nearby boats lie to one anchor, your swinging radius will be different from theirs so give them plenty of room.

A Bahamian moor works best when a consistent wind blows across the current and keeps the bow steady in one direction. Without a breeze, the boat may spin as the current reverses, twisting the lines. You can minimize this in two ways: First, if possible, cleat one anchor line at the bow on one side and the other a few feet back on the other side. The boat will not be able to spin in place with both lines taut. Second, use a swivel with three lengths of chain. The swivel has two eyes or shackles on one side to connect to the chain leading down to the two anchors, and one shackle on the other end connects to a third length of chain that reaches up to the vessel. Regardless of the boat’s dance at the surface, the swivel does all the twisting. Keep in mind, however, that this method takes advanced preparation, extra equipment and more time to set and retrieve the anchors.

Holding Ground

Most Bahamas anchoring is done in less than 15 feet of water, so 100-120 feet of chain or line should be sufficient. A bow lookout can guide the driver to a nice patch of sand on an otherwise grassy bottom and watch for the telltale cloud as the anchor makes contact. When setting the anchor, take care not to pull it out of the sand and into the grass. Hitting a small target with an anchor hanging off a moving vessel requires practice. Don’t be shy about repeating the process until you’re successful—it’ll be worth it.

On a coral pan, there is nothing for an anchor to dig into and it will generally just slide on its side without hooking up. This is a dangerous situation and you’ll recognize a dragging anchor by the chain skipping or jerking in the bow roller. Always try to snorkel on your anchor to check its position and its environment. An anchor painted white is easier to spot underwater and is an easy DIY project.

Of course, the last tip—which arguably should be the first—is don’t anchor in sketchy places like cuts where water gets squeezed and currents speed up. If a mellower anchorage is one bay over from where you’d like to snorkel, use the dinghy to commute, but stay overnight around the corner.

The Best Anchor

Types of anchor are a hotly debated subject. I find at a bar, the opinions grow louder and convictions stronger with each cocktail. The truth is that the best anchor is the one that fits the circumstances: type of holding ground, current, and tides, and the type and size of boat. In a perfect world, we’d have one of every sort just to be safe.

Not having that kind of space or budget, I carry three: a Manson Supreme, an original Bruce, and a Fortress. The first two are on the bow and the last one is used as a stern anchor because it’s aluminum, so it’s light and easy to manage by hand from the stern or dinghy.

My Manson (similar to a Rocna) has dragged only once and that was in the grass, the nemesis of all anchors. I’ve found the advantage of a claw like the Bruce or Lewmar, is that it tends to reset quickly and typically on its own if it breaks out. Fortress and Danforth anchors with opening flukes are excellent in mud and sand and stow easily off the bow roller on smaller vessels. I’ve also had good luck with a Delta and a Spade.

I believe in all chain rode, at least for the primary anchor. The chain won’t chafe through on rock or coral, creates a nice catenary and adds a bit of heft to an undersized anchor. The secondary anchor should have chain equal to at least one length of the boat and another 100-150 feet of nylon rode. My stern Fortress has 50 feet of chain and 265 feet of flat polyester webbing on a Quickline that stows nicely.

Windlass Wisdom

A working windlass is key to any successful anchoring routine. For a Bahamian moor, a windlass should have a chain gypsy on one side and a line winch on the other. If you haven’t serviced your windlass in a while or even used it for that matter, remember that it’s cheap insurance so it should be in working order. Take off the cover, check the pawls, lubricate necessary points, and lay eyes on the wire connections to ensure they’re solid.

Finally, be sure to check the weather before choosing an anchorage, and set an anchor alarm on your GPS. Then, I promise, you’ll sleep like a baby.

By Zuzana Prochazka Southern Boating May 2017

See more: Tips for Anchoring in the Bahamas

Rocna Anchor

A quick view of some of the features of the Rocna 15″ anchor.

Set it and forget it. With a roll bar to ensure optimal setting position every time, the Rocna Anchor holds firm in any bottom type. It’s easy to handle, with a variety of attachment points, and typically sets within 3 feet of where it’s dropped. Fourteen model sizes for boats 16-150 feet each come with a galvanized steel finish.

Lifetime warranty. MSRP starts at $147.99; rocna.com

Vulcan 15″ anchor
Exit mobile version