

Proper bow thruster maintenance will ensure the best performance from your bow thruster
Bow thrusters are part of what I refer to as the “silent crewmember’s union.” Always willing to help out when needed, thrusters—along with other union members (autopilots, anchor windlasses, etc.)—make our time on the water both safer and more enjoyable. As with any boating equipment, proper bow thruster maintenance is key when it comes to reliability. Here’s how to make sure your thruster is always ready to lend a hand.
Electric vs Hydraulic
A bow thruster is simply a propulsion device that provides lateral (port and starboard) thrust, making the vessel more maneuverable. It is electric or hydraulic and will be either a traditional tunnel- or tube-mounted drive or an externally mounted unit.
Electric units can be further divided into 12- or 24-volt DC types or even the occasional
AC-powered unit. Hydraulic thrusters are commonly found on larger vessels, particularly those that have additional hydraulic systems on board to power anchor windlass or dingy davits.
A typical electric thruster installation involves either running cables of sufficient size to minimize voltage drop from an existing battery bank or installing a dedicated battery in the vicinity of the thruster along with a method of charging it. A third option is piggybacking off of an electric windlass circuit.
Bow Thruster Maintenance
Bow thruster maintenance requirements are determined by the type of thruster you have. Different models have different needs, so the first place to look when compiling your maintenance list is the owner’s manual. Schedule and follow the specific requisite provided there, but here are some other things to consider.
Access the thruster space at least twice a year and inspect the thruster compartment for excessive moisture levels, standing water and leaks. Examine the thruster tube ends (where glassed to the hull) for cracks in the gelcoat or laminate. Another place to check for leaking is the gasket at the thruster saddle, the bracket where the motor mounts to the thruster tube. Inspect the motor and all thruster components for corrosion. Even if there are no leaks, many thrusters are installed in compartments near the anchor locker, where wet rodes and chain create a moisture-rich environment. Running rust, flaking paint or a white, powdery substance on aluminum components are all indications of corrosion
Inspect the motor and all thruster components for corrosion. Even if there are no leaks, many thrusters are installed in compartments near the anchor locker, where wet rodes and chain create a moisture-rich environment. Running rust, flaking paint or a white, powdery substance on aluminum components are all indications of corrosion
and should be addressed. Many manufacturers recommend removal of the motor annually
for examination. This provides an opportunity to check motor brushes, grease couplers, inspect shear pins, etc. It also allows you to view the condition of the sealing gasket
and ensure all mounting hardware is tight.
Secure power to the thruster, then look over and clean all electrical connections. Check both ends of the battery cables for loose hardware, corrosion and other issues; remove and clean any terminals where decay is noted.
Moisture can wick under shrink tubing, so remove it, inspect and clean connectors as required, then recover them. Go over all other thruster system electrical connections and components (battery switches, fuse holders, solenoid connections, etc.).
Check the gear oil level. Some units are completely sealed (meaning their oil level never needs evaluation); however, others require periodic topping-off and changing at regular
intervals. Most units use 90-weight gear oil, but confirm whatever is called for in your owner’s manual.
If your thruster is powered by a dedicated battery, check its installation and condition at least twice a year. It is a good idea to put this on your calendar for the spring and fall months. Check the battery performance with a battery tester. If the battery is not holding a charge, replace it.
Don’t forget the helm control panel and joystick during your inspection, examining each for looseness, deterioration, corrosion, and UV damage. Verify proper operation of the
controls at each helm position, and if you have a wireless remote, now is a good time to install new batteries.
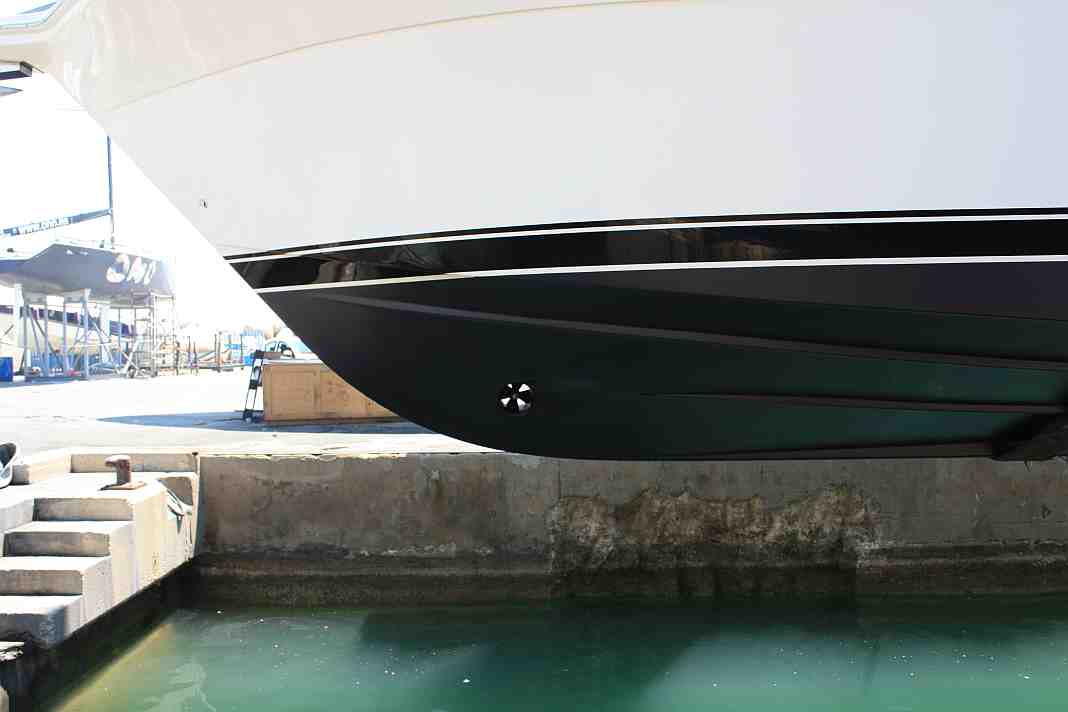
During Haulout
Clean the thruster drive, propeller(s) and inside of the tunnel of marine growth, and check each for cracks or dings. Inspect the drive for corrosion or other problems and the propeller for damage, looseness, etc. Oil in the tunnel beneath the propeller indicates a leaking seal, which will need to be replaced.
Check the condition of the sacrificial anodes (zincs). Although some units have composite gear assemblies and don’t require them, most thrusters will have at least one zinc installed. These should be looked at and renewed annually at a minimum—sometimes more often depending on your vessel’s location and other factors. Always check thruster zincs when you have your other zincs inspected (propeller shaft, rudder, trim tabs, etc.); those zincs can typically be replaced by a diver. Some thruster zincs are specialty items and may not be readily available locally, so carry plenty of spares should they need replacing. In fact, this is a good idea for any extra parts required for your thruster (shear pins, brushes, saddle gaskets, oil seals, spare propellers, etc.).
Apply appropriate antifoulant to the tunnel and drive. Metal drives may require a specific type of antifoulant paint, so follow whatever is recommended in your owner’s manual.
By Frank Lanier, Southern Boating October 2017