When your outboard’s tilt and trim system fails, you feel it immediately. You can’t optimize your running angle for fuel economy, smooth out a rough ride in heavy seas, or raise the engine to avoid damage when trailering. Here’s how to systematically track down the problem.
Understanding the System
The tilt and trim unit improves boat performance by adjusting the engine angle, which changes the running surface of the hull. That adjustability matters across a wide range of conditions, from reducing draft in skinny water to finding the right trim angle offshore when the seas build.
While this guide focuses on outboard engines, most of what follows applies equally well when troubleshooting stern drives.
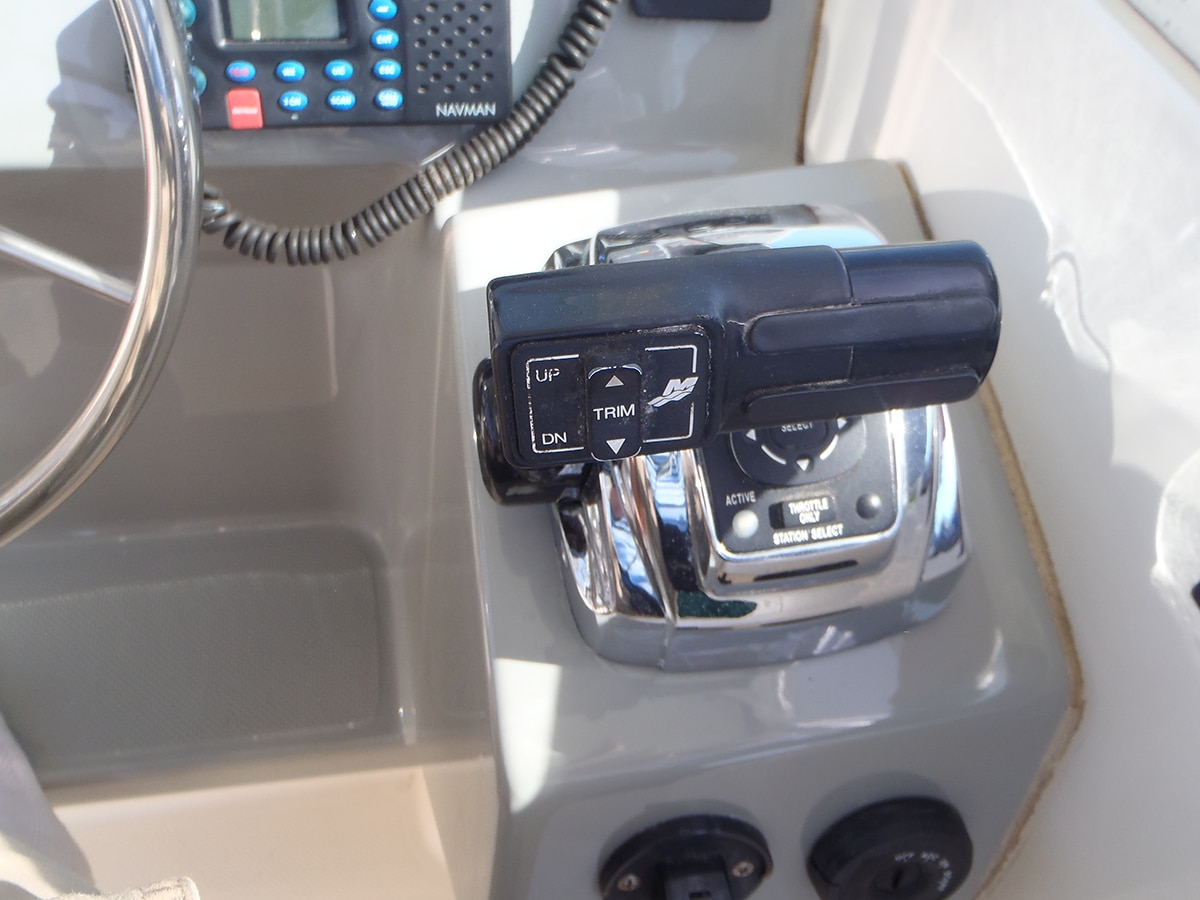
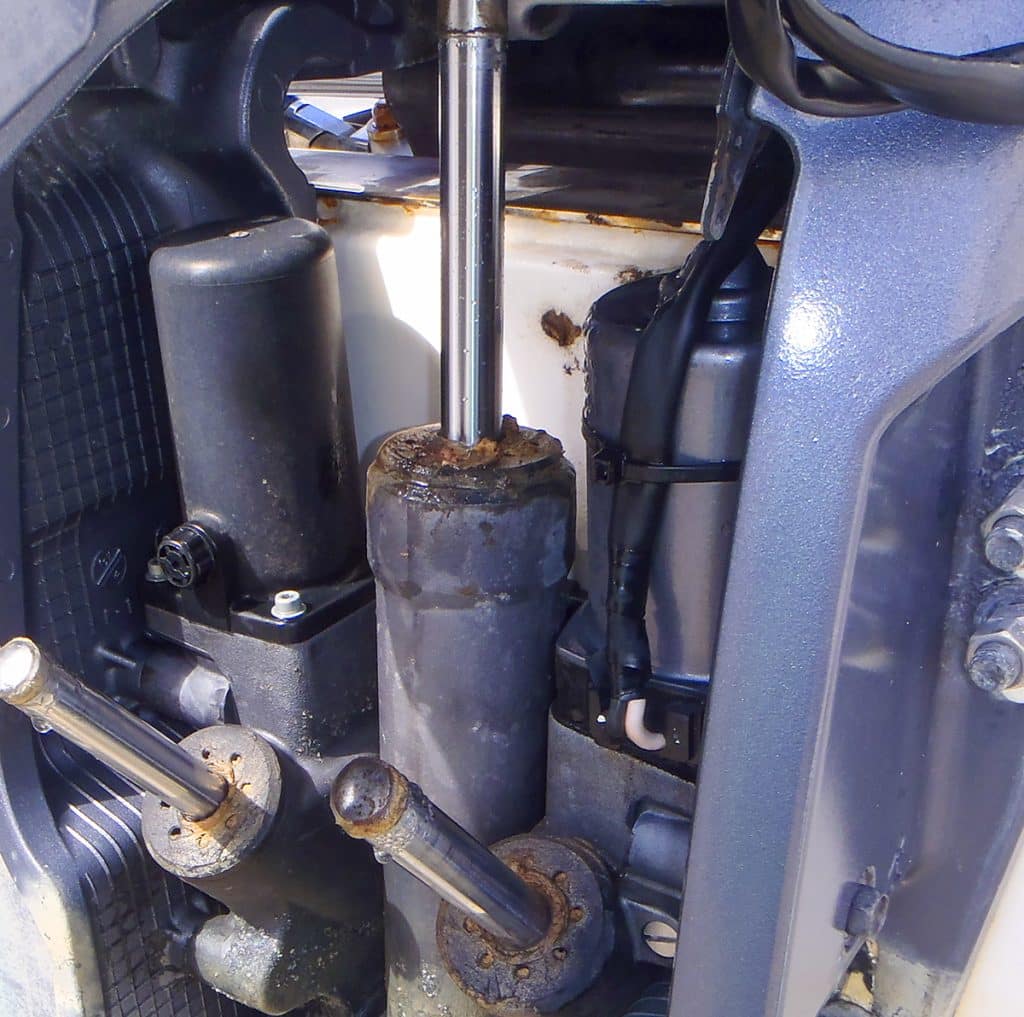
There are two main types of tilt and trim systems. Older installations used an electric motor coupled to a mechanical lifting device such as a worm gear. The system you’ll find on most boats today is the electric/hydraulic power tilt and trim, which has three primary components: a 12-volt electric motor, a small hydraulic pump, and a reservoir/assembly unit. The electric motor drives the hydraulic pump, which forces fluid to the cylinders or rams that move the engine up or down.
Subscribe Here for More DIY and
Maintenance Content
Start With the Basics
If your tilt and trim fails to operate, the first step is determining whether the problem lies with the electric motor or the hydraulic pump assembly. Before going further, confirm the battery is fully charged and the battery switch is in the on position. Also check any inline fuses associated with the tilt and trim circuit — a blown fuse is one of the most common causes of a no-operation condition, and always worth ruling out first. Carry spares.
Diagnosing Electrical and Motor Issues
With the basics confirmed, operate the tilt switch and listen for the solenoid or start relay. If you hear nothing, the problem is typically with the tilt switch, the solenoid, or the wiring and connections between them. If you hear a faint click, you have power reaching the solenoid or relay. The next step is to test the motor itself.
All tilt and trim motors are 12-volt DC reversing-type units with one green wire and one blue wire. Older systems may also have a third black wire for grounding motors that don’t receive ground through their casing. The rule is simple: The blue wire raises the engine, the green wire lowers it. A useful memory aid is “blue sky, green grass.”
Also Read
Trade Winds & Second Chances: Rediscovering the British Virgin Islands by Boat
Sailing the British Virgin Islands remains one of the most iconic boating experiences in the Caribbean, even after the devastating...
To test the motor, disconnect it from the solenoid by unplugging the quick-disconnect plug or detaching the blue and green wires at the solenoid or relay. Then use a jumper wire to apply 12 volts DC directly to the appropriate wire. If the engine is down, energize the blue wire. If the engine is raised, energize the green.
If the motor fails to run with power applied directly, the motor itself has failed and will need replacement. If it runs, the problem is upstream — a faulty solenoid or relay, corroded connections, or a failed quick-disconnect plug. Corrosion at these connection points is one of the most common causes of tilt and trim failure, especially in saltwater environments.
Diagnosing Hydraulic Problems
If the motor runs but the engine won’t raise or lower, slips down from the raised position, or won’t hold trim, the problem is in the hydraulic side of the system.
Start by checking the hydraulic fluid reservoir level. Hydraulic fluid does not evaporate; a low level means there is a leak somewhere in the hoses, fittings, or seals. While you’re checking the reservoir, also look for water contamination. Water in the hydraulic system can cause erratic behavior even when the fluid level appears adequate.
Also Read:
A Second Chance at Sea
A spearfishing trip off Virginia Beach turned into a dramatic Coast Guard rescue after a 24-foot boat capsized...
The most common location for leaks is the tilt and trim ram seals. Seals can fail from age and UV degradation, or from corrosion and pitting on the rams themselves. UV-damaged seals can simply be replaced. But if the rams are pitted, new seals won’t hold — the pitting will damage them during operation. In that case, both the seals and rams need to be replaced together.
If fluid level is adequate and no external leaks are visible, the hydraulic pump itself is the likely culprit. At that point, the repair typically requires removal and either rebuilding or replacing the pump at a qualified service facility.
—By Frank Lanier


It works but is slow going up and down