Hey, There! Subscribe to Our Daily Newsletter

Get exclusive recipes, ingredients lists, and amazing fitness food tips everyday in your inbox.


You have subscribed successfully!

Some error occured

Please fill all the required * fields.

Air Conditioner Maintenance

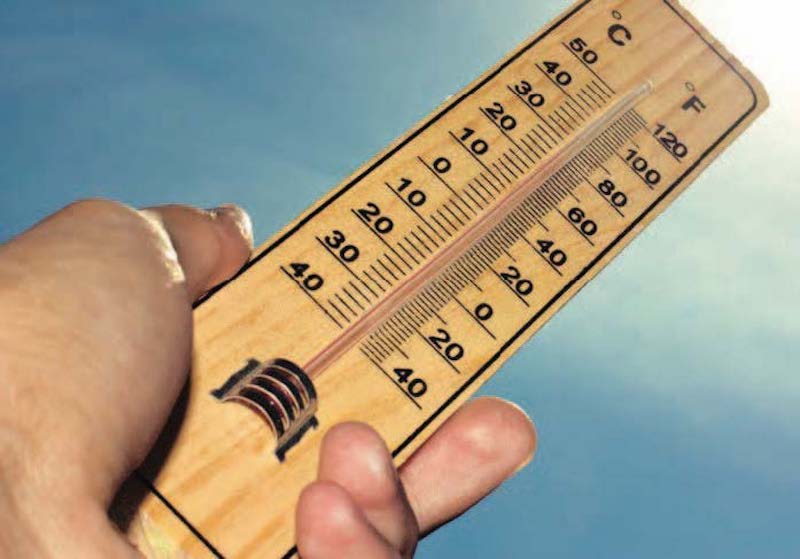
Keep it cool: The lowdown on air conditioning maintenance

Air conditioning systems are one of those onboard items that rarely get a second thought—until they stop working. Here’s how to ensure your system keeps cranking out cool goodness on even the sweatiest of summer days.

Air conditioning systems come in numerous configurations; however, they all contain three major components: an evaporator (where “boiling” refrigerant absorbs heat from air), a compressor (which pushes the refrigerant through the system) and a condenser (where the refrigerant is cooled prior to being returned to the evaporator). Marine air conditioning units are typically direct expansion designs, meaning they pump refrigerant directly to air handlers inside the boat. Larger vessels may instead use a chilled-water system, which cools and circulates cold fresh water through the air handlers instead of refrigerant.

The key to keeping your air conditioner operating reliably is regular maintenance. The first place to look for recommended maintenance is your owner’s manual, but here are a few general tips that can be used to help preserve most any system.

Marine air conditioners work by exchanging heat with circulating seawater. When problems occur, one of the most common causes is a lack of water flow through the system. Symptoms of a saltwater system with restricted water flow can range from a lack of cooling output to more frequent on/off cycling of the unit as it struggles to operate.

Air conditioner maintenance of your cooling water system starts with regularly checking the cooling water intake strainer located between the raw water intake seacock and the unit’s pump. Shut off the seacock, then take out the strainer basket and make sure it’s clear of debris and growth. Once the strainer basket is removed, open the seacock briefly to ensure nothing is clogged in front of the strainer. Then carefully check the strainer basket for damage. The fine, stainless steel mesh baskets found in many air conditioning strainers can erode rapidly due to the constant flow of seawater, so it’s a good idea to keep spares on hand.

Also, check the condition of all hose runs and connections. Begin at the seacock and work your way through the system, from seacock to strainer to pump to air conditioning unit and finally, the overboard discharge thru-hull. Look for issues such as leaks, corroded or broken hose clamps, chafe, collapsed hoses and those showing signs of age or deterioration (cracks, swelling at the hose clamps, etc.).

Seawater cooling hoses should also be double clamped where possible if there is sufficient hose barb to allow it. Hose failure is never a good thing, but it can be particularly bad for owners who become complacent about continually running their air conditioning while the vessel is left unattended. If a raw water cooling hose fails with no one on board, the continuous pumping of seawater can easily sink a boat. A less dramatic reason to avoid running your air conditioner 24/7 is that the oxygenated seawater produced by this constant flow enables all kinds of marine critters to take up residence and thrive in your cooling system.

Another issue that can restrict cooling water flow is the buildup of scale in the condenser coils. The coils should be flushed periodically with a weak solution of biodegradable acid to remove both scale and marine growth, typically every two to five years (depending on where the boat is located and how often the air conditioning is used). Back flushing the system using dock or pressurized water is another option to try if the system is clogged.

In addition to cooling water, an air conditioner also needs plenty of air flow to perform correctly. Good quality, properly fitted air filters are crucial to protecting your air conditioner against dirt and dust. Most systems will have two—one behind the return air grill and one at the evaporator unit. Air filters should be cleaned monthly as described in the owner’s manual, typically by vacuuming or removal and washing with plain water; allow them to dry thoroughly before reinstallation.

The inspection of the condensate pan should also be added to your maintenance checklist. This is the tray below the air conditioning unit that collects the water (humidity) pulled from the air as it’s being cooled. The two things to look for here are proper drainage and corrosion of the pan itself.

The pan should be plumbed so that it drains overboard or into a sump, where the water is then pumped out. Allowing condensation to effuse into the bilge is not recommended.

A simple way to check the drain for adequate operation is to temporarily plug it and pour water into the pan, which should then flush away within 30 seconds or so. If the drain hose is clogged, it can be blown clear with compressed air or pressurized water. If the pan is corroded, particularly to the point that it can no longer contain the condensation, it should be repaired or replaced.

Maintenance requirements for a chilled-water air conditioning system are similar to those for a direct expansion system. Chilled-water systems have to be filled with water to operate properly (similar to refrigerant in a direct expansion system). They will typically have pressure gauges to check for leaks or air in the system, which should be part of regularly scheduled air conditioner maintenance.

By Frank Lanier, Southern Boating Magazine July 2017

The Wondrous Windlass

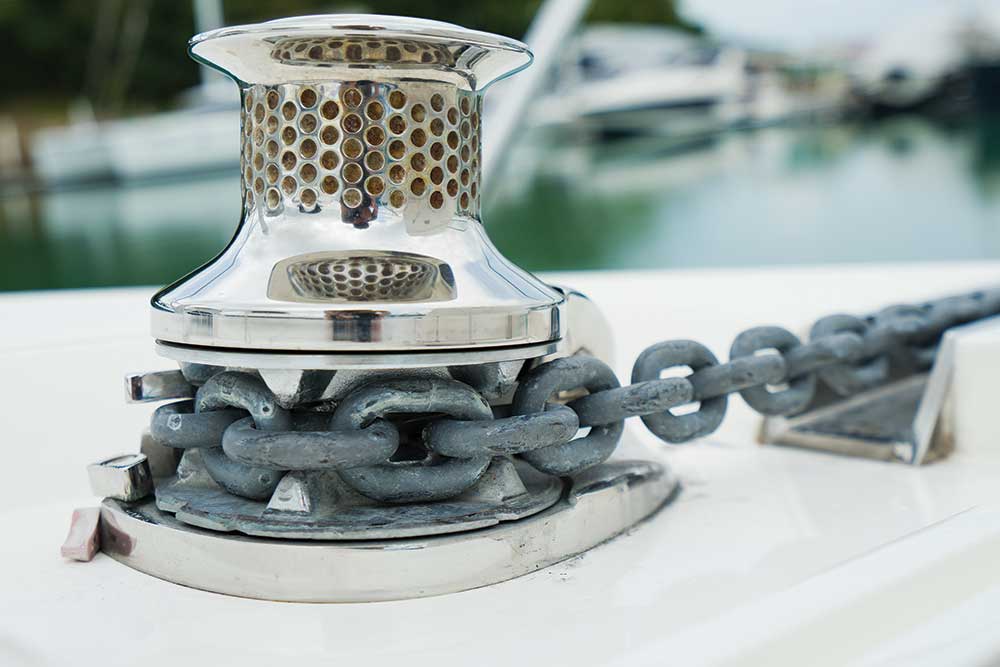
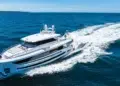
Heavy-duty lifting is this marine powerhouse’s job.

Dropping anchor in a beautiful cove is often the goal of cruisers, who seek and set sail for stunning destinations only accessed by water. To aid anchor deployment and retrieval, most cruising vessels are equipped with a windlass, and power options include manual, electric or hydraulic. Installing a windlass can aid a cruiser for years to come.

The electrically powered windlass is the type most often used on cruisers. Vertical windlass designs have the electric motor and rope/chain gypsy (the chain wheel that the chain and rope roll up on) installed in a compartment just below deck on the bow, while horizontal designs have the entire lifting assembly mounted on the bow and covered for protection. An electric windlass allows the anchor line to pay out at a controlled speed as you deploy your anchor. When you’re ready to haul the anchor up, you hit the switch and the electric motor hauls in your chain and anchor.

Windlass technology does not change quickly, yet there have been advancements in metallurgic compounds and motor and gearbox designs. For example, Anchorlift uses AISI 316L-grade solid stainless steel for the production of all of its models and accessories. John Lynch, Anchorlift general manager, explains why. “The reason is durability and stability of the material. AISI 316L stainless steel is the best available, and we don’t use nylon, aluminum or plastic because we feel these reduce performance and compromise the durability of the windlass.”

Anchorlift Aquarius 2500 Series Windlass

Other leading windlass manufacturers include Lewmar, Maxwell Marine and Quick Nautical Equipment. Windlass selection is based on three criteria: vessel size, vessel weight and anchor size. “These all go into the science of selecting the appropriate windlass for the boat, because it’s not just the windlass that is needed,” Lynch explains. “You need to have the correct bow roller for the style anchor that is used, and the anchor design affects this as well as the position of the windlass, whether it is deck-mounted or thru-hull.”

Boat owners also need to utilize the correct rode kit, which is determined by the gypsy size in the windlass, how deep you normally anchor, the size of the anchor locker, and your scope ratio (the distance of rode compared with the depth you are in). In addition, whether the boat has a 12v or 24v power system is also a factor.

Lynch says their website was designed to take out the guesswork for customers. “We have an extensive amount of information, photos, drawings, diagrams, comparisons, and specifications available to view and download in order to help make the selection process very easy. Plus we have staff that is always available to answer calls regarding windlass and windlass accessories.”

Maintaining the windlass involves rinsing the windlass with fresh water after a day of use and polishing periodically to keep its shiny luster – especially stainless steel. Boat owners should ensure the unit is properly greased and that no corrosion starts to form on the surfaces of the unit. This includes the motor and gearbox of a vertical windlass that are located below deck, usually in the anchor locker.

“We recommend using an anti-corrosion spray (paraffin based) and spray the entire motor and gearbox thoroughly,” Lynch adds. “Boat owners should periodically check to see if any white powdery material (corrosion) is present. If so, remove it with a wire brush and apply more anti-corrosion spray. The anchor locker is a harsh environment and gets very wet when the rode (anchor rope and chain) whips around in there when the windlass is in use. This creates a very unfriendly environment for materials that can corrode.”

Regardless of the manufacturer and model installed, user error can still happen on the water. For example, a windlass should never be used to haul the seabed to the boat, or drag the boat to the anchor. This can cause damage to the windlass such as a bent shaft or damage to the vessel itself.

“The only way to avoid any mistakes is to follow the manufacturer’s recommended use of the product,” Lynch says. “If you have never used a windlass before, there are blogs, websites and, of course, your local marina staff that will help you decide which is right for you and how to properly use it. We also strongly suggest professional installation of the windlass and its accessories. Although they look easy to install, it can become quite involved and frustrating once you get into it.”

Anchorlift’s Anchor Turner Kit also helps boat owners avoid problems with twisting anchors when they’re retracted. It includes an anchor connector swivel and anchor turner, which helps the anchor park correctly in the bow roller rather than upside down.

INFORMATION:

anchorlift.com

lewmar.com

maxwellmarine.com

quicknauticalequipment.com  

— By Doug Thompson, Southern Boating Magazine November 2016

MagicEzy Mega Fusion

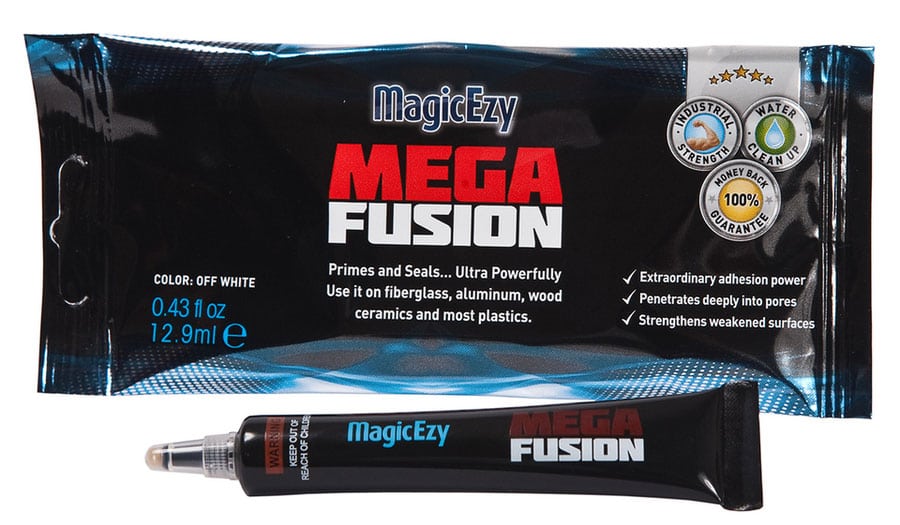
MagicEzy Mega Fusion makes repairs to plastic or aluminum surfaces on your boat, prime them first to maximize adhesion and ensure a flawless, like-new finish with Mega Fusion from MagicEzy. There’s no fiberglass prep work needed with Hairline Fix and 9 Second Chip Fix, which prevents delamination and strengthens weakened or cracked fiberglass. All three products are water-soluble, environmentally friendly and available in 11 colors. MSRP $24.99/tube; magicezy.com

Negative Effects of Corrosion

The Devil is in the Details

“Great floods have flown from simple sources,” said William Shakespeare, which is a fitting opening for the subject of the potential negative effects of corrosion aboard your boat and the possibility of big troubles because of it. How big? Great floods, indeed.

Here are a few facts. Steering clear of any chemistry lesson, electrolysis involves only one metal and a major change occurring in an electrolyte with chemical properties that make it capable of conducting an electrical current. A good example is when a lead-acid battery discharges and produces a significant alteration in the concentration of the battery acid. So when one of my dock mates called me on the VHF asking for a tow, he was wrong when he stated, “Electrolysis caused that blade on my prop to weaken and finally break off.” No, shipmates, his problem was most likely brought about by galvanic corrosion or, in part and sometimes in collusion with, its equally evil relative, stray current.

With galvanic corrosion the deterioration occurs between the dissimilar metals as they react while immersed in salt water. This is caused by the current—the movement of an electric charge—that flows between the two, each acting as anode or cathode, depending on its place on the galvanic chart of metals in sea water, and as a result of either being physically or electrically connected.

[photomosaic ids=”5693,5692,5691,5690,5689″ orderby=”rand”]

The long and short of it here is not so much with the why of the process but more of preventing the result. For example, my buddy’s bronze propeller blade gave up more of itself, corroded as it were, and also the stainless steel shaft it was attached to because it is a less noble (or more reactive) metal than that of the shaft’s material.

While the effects of galvanic corrosion will more than likely occur over a protracted period of time, the serious effects of stray current can be seen in as little as several days. Should you have, for example, some faulty wiring lying in the bilge or a damaged float switch sending current into the water—or the same condition existing on another vessel in your marina—or even issues from the dockside shore power, regardless of whether you have a galvanic isolator in use, your boat is in serious danger. A shaft, rudders, props, outdrives, lower units, and bronze through-hull fittings are all at risk. If you even suspect this may be the case, and unless you are an ABYC certified marine electrician, the best advice is to take a big step back and get the experts in posthaste. (abycinc.org/educationprograms/certificationDirSearch.cfm).

Protection against galvanic corrosion is a bit simpler and yet comes with its own set of rules. “With fiberglass boats, Mil Spec A-18001K Zinc alloy sacrificial anodes are most suitable for the saltwater environment if the underwater metal you are trying to protect is bronze, stainless, and Nibral,” says Bob Olsen, President of BoatZincs.com. “With brackish water, aluminum anodes (Mil Spec A-24779)––which also provide saltwater protection as well––work best. If you use your boat only in fresh water, magnesium anodes (Mil Spec A-21412) are what you will need.”

If you run a stern drive or outboard boat, use aluminum protection. It’s best to check with your manufacturer for any special needs. In addition, with inboard engines, always make sure to check your pencil zincs twice a year.

The size of the anode is a function of how many square feet of metal are being protected, and if you are re-zincing make sure you confer with your yard or marina service manager. “Except for a few situations, you cannot over-protect your boat,” Olsen advises. He adds that boat owners should feel free to collar their boat shafts as well, as long as the boat is properly bonded. As always, call in the right technician to have a look if questions arise.

Making sure your boat’s metal fittings are properly protected against both galvanic and stray current corrosion is one of the most important preventive maintenance regimens aboard your boat.

By Ken Kreisler, Southern Boating March 2014

When Your Outboard Goes Under: Dunked Outboard Rescue

Save Your Dunked Outboard

How to save your outboard motor if it goes underwater

Once in every boat owner’s life, it’s likely to happen. A Titanic tragedy it is not; someone just forgot to replace the drain plug, and your boat lies submerged at the ramp. Fear not. A dunked outboard can happen, but you need to act fast!

Saving your outboard—whether it’s a two or four stroke—from a watery death in fresh or salt water isn’t as hard as most people think. But fast action is crucial regardless of salinity. Once a waterlogged motor comes into contact with air, corrosive rusting begins.

This engine was underwater for far too long. Photo courtesy of Yamaha

Portable outboards of 25 horsepower and smaller are the most likely engines to go under. Marine mechanics call it “the classic late Saturday afternoon emergency save,” but how it gets to that point is up to fate. For example, while carrying a 9.9-hp outboard you stub a toe at the dock, and you and the motor hit the lake bottom. Or, you fail to tighten down the thumbscrews on the clamps, and normal vibrations loosen the connections to the boat until it is bath time. Most outboards of 60 horsepower and larger are bolted to the transom. Unless the entire boat actually sinks you probably won’t dunk a large engine. Regardless, the techniques used to save an engine work for all sizes.

Step One: Pickling your submerged engine

If the engine goes into saltwater, the first step is to raise the engine and get it right back into the water. No kidding! A freshwater bath (called pickling) is one way to begin flushing all the salt water and debris out of the engine. Some marine mechanics fill the entire engine with oil or diesel fuel. The goal is to displace the salt water and keep the exposed metal parts from air exposure. “Your number one enemy is air, so if you are not prepared to work on it immediately, sink it in fresh water,” says John Wilkinson, a priority representative at the Yamaha Marine Service call center. “Once you are ready and have two or three hours set aside to work on it, start with a garden hose and spray the entire engine, and drain the carburetor or vapor separator on a fuel-injected engine.”

Step Two: Break the dunked outboard down

Next, without delay, pull the spark plugs, drain the cylinders and spray an entire can of quality fogging oil (such as Lear Chemical Corrosion Block) throughout, rotating the crankshaft to save the cylinders. Add a fresh set of spark plugs, change the oil and filter on a four-stroke, then add gas and get the engine started. On a two-stroke engine, run a rich gas-oil mix used during break-in, which will add more lubrication. The richer mix will also likely foul your spark plugs, but you’re out to save the motor, not preserve spark plugs. Run the motor for an extended period, two hours or more if you can. The idea is to get the engine warm enough to bake out any water.

Step Three: Avoid Corrosion

Now you can start working on the other parts of the engine. “One crucial thing is to take the starter motor apart and clean it up,” says David Greenwood, planning manager for Suzuki and a long-time outboard motor expert. “That starter motor is going to start corroding in no time, so you need to clean and grease all electrical connections. Anything that shouldn’t be underwater at any given time needs to be addressed, including the main wiring harness. Eventually, that will probably need to be replaced.”

Step 4: Oil it up

On a four-stroke engine, change the oil two to three times through the procedure. On a two-stroke, run double oil for the first 10 hours. “In most cases, you’ll have a qualified marine technician doing this within 24 hours,” Wilkinson notes. But how about the person that’s deep in The Bahamas? “If his outboard goes under, the first thing is to rinse it with as much fresh water as possible, then fill it up with oil so nothing is exposed, wrap it up in trash bags and stow it in the bilge so it can be worked on. Any oil, even cooking oil, is better than no oil at all; you just don’t want dry steel parts that are open to rust.”

Pull the components from the engine, rinse with fresh water and oil it up!

Best Practices

Obviously, it’s best not to dunk your outboard. Most small outboards are attached with two clamps and two thumbscrews. A good tip involves running a wire or cable from the ear of one thumbscrew to the ear of the other, through a hole—either provided or drilled. Connect the cable with a small lock, and you’ve got something that prevents the thumbscrews from unthreading and also works as a theft deterrent. The thumbscrews will only twist so far before the cable stops them. Or, you can drill a hole through the engine bracket and the transom and drop a bolt through.

Outboards can survive saltwater immersion for an amazingly long time. For example, a Yamaha 8-hp outboard sunk along with a sailboat in August of 1992 when Hurricane Andrew ripped through Florida. The sailboat was salvaged, along with an 8-hp motor. Using the same steps described above, the small engine started after just three pulls and was nicknamed “Old Crusty.”

The lesson is that no matter how bad it looks, it’s at least worth a try to save a dunked outboard. Most likely, you will succeed.

By Doug Thompson Southern Boating December 2013

Interlux Boat Paint Guide App

Choosing paint colors is easy peasy with the Interlux Paint Guide App. Free for Apple IOS and Android smartphones and tablets, the app includes a useful quick reference guide, information on topsides, varnishes, undercoats, and more. A store locator and paint estimation tool calculates exactly what you need and where to get it. Available for download from the iTunes App Store or from Google Play. FREE; yachtpaint.com/usa 

Southern Boating September 2014


MagicEzy Mega Fusion

MagicEzy Mega Fusion makes repairs to plastic or aluminum surfaces on your boat look  brand new. There’s no fiberglass prep work needed with Hairline Fix and 9 Second Chip Fix, which prevents delamination and strengthens weakened or cracked fiberglass. All three products are water-soluble, environmentally friendly and available in 11 colors. MSRP $24.99/tube; magicezy.com

Southern Boating June 2014

DieselFusion Additive

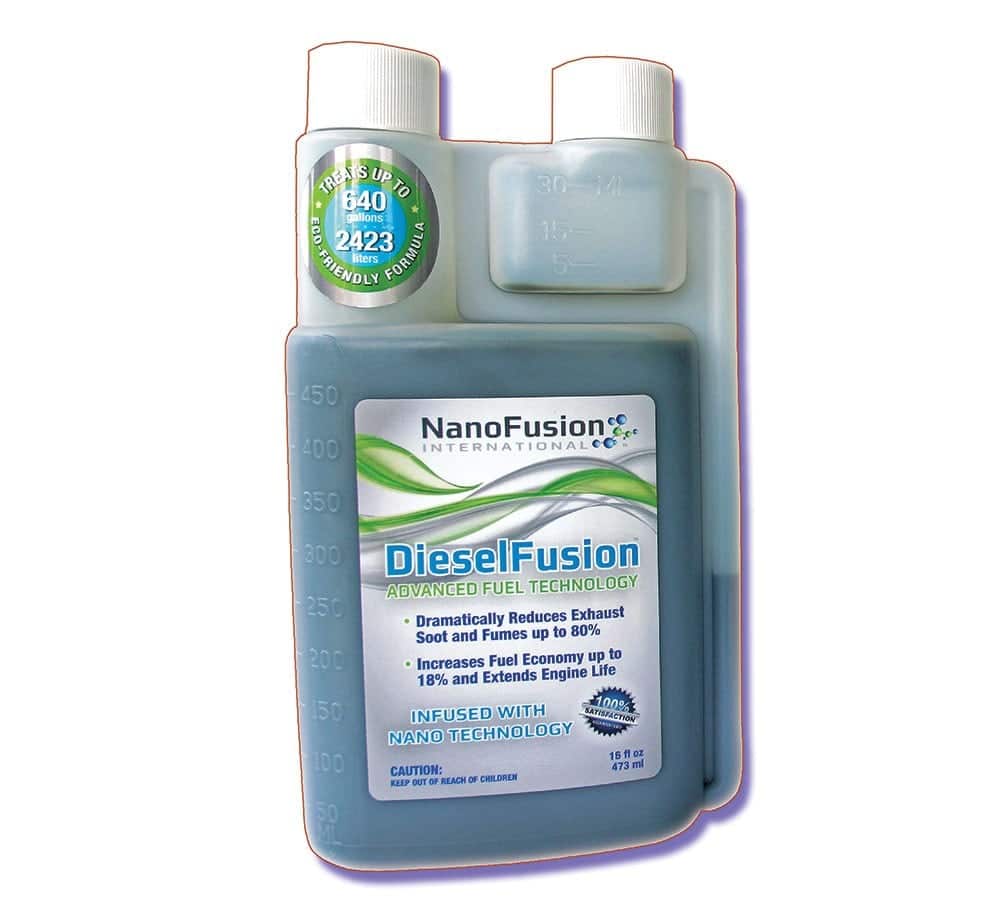
DieselFusion is a fuel additive that utilizes nano-technology to enhance marine fuels and protect vital engine components. DieselFusion dramatically reduces exhaust soot and fumes up to 80 percent and increases fuel economy up to 18 percent while extending engine life. This non-hazardous, eco-friendly product delivers a higher level of engine efficiency, so you can explore with confidence. Available in pints and gallons, a pint of DieselFusion treats 640 gallons of diesel fuel with fuel cost savings starting 30 minutes after dosing. MSRP starts at $59.95 per pint; Contact DavidSHalcomb@gmail.com or call (262) 914-7002.

Southern Boating January 2014

Exit mobile version