Ready to Launch
Life raft inspections and stowage
Like bear pepper spray and supplies for the zombie apocalypse, life rafts are purchased in hope that they’ll never be needed. Even so, they’re expected to operate flawlessly in an emergency, despite minimal maintenance and constant exposure to the harsh marine environment. Here’s how to keep your life raft ready, willing, and able.

Life Raft Essentials
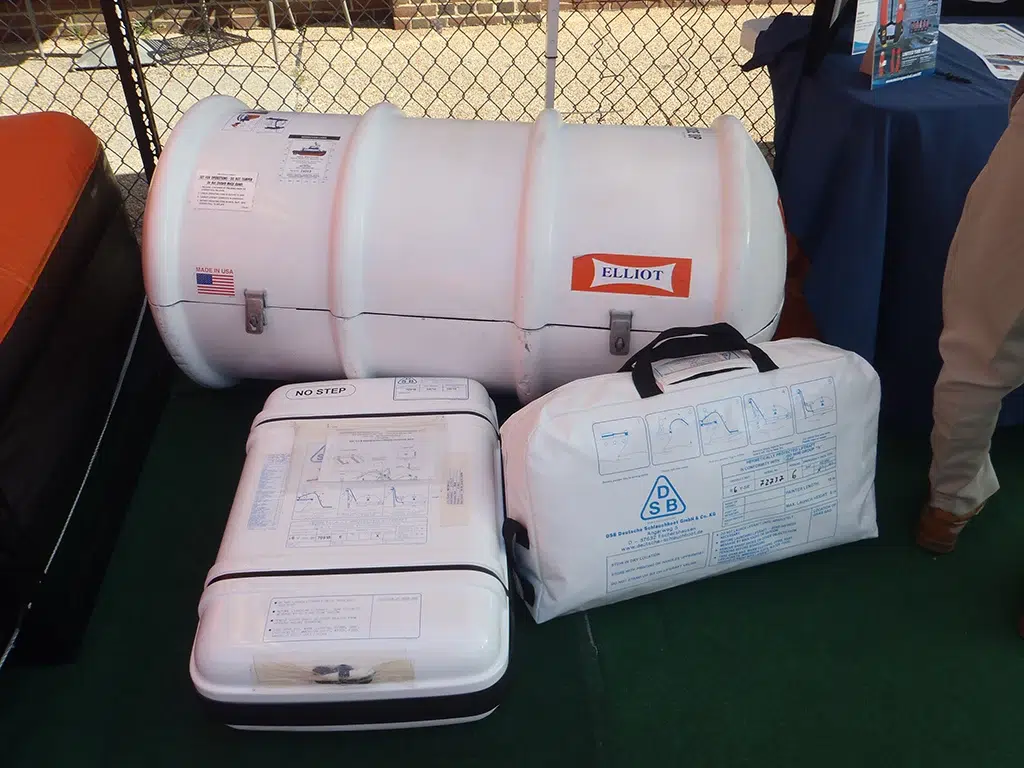
Valise rafts come packaged in a soft, flexible case designed for storage belowdecks. Canister rafts are contained within a rigid canister for mounting on deck.
The valise style raft is popular due to its greater compactness, lighter weight, and the additional protection offered by stowing it below. This keeps the decks clear and the raft guarded from weather and theft.
Belowdecks storage on smaller vessels can be problematic, however, as many lack sufficient space near the companionway to stow a bulky raft without impeding the normal flow of traffic. Another downside is the need to lug the raft on deck to deploy, as rafts are heavy and may be too much for smaller crewmembers to handle.
While a valise life raft can be temporarily stored abovedecks during offshore passages for easier deployment, rafts permanently stowed above should be housed within a canister. Canisters (typically stored in molded fiberglass) offer greater protection from physical damage and the elements than a fabric valise, allowing them to be mounted at most any suitable location abovedecks.
The cons associated with canisters include being larger, heavier, and more expensive than a valise container. Unless the vessel has a dedicated life raft storage area, they also require the installation of a cradle or mount for the container, which means drilling holes into the deck or wherever the raft will be located.
Owner’s Inspection Checklist
First, look at the inspection date which will be prominently displayed on the exterior of the valise or canister. Inspection cycles vary depending on the manufacturer and factors, such as the type and age of the raft.
Some life rafts require their first inspection after three years, while others may not need one until five years. For some rafts, the three-year interval may only apply to the first three years after purchase, after which they may require annual inspections.
The fees for inspection and recertification also vary. For example, repacking the same life raft at six years will typically cost more than the first inspection at three years, as items inside (flares, batteries, food) will likely be expired and need replacing.
Additional requirements, such as hydrostatic testing of the gas/inflation cylinder, can also add to the expense. Keep this in mind when purchasing a used raft, as the cost of that next inspection may well exceed the purchase price of that sweet find at the marine swap meet.
Always have your life raft inspected at a service center authorized by the manufacturer and attend your inspection, if possible. This provides an opportunity to familiarize yourself with the raft, observe how it inflates, and verify what’s inside.
Canister life rafts will have a hydrostatic release unit (HRU) mechanism, which automatically releases the raft at a pre-determined depth. The HRU will also have an expiration date and should be replaced if expired or close to expiration.
Spotting Physical Wear and Tear
After checking inspection dates, the next thing to do is look for physical damage. Inspect valise cases and carrying handles for cuts, tears, rips, chafing, or degradation of the material due to age or UV exposure. Inspect canisters for damage such as dings, cracks, failure of the packing bands or sealing gasket, any of which could allow water entry. Although rafts are vacuum-packed prior to stowage in canisters (as well as valise cases), they should never be allowed to rest in water. If you find damage to the canister or suspect water entry, the raft will require immediate inspection.
Verify the cradle is free from damage, such as corrosion or broken welds. Make sure all raft mounts and cradles are secured with sufficiently robust mounting hardware that is properly tightened. Inspect the wire or webbing straps securing the canister to the cradle for problems, as well as the life raft painter line (the “rip cord” that activates the raft) and its connection point to the vessel.
Safety First: Important Considerations
While conducting the above inspections, take a moment to step back and view the entire life raft installation to spot potential problems. If mounted near the engine deck hatch, will you be able to reach and deploy the raft in the event of an engine fire or explosion? Will that spot beneath the boom allow the raft to deploy without becoming tangled in the rigging? Don’t be afraid to simulate a launch using the raft (or a cardboard box of similar size) to develop a launching procedure and ferret out problems beforehand—your life may depend on it.
-by Frank Lanier


