Torqeedo’s Cruise 10.0

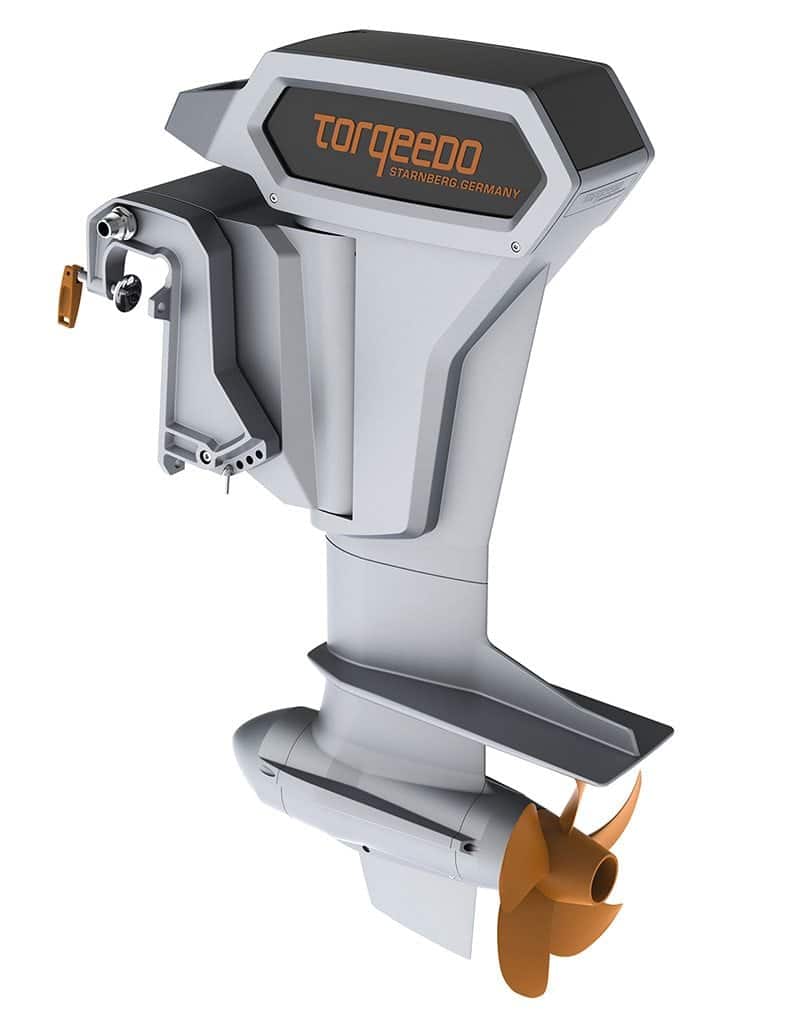
Clean, green and quiet

Torqeedo’s new Cruise 10.0 is a clean, green and quiet electric outboard that’s simple to operate yet provides great speed, thrust and power.

The Torqeedo’s Cruise 10.0is an outboard DC motor and propeller provide up to 12kW at peak input and 10kW of continuous power. The 48V outboard delivers impressive performance while maintaining the simple handling and installation of a low voltage system. It comes with an integrated electric tilt, easily mounts to the vessel’s remote steering and is available in three shaft lengths.

MSRP $7,999; torqeedo.com

By Nathalie Gouillou, Southern Exposure, April 2016

Southern Exposure’s Q&A: Jake Cordero, Artist

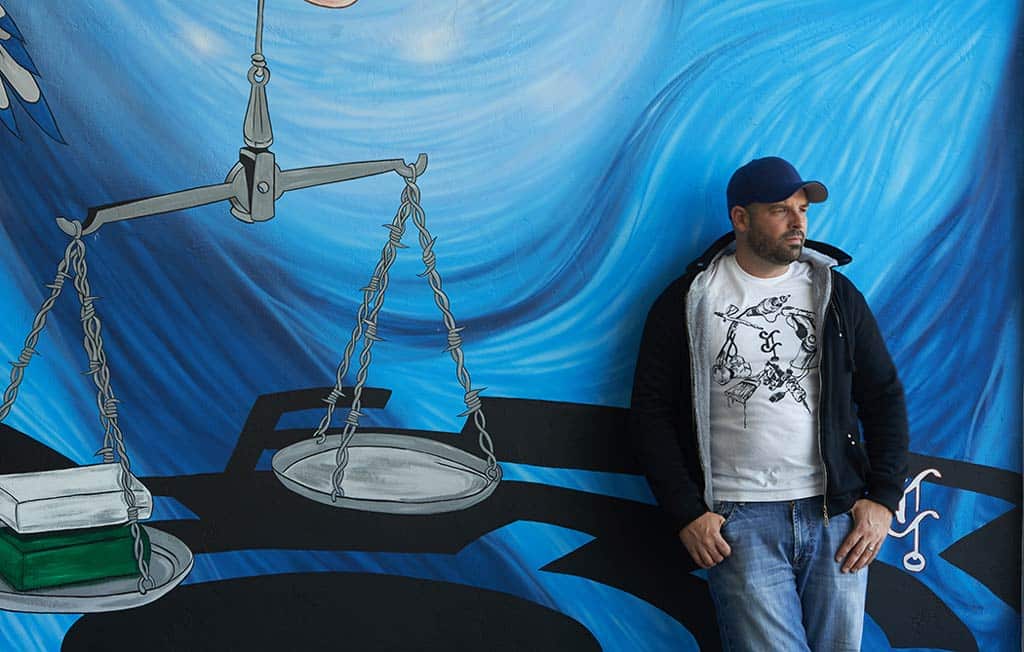
When in South Florida, look for artist Jake Cordero’s vibrant paintings that convey his passion for cultures, nature and animals.

SB: Tell us about yourself and what prompted your creativity and art.
JC:
I grew up around the Davie Boulevard area in Fort Lauderdale, Florida. I believe my early exposure to the arts really sparked my creativity and my view of the world. I started art and music when I was 6 years old in a Broward magnet school. These magnet programs put different mediums in my hands and I haven’t stopped since.

SB: When did the marine world become part of your work? What was the attraction?
JC:
During my academic studies I had to work on the many “-isms” of art history, but being a native Floridian, the ocean was my backyard. I’ve always had something nature-driven in my personal sketches and paintings. Over the past few years, the unique, colorful, cultural style within my marine themes has had an amazing response and continuous demand and well received by my fellow Floridians as well as abroad.

SB: What was the boating industry like when you started compared to how it is now?
JC:
I feel the boating industry has exploded and keeps breaking new barriers. Every boat show I attend, I’m amazed at how many diverse vendors attend and how the quality and innovation continues to increase.

SB: What is your main objective when you are creating a work of art?
JC:
My main objective is to “say something.” Similar to the ocean, I like to dig slightly deeper than just a pretty picture. For my marine subject matter, the vibrant colors I use are as close to mimicking these beautiful creatures flourishing in their natural environment. I’m a guest in their world, and they don’t feel threatened by my presence. It’s pretty amazing when I get a close-up and the light rays hit their scales… Mother Nature is pretty incredible.

SB: What do you enjoy most about being an artist?
JC:
The challenges of innovation and creativity. I am constantly growing artistically and feeding off my surroundings. I get to test my creativity and hone new skills and the aesthetics of different mediums. The joy of getting better and better at my craft and creating a small window into my visions and artistic story is what it’s all about. Art makes people feel something. Whether they connect or disconnect, there’s still some type of reaction received.

SB: Tell us about one or two of your favorite pieces.
JC:
“Miami Sailfish” is a new release, which has yet to be seen by the public. I took a 25-year-old 7-foot sailfish taxidermy and completely refurbished it and gave it a new voice. This is by far the most unique taxidermy in the world. This was such a fun piece to bring to life.

“Octopus Element” began with reclaimed wood and making it truly unique. The wood was acquired from an old Florida Keys’ shack that was being renovated. I used several mediums, such as aerosol, acrylics and oils and wanted to interpret the strange but gorgeous underwater body gliding through our reefs.

SB: What are some projects you have coming up?  Anything exciting you’d like to share?
JC:
I’m always sketching and designing innovative imagery using various mediums. The end result of what I do is always painting. I paint carved wood, taxidermy, murals, surfboards, Converse Chuck Taylors… I’m really excited about two of my nature pieces being part of a new film. I received a call from NBC Universal Studios requesting to use two of my pieces in a scene for the Ice Cube and Kevin Hart sequel Ride Along: 2. I’m stoked to see how they used them in their scenes. It’s a great honor.

My works are always full of energy and passion. I’m very fortunate to be surrounded by a vibrant and colorful environment, which is clearly rendered in my works. You can see there’s an aboriginal-tribal pattern incorporated in each piece. This is majorly influenced by my love of all cultures, especially many of the primitive pioneers. Being a first generation American from Cuban-Russian parents, diversity has always been around me and I embrace it. Many native cultures create statues and artwork rendering their native animals (i.e. wolf, coyote, orca, bear, etc.) I’m from South Florida, so those animals are not really indigenous to my environment. I began designing the nature I see in my environment and it’s all been history since. jacobcordero.com

By Nathalie Gouillou, Southern Exposure, April 2016

Haulover Marine Center, North Miami Beach, Florida

Improvements are coming to a South Florida marina

Westrec Marinas Haulover Marine Center in North Miami Beach, Florida, has been getting a major makeover that is set for completion by spring 2016. Haulover Marine Center on the ICW at Bakers-Haulover Inlet is nestled between Sunny Isles and Bal Harbor, directly across from South Florida’s popular inland sandbar and one of Miami-Dade County’s nicest beaches.

Split into two sites—Haulover Marine Center on the northern end and Haulover Point at the southern end—the center, which provides dry storage for boats and personal watercraft, is getting a bevy of enhancements to its already long list of amenities.

To enhance and modernize Haulover Marine Center, Westrec is adding nearly double the dry storage with a new building slated to withstand a category 5 hurricane and offers 500 racks. The new five-rack-high dry storage building is designed to hold larger multi-outboard engine boats in the 30 to 50-foot range that are popular today and too cumbersome to trailer. The center will also have a new office, retail store and bathhouse.

Amenities:

  • Bait and tackle shop
  • Boat launching ramps
  • Boat rentals
  • Boat wash-down facilities
  • Charter fishing
  • Commercial slips
  • Electric maximum 50 amps
  • Fish cleaning area
  • Freshwater hookups
  • Gas and Diesel Fuel
  • Marine store
  • Pump out
  • In/out dry storage
  • Restrooms
  • Showers

Westrec Marinas
Southern Regional Office
801 N. E. Third Street
Dania Beach, Florida 33004
(954) 926-0300 ext 4
Fax: (954) 922-5485
Westrec.com

By Nathalie Gouillou, Southern Exposure, April 2016

Swimsuit 2016

Here are a few outtakes from the Swimsuit 2016 issue.

We had so much fun cruising through the Bahamian Islands for our four-day photo shoot. We hope you have as much fun with these pictures as we had shooting them. Special thanks to all our sponsors who worked with us on the Swimsuit 2016 issue!


Can’t Upgrade?

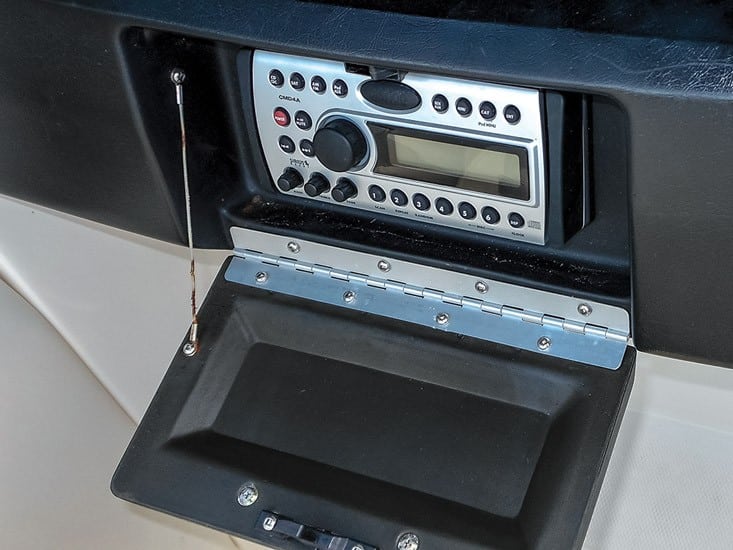
Then update your existing audio.

Your boat’s stereo is older, it still sounds great, but there is no Bluetooth interface for your smart phone to stream to. The stereo’s auxiliary input is already used, or there isn’t one at all. You could replace your stereo, but this is often not as simple—or affordable—as it sounds. Many older boat stereos such as the Clarions were larger and replacing them takes more effort than many would realize. Since the footprint was larger than newer stereos, it now requires fabrication of a cover plate and handling associated cosmetic problems. The remote control in the dash may also need replacement and it may be difficult to pull wire. So how do you adapt your existing stereo to use new technologies?

There are many types of adapters and approaches that can breathe new technological life into your stereo. We’ll start with the stereo’s auxiliary input—on many boats it is already being used by another device such as the TV or a DVD player. In our first case we can have multiple devices share the stereo’s auxiliary input, but only one device can use it at a time. The easiest way to do this is by using audio cable splitters, which are inexpensive, available in almost any plug configuration and an easy way to share the input. The new input could be as basic as a 1/8″ headphone mini-jack that plugs into your smartphone or iPod, or use an audio switch box to select the source so that multiple audio inputs can share the port.

Other options for new audio sources include adding Bluetooth to your existing stereo that consists of FM modulators and FM transmitters. The differences between these two are that the FM transmitter sends a low power FM signal that will be heard by your stereo’s antenna, while the FM modulator is connected directly to the antenna.

To use the typical FM transmitter, select an unused FM frequency, set the device to transmit at that frequency, plug in your audio source, and presto. There is zero wiring to deal with, but a downside is that in most cases, you will need a 12VDC receptacle nearby to plug into—the closer the better. The range is limited, and about 20 feet is the maximum.

The FM modulator does a similar job but in a much different way. Unplug the stereo’s antenna wire and plug it into the modulator. Then plug the modulator’s antenna cable into the stereo. The modulator injects a strong FM signal directly into the antenna wire. The signal source is typically cleaner and much less prone to interference. The downsides are that it requires removing the stereo to install, it has to be wired to 12-volt power, and in most cases, the frequency options are fewer (2 to 8 max).

Given the choices between these two approaches, I favor the FM modulator over the FM transmitter. It requires physical installation, meaning the stereo will have to be extracted at least partially to install it, but the gear ends up being tucked away out of sight. Overall, the sound quality is better in most scenarios. Two good options to consider are the Scosche Universal FM modulator and Audiovox FM100A.

The world of Bluetooth comes in several similar adapter forms. There are FM transmitter versions, which have the same characteristics discussed earlier, and ones that require connection to your stereo’s auxiliary input either directly or through a FM modulator. A good Bluetooth option for boat owners is Wet Sounds Bluetooth volume control WW-BT-VC. This is a small, water-resistant controller suitable for both console and interior mounting. It requires 12VDC connection to ships power and has a 1/8″ mini-jack stereo output for connection to your stereo. It pauses (mutes), changes tracks and controls the sound volume all with one small knob. As with other audio sources you can use either a FM transmitter or modulator for input to your stereo if need be. It pairs quickly and has good wireless range.

As a final note, your stereo’s auxiliary input is designed to accept what’s called a “Line Level” audio signal, and in some cases, this can cause minor problems. The headphone jack on your smart phone or iPod is like a line level output on a small dose of steroids. You won’t hurt your stereo with it, but if the input volume is turned all of the way up you can overdrive the auxiliary input causing sound distortion. So the general rule of thumb is to have the headphone jack volume turned way down and to use the stereo to control the sound volume. In the case of the Wet Sounds Bluetooth volume control, if you’re using a FM modulator you may have to play a bit with the volume settings to find a good-sounding combination.

There are many options available to get more life out of your stereo, but shop carefully and take time to read the customer reviews about the products before you buy. Like many things in life, sometimes the least expensive approach to good tunes cost you the most in aggravation.

Southern Boating, April 2015 By Bill Bishop

Weego Jump Starter Battery

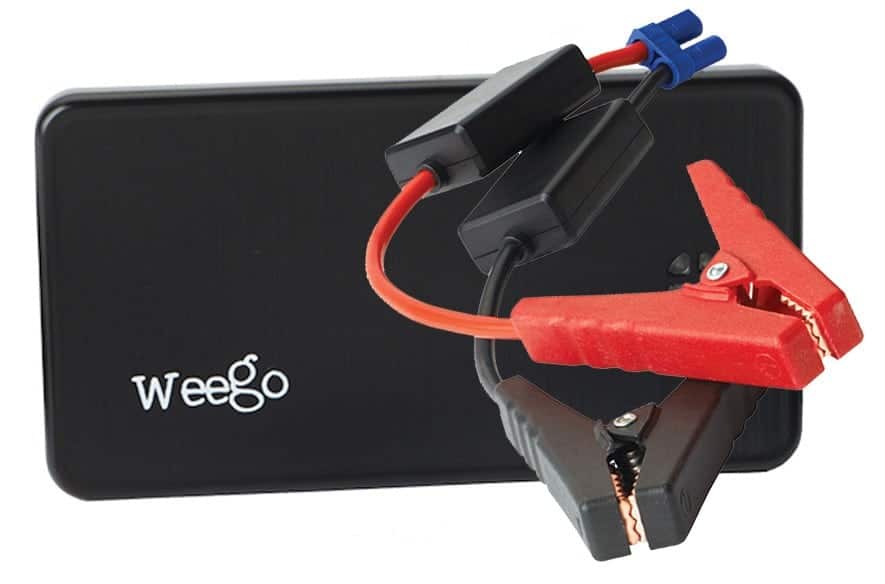
Weego Jump Starter Battery+ is a compact and portable jump starter that fits in your pocket and starts 12V batteries in boats, cars, toys, and more. It also charges phones, tablets and speakers, and is easy to use with jumper cables included. Weego Jump Starters are offered in three sizes: JS6 Standard is capable of starting gas engines up to 4.6L and diesel engines up to 2.4L; JS12 Heavy Duty can easily start gas engines up to 6.4L and diesel engines up to 3.2L, and JS18 Professional can start gas engines greater than 6.4L and up to 4.8L diesels. MSRP $99; myweego.com

Installing a Cockpit TV

It’s a beautiful Sunday afternoon in the anchorage and the big game is going to kick off in a few minutes. With this simple how-to guide, watch it on your new TV in the comfort of your cockpit instead of down in your dimly lit cabin.

1. Select a good mounting place. Although every boat’s cockpit is different, take a seat where you’re most comfortable and look around for a place with good visibility. Typical options are on a cabinet, wet bar, or on an arch or bulkhead. In this scenario we’re using an arch. Measure the selected mounting area and determine the maximum width and height for a TV, keeping in mind that the mount site will be the center of the television—most of today’s TVs are wider than they are high. Size does matter but be pragmatic about this. It may help to make a cardboard template of a TV to visualize the actual size.

2. Buy the TV. Once you have the maximum allowable dimensions, head to your favorite electronics store with a tape measure. First, find TVs that will fit, and then pick the brand and features you want. Your best option is a LED television since they are lightweight, thin and bright. If you plan to use an antenna or dockside cable, ensure the TV has a coax (Antenna In) connector. You may also want a built-in DVD player.

3. Buy a mount. Surfaces on a boat are rarely ever square or straight. In reality, most surfaces are curved and sometimes in a complex way—an arch might lean in and have a twist as it curves upward. The solution to arch and bulkhead mounting is to use a full-motion mount such as the Sanus VFS415 (shown). This is important since TVs that are fully retracted against the arch often look straight but when repositioned can appear twisted, and watching a TV when the top edge is running downhill is disconcerting. A full-motion mount solves all of these problems since it can be adjusted to all angles and any position that pleases the eye.

Once the area is selected to install the TV mount, you can begin to cut the necessary holes for the wiring.

4. Prepare to install. Most mounts attach with two bolts that are included in the package. Throw them out and replace with non-rusting stainless steel bolts. This now begs the point that you need to put nuts on them and you need access, which is gained by two methods. The best option is to place the mount in a location near an access point for wiring already installed, such as a speaker cutout. The second best option is to cut a hole and install a small Beckson plate to provide access. It is possible to use lag bolts, but the larger the TV the more problematic this becomes since your TV can bounce around when under way (see step 6). In either case be mindful of wiring inside when doing any cutting and drilling.

5. Access power and signal source. Power for most TVs will be 110VAC. In this installation power came from a spare AC breaker. Triplex AC wiring was pulled from the AC panel to the TVs location and a GFCI outlet was installed. (If there is any confusion about how to do this, hire a good technician instead. You don’t want to be a statistic with a damaged TV.) The TV’s signal source can come from many places such as the boat’s existing cable TV backbone, satellite TV receivers, and stand alone digital TV antennas. When using the coax backbone, digital on-air signals will be very good quality, and dockside cable TV will be adequate quality. If you’re using satellite TV, most are not high-definition systems. Your best option is to use a HDMI output from the receiver to feed the TV, and the next best resolution is the five-wire component TV connection. You will end up with a good quality signal about equal to 720p resolution.
You will want to place the power and signal source connections as close as practical to the TV. In many cases you can place them behind the TV to hide them but sometimes that’s not possible. In our installation, since this was an aluminum arch filled with wiring and tubing, the outlets were placed below the TV in the coaming. The HDMI cable connection will need to be wrapped with electrical tape on the back of the outlet to keep it from vibrating out. The wiring to the TV gets covered with split loom and neatly tied up and harnessed behind the set.

The TV has been mounted and connected.

6. Prepare TV for cruising. The TV should be restrained when not in use or during rough conditions. The best way to do this is with a couple of SS eyes and bungee cord. Your chartplotter is IP67 rated, but the TV isn’t rated IP anything so you it needs protection from the elements. The low cost approach is to use a good quality plastic garbage bag. It’s not attractive, but it’s functional. The better-looking option is a TV cover, which are available online starting at about $25. Also, an Allen wrench will most likely have come with your mount—do NOT lose it. You’ll need it to remove the TV for storage over cold winters or in adverse weather. Finally, kick back and enjoy that game!

Bill Bishop is a Florida based professional marine electronics installer and consultant. He writes extensively on the subject and publishes The Marine Installers Rant.

Southern Boating, February 2015, Bill Bishop

NV Charts Cuba

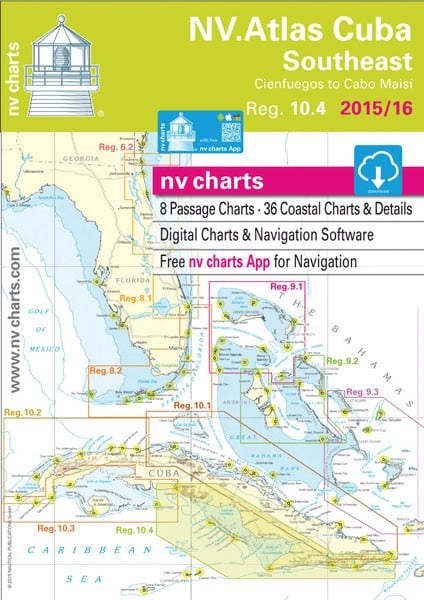
NV Charts releases four new chart regions for Cuba, covering the entire coastline in paper and digital formats, and including harbor and anchorage details. The chart regions not only include the download of digital charts but free navigation software and free nv charts Mobile App for iOS/OS X and Android devices. The new Cuba release is up to date, meticulously surveyed and available just in time for cruising the Caribbean Sea during the winter months. Chart region is based on data from various sources including NV Charts’ own survey data with clear cartography and conformity with international chart standards. MSRP $99.80; nvcharts.com

Ten Galley Upgrades.

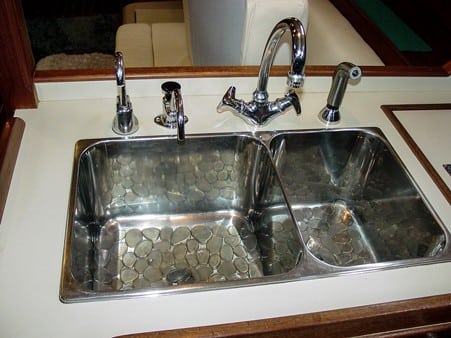
Make mealtime prep a breeze with these 10 galley upgrades.

Those forced to toil at the often thankless task of fixing grub for the crew may feel more like a galley slave than galley gourmet, but it doesn’t have to be that way. Here’s a look at 10 easy upgrades that can make galley duty more enjoyable. For the HGTV dreamers with a knack as a handyman or woman, tackle this list yourself to save on cost. Or for those who prefer the peace of mind of professionalism, save yourself the headache by checking references for a good local contractor. For a simple spruce, freshen your galley with a new coat of paint and de-cluttering.

1. Improve your lighting. Nothing makes a galley seem more cramped than poor lighting. Replacing outdated incandescent lights with modern units featuring fluorescent or LED technology will not only improve available light but reduce energy consumption as well. Upgrading or installing additional lighting over the stove, sink and food prep areas will go a long way toward achieving galley nirvana. For night-vision-safe galley work, choose units that provide both white and red light options, such as those offered by Alpenglow. Painting or covering dark, less reflective galley surfaces with light-colored countertop materials can also improve your existing lighting.

2. Increase counter space. When it comes to food prep and serving, most galleys are notoriously short on counter space, doubly so when entertaining onboard guests. A quick, easy way to supplement existing workspace is to install a cutting board over the galley sink. Wood and synthetic cutting boards come in a wide variety of shapes and sizes, making it easy to find one that will fit your sink with minimal trimming. Another option is fitting a removable top over your stove burners for use when preparing cold foods.

3. Maximize storage. No matter how you slice it, you just can’t have too much galley storage. Take a moment to step back and look at your galley and surrounding areas as a whole, not only to visualize ways to better utilize existing space but also to ferret out hidden or unused areas to increase storage options. Pots and pans that are used less frequently might be stored under the stove, sink or even the galley floorboards. I installed several shelves in an underutilized hanging locker adjacent to the galley aboard my boat, converting it into an easily accessible storage locker for cans, dry goods and other foodstuffs.

4. Upgrade sink and faucet. Too many galleys feature a single, diminutive sink that’s unfit for food preparation, dish washing or pretty much any other galley-sink related task. Upgrading to a deep, full-sized single or double sink is fairly straightforward and will make a marked improvement on most any galley operation. Swap out that old dual control faucet with a single lever unit to make one-handed operation a breeze. Those with extendable, pull-out faucets provide even more flexibility.

5. Get some air. Nothing enhances the quality of galley life like plenty of cool, fresh air, particularly during the heat of summer. Good ventilation provides a multitude of benefits, from rapid removal of smoke and food odors generated while cooking to the elimination of minor carbon monoxide buildup and its negative effects on crew health (headaches, seasickness, etc). Even something as simple as installing an adjustable galley fan can make a huge difference in aiding ventilation.

6. Install a saltwater faucet. Fresh water is something most of us take for granted, especially in the U.S. where it’s readily available at most marinas for no extra charge when fueling or docking for the night. When cruising outside of the U.S. where water supplies are limited and costly, however, having a saltwater pump and faucet is not only handy but economical to boot. From rinsing potatoes to washing dishes, using clean salt water in the galley is an excellent way to stretch your fresh water supply. Manual hand pumps are popular and easy to install, but foot pumps have the added benefit of freeing up both hands during use.

7. Add a real trashcan. Nothing says fancy galley living like a fixed trashcan. Sure, that diminutive plastic can under the sink works, but the convenience and luxury of a built-in, kitchen-bag sized bin (possibly topped with a cutting board lid) has to be experienced to be truly appreciated.

8. Add a dish drying rack. A drying rack not only makes dish washing easier but also cuts down on wet towels. Look around and find one that fits into your sink, which provides both an easy way to dry dishes and store the rack when not in use.

9. Install a “Vacuum flask” (aka Thermos ®) holder. Thermos bottles rock! That’s why a holder or rack that keeps them secure and handy is just the ticket for those cold days or overnight passages. Just heat up water at the beginning of the trip and crewmembers will have hot water for tea, coffee, hot chocolate, or instant soups for hours to come.

10. Move up to a wall-mounted dispenser. Everyone loves the convenience of paper towels, but where do you put them where they’re out of the way yet easy to grab when needed? Same thing with tin foil and cling-wrap—they’re always clogging up your drawers or impossible to find when needed. Multiple wall-mounted dispensers keep each of these in easy reach and are compact to boot—just perfect for that bare spot on the galley bulkhead!

Captain Lincoln F. Sternn has operated and maintained vessels ranging from dive boats to passenger ferries in the Atlantic, Caribbean, and South Pacific.

Cabana Life Sportwear

Cabana Life’s collection offers protection from the sun with a variety of beach essentials including swimsuits, cover-ups, tunics, shirts, pants, hats, and more for the entire family. Combining fashion with function by providing 50+ UV protection—blocking 98 percent UVA and UVB—through its patented SkinSafe™ Technology, the clothing line fuses classical nautical elements with current trends. Pictured: the Lava Tankini Top, MSRP $58; cabanalife.com

Full Nest, Empty Nest

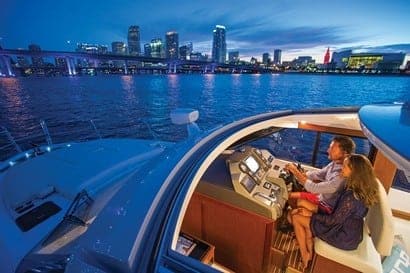
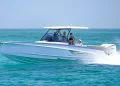
The Bavaria Virtess 420 Coupe appeals to families—no matter what stage of life they’re in.

It has been said that there’s a boat for everyone and a person for every boat. For anyone who has attended boat shows and seen the varieties of boat designs, sizes and layouts, it’s not exactly a stretch of the imagination to realize that there are in fact, many boats that meet a buyer’s needs. Infrequently if ever, though, have I felt a boat could easily transition to the changing needs of families: couples become parents, babies become teens, and parents become couples again. As it turns out, the Bavaria 420 Virtess is an exception to that line of thinking.

As the company’s moniker suggests, Bavaria Yachts is based in Germany, and the factory-direct company has been building boats for nearly 40 years. Its product lines include both mono- and multi-hull sailboats, and two motoryacht lines. The Sport line offers sizes 29 to 45 feet, and the Virtess line—first launched in 2012—comes as both a 42′ Flybridge and 42′ Coupe. Bavaria has earned a reputation in Europe as one of the top-producing builders, but it wasn’t until the 2014 Fort Lauderdale Boat Show that they entered the U.S. market and introduced the Virtess 420—even without the U.S. introduction they’ve already built some 40 hulls. It was there that the Bavaria Virtess 420 Coupe—or more specifically, its swim platform, transitional cockpit furniture and rooftop sunpad—turned my head.

Dirk Boehmer, Bavaria Motor Yachts USA national sales director, welcomed me to its U.S. Sales and Service headquarters at Harbor Town Marina in Dania, Florida, just south of Fort Lauderdale. Additional factory direct sales offices are in Annapolis, Maryland; Mystic, Connecticut; Atlanta, Georgia; and San Diego, California.

“Before you board, take a look at this,” Boehmer said while he lowered the swim platform into the water. I wasn’t sure why he was so enthralled with the hydraulically lowered swim platform since they’re not a new concept, but then I noticed the telescoping stairway extending automatically as the swim platform lowered. Now that is new, I thought, and at the same time I realized it makes every other builders’ standard swim ladder look so last decade, maybe even pre-millennium. Then Boehmer raised the platform back up, and the stairway neatly tucked into the platform deck. So clever, and so cool.

Another sensible option that goes hand-in-hand with that coolness is the movable cockpit furniture. Two loveseat-sized sofas and a table slide via channels in the deck for multiple arrangements and open up the cockpit area. When you’re at anchor and enjoying the water, slide the sofas around to face each other so that the entire back area is open to the water—and those playing in it.

Teenagers seeking personal space on board the 420 Coupe will undoubtedly climb the cockpit ladder and claim the rooftop sunpad, which you don’t see from the dock. Be careful of the ladder handhold—it’s a necessary safety feature but the sturdy rail protrudes a bit, and I bumped into it twice while moving around the cockpit. There’s another sunpad on the bow equally spacious for sunning or stargazing.

Inside the salon, a comfy settee and table for six is to starboard and directly across from the standard pop-up TV. There’s room for two at the helm, and headroom throughout is ample—even for Boehmer’s 6’4″ height there’s room to spare. Directly across from the helm, the galley to port offers built-in garbage containers, a double sink, microwave, cooktop, fridge, and a dedicated space for a serving tray with storage underneath. Teak is standard for the sole, although this particular model has DuraDeck synthetic teak inside and out, a robust, durable option for families.

German engineering is as evident below deck as it is above with efficiency of design and space utilization. A few steps forward and down from the salon, three cabins accommodate six comfortably—ideal for a family or three couples on a long cruising weekend. (Don’t forget that this is only a 42-foot boat.) The ensuite forward master with an island queen bed offers more than adequate storage, while the two guest cabins each have two twin berths—they can be combined for a full-size berth—and share the other head, which also serves as a dayhead and is accessed from the hallway.

One of the benefits of buying a boat from a factory-direct builder like Bavaria is that there are no dealer mark-ups added to the price. According to Boehmer, all of their models sized 36 feet and larger are extremely price competitive compared with other boats in the same class and size. It’s important to keep in mind, though, that while production efficiency has been scrutinized and maximized, any customization changes will reduce the cost savings and add to the price. Boehmer says that depending on requested changes, they may be accommodated at the factory but implemented after delivery in the U.S. All Bavaria Motor Yachts come with a full two-year warranty, whether sold in Europe—a compulsory requirement there—or in the U.S.

My sea trial out of the Dania Cut-Off Canal and past container ships being loaded at Port Everglades gave me time to explore the Virtess 420 Coupe’s conversation areas and imagine that if I was lucky, my sea trial might last a little longer than expected. The only thing that would make the day even better would be to have my whole family with me, and on this boat there would even be room for the cousins, too.

SPECIFICATIONS
LOA: 44′ 7″
Beam: 13′ 10″
Draft: 3′ 8″
Weight: 24,250 lbs.
Fuel/Water: 317/108 U.S. gals.
Power: 2x Volvo Penta IPS 600 diesels @ 435-hp each
Cruise/Top speed: 25/34 knots
Range: 250 nm @ cruise
MSRP: $763,291 as equipped; $630,563 base price (delivered to Fort Lauderdale and prepped)

CONTACT
Bavaria Yachts USA
825 NE Third Street
Dania Beach, FL 33004
(954) 639-7976
motoryachts@bavariayachts.com
bavariayachts.com

Southern Boating, By Liz Pasch, June 2015

Fish On!

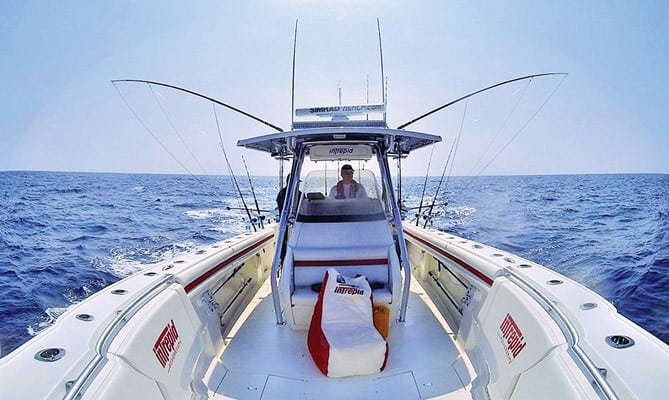
How to select and install outrigger equipment.

Outriggers are used to increase the width of the trolling spread of bait and lures. When considering what type of outriggers and poles to purchase, the biggest factors are price, convenience and presentation of the bait. Options generally include either aluminum or carbon fiber poles, and simple gunnel-mounted outriggers or convenient T-top mounts.

Gunnel-mounted outriggers are the simplest and least expensive outrigger option. They can be set in a variety of positions—straight up for running, angled out for trolling and straight back for navigating under bridges. They are also the easiest to install since only an angled hole, saw and a drill are required for installation. A pair of gunnel-mounted outriggers ranges from less than $400 up to $700 depending on the features. Simplicity, however, is not always the best option. Captain Mark Henderson of the Liquid Fire Fishing Team advises, “A disadvantage of gunnel-mounted outriggers is [that] there is more line in the water because the angle from the release clip where the line is held is lower. Therefore, to let a lure or bait out the same distance as an outrigger from the T-top, there will be more monofilament in the water, which increases drag pressure and diminishes the action of the lure.” The most popular option for center console boats is top-mounted outriggers. Their position from above the top provides both a cleaner presentation of the bait and complete fish-fighting ability around the boat with no obstructions from a gunnel outrigger. If your boat does not already have outriggers installed or is not equipped with outrigger mounting plates, aftermarket mounting plates can be added for about $300 a pair.

There are two types of top-mounted outriggers. The first are top-mount models that require someone to climb up on the gunnel to raise or lower the poles. These types of mounts start around $600 for a pair or come complete with poles and a rigging kit for about $1,300. The second type of mounted outrigger is much safer and very convenient and allows a fisherman to change the direction and angle of the outrigger by using an elevation crank under the top. This provides a much safer way to change angles and lower poles when in rough seas. These outriggers may require mounting plates or wedges that don’t come in the box, and prices range from about $1,300 up to $2,500 for a pair of mounts. The great benefit is that you can install these yourself.

Outrigger pole options are not as readily available as the mounts—your choices involve length and material (aluminum or carbon fiber). For most boat owners aluminum poles cover their needs. For vessels under 30 feet, a pole length of 15 feet eliminates the additional weight and length of 18-foot poles, as there is less “bouncing” of the poles when extended while running offshore. This means less stress is placed on the T-top and bases. Boats 30 feet and larger tend to have a softer ride, which allows the vessels to easily handle the additional length and weight of the 18-foot poles. “The added length of the 18-foot poles provides the opportunity to add an additional line on each side and also increases the width of the trolling spread by 6 feet. This increases the surface area to make a wider and fuller bait presentation,” says Henderson.

Aluminum outrigger poles are far less expensive than carbon fiber poles, however, they are much heavier. Because aluminum is more flexible it may not allow the bait, lures or dredges to swim as true through the water. Also, aluminum poles do not hold as well under heavy loads when trolling large lures or pulling heavy dredges, especially in rough seas.

Carbon fiber poles are rising in popularity. These poles are much lighter, create less stress on the outrigger mounts and allow easy maneuvering when swinging them out to their fishing and running positions. Carbon fiber poles are also stiffer and create less whipping movement, which allows the bait to run truer for a natural display under water. That said, carbon fiber poles are at least four to five times more expensive than aluminum outrigger poles. They can also be more sensitive to nicks and scratches—a major dent or scratch can weaken the strength of the pole, and the repairs can be more costly than those on aluminum poles.

Whether you select gunnel or T-top mounts, aluminum or carbon fiber poles, there are many affordable choices that will fit your budget and increase your sport fishing fun.

Southern Boating, July 2015, By Jose Chao

Lumitec’s SeaBlazeX

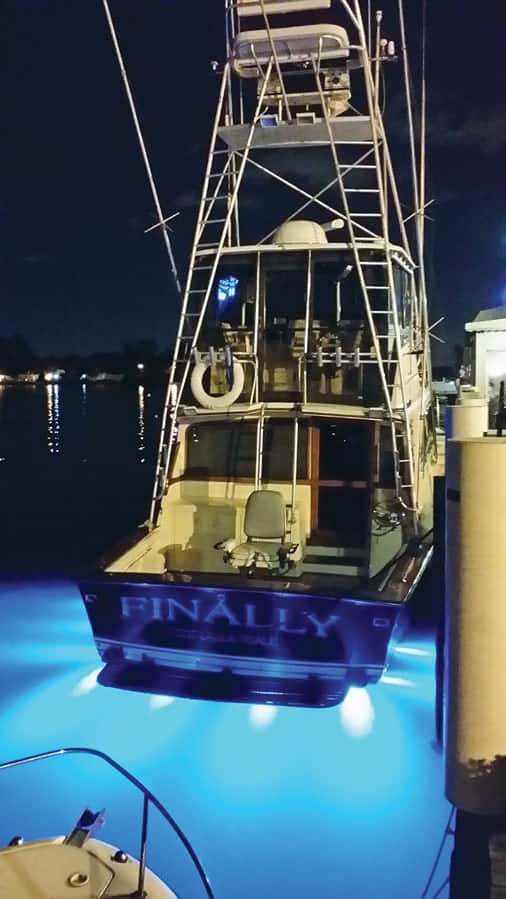
Lumitec’s SeaBlazeX is an underwater light that features twice the useable light of their popular SeaBlaze3. Completely surface mounted, the SeaBlazeX housing is made of bronze alloy with a designed underwater service life of more than 50 years. The circuitry is self-contained and tested to rigorous military standards for EMI, transient voltages, temperature extremes, and mechanical shock and vibration. Available in blue, green, white, and random cross fade. MSRP $429; lumiteclighting.com

Dayboat or Cruiser?

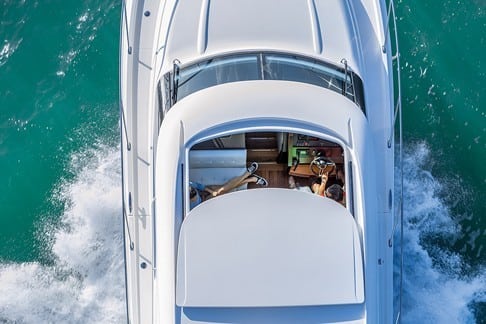
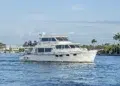
Tiara 39 Coupe delivers the best of both worlds.

“Elliott Key or simply cruising the ICW and stopping for lunch.” Issy Perera, president of Apex Marine in South Florida—and a Tiara Yachts dealer—knows precisely where Tiara’s new 39 Coupe is going to create a remarkable swagger among the growing number of dayboats that now congregate popular gathering spots on weekends.

Yet the twin Volvo IPS 500 drives and 300-gallon diesel fuel capacity will just as easily conquer Key West, Havana Harbor and Marsh Harbour. “Cruising, especially with the price of fuel dropping, remains an important component for today’s boater,” acknowledges Tom Slikkers, president and CEO of S2 Yachts, Tiara’s parent company. “As we modernize our fleet with innovations, we’re more in tune with our customers’ changing lifestyles, and the Coupe series caters to dayboaters and cruisers alike.”

This is Tiara’s third Coupe following successive launches of their 50 and 44 Coupes that share a design trait styled around outdoor entertaining. A cockpit sole to hardtop sliding glass door glides open creating a seamless union between galley and salon inside, with an outdoor cockpit conducive to conversation, dining or simply enjoying the fresh air.

Across many boat lines, builders are “Swiss Army knifing” entertainment centers in cockpits, combining storage space, recessed grills, tackle drawers, and ice makers. Tiara’s vision is a designer’s dream. By positioning this feature of the Coupe series at the transom, a functioning focal point island was created, which serves as a luxurious forward-facing lounger, while the swim platform side includes a hidden grill, drawers and entrance to a cavernous storage trunk.

This island establishes two ways of egress, a definite advantage for singlehanded docking or boarding regardless of the marina’s finger pier configuration. The dual entry is also a winner with grill masters as they rush a plate of hot hamburgers or mouthwatering mahi-mahi from the innovation award-winning Kenyon All Seasons Electric Grill recessed in the aft island. This eliminates a congestion point yet keeps everyone close to the conversation.

An optional teak salon table with manual hi-lo pedestal bases easily stores between meals—storage is abundant in the Coupe series. IPS equipped boats opened spaces below decks that massive engine blocks once occupied. That room led to the enlargement of cabin space and in the Tiara 39 Coupe’s instance, a garage-like fiberglass liner accessed by a simply actuated one-piece door. Shore power cables, fenders, cleaning supplies, hoses, and fishing rods—there is room for it all—are out of sight, yet easily within reach.

Built for living outdoors, the salon delivers a yacht-like ambiance within the 13′ 3″ beam. The starboard galley features an Isotherm 120V/AC drawer unit—drawer refrigerator on top with lower drawer freezer, microwave/convection oven, and recessed two-burner electric cooktop. All appliances are neatly accented by Corian countertops and easily powered underway by the Onan 7.5kW generator. Portside, an L-lounge offers seating for four, with easy viewing of the 28″ LCD TV with Samsung Blu-Ray DVD player mounted above the galley.

Tiara has wisely chosen to sculpt a command center with the Volvo Glass Cockpit integrated electronics package with Volvo engine option. Twin Garmin 12″ displays allow for orchestration of every feature, sounder, radar, plotter, optional video cameras, all on presets that best serve you in the moment. While the 17.5-inch leather trimmed wheel offers a pleasing, reassuring tactile response, Volvo Joystick Plus Control with joystick driving may be the closing argument that sways the purchasing jury. Tiara’s sweet-riding hull delivers an exceptional driving experience, one that tempts you to turn hard to starboard as if cornering a roadster. Joystick control removes any navigation and docking hesitation.

Other notable design features include a manual sunroof and Duette blinds for port and starboard salon windows. The Fusion 3 zone sound system—with wired remote powered by JL Audio digital amp—blasts your favorite tunes from four speakers and Polk 8″ subwoofer with tuned enclosure. Bring your own playlist on board, as the unit accepts USB/MP3 and has integrated Bluetooth.

For weekends aboard or vacation adventures, below deck accommodations are inspirational. The master centerpiece is a queen-size pedestal berth with a deep quilted innerspring mattress. Storage is a cut above normal, with a cedar-backed hanging locker, a couple of upper storage compartments port and starboard, and significant space below the berth. Privacy is afforded with a bi-fold teak door.

An aft stateroom sports a full-size berth and a clever portside settee that can be used for additional sleeping capacity. For families, these sleeping arrangements are ideal, but owners who prefer separate sleeping accommodations will find the roominess of both staterooms more than adequate.

The single head between the master and aft stateroom is easy to access by day or night, and the over-the-counter mirrors and LED lighting create a sense of space. The shaped sink, single handle faucet and teak countertop over the lower vanity storage add a distinctive designer element to the head and shower.

Throughout the 39 Coupe are rich, solid wood flooring, decorative wall coverings, and heavy-duty hardware on latches that will stay closed in unsavory seas. Desirable options prospective owners should consider include a flat-screen TV and DVD player for the master stateroom, the elegant Sisal Seagrass aft cockpit carpet, and a well-engineered Makefast Marine powered sunshade that extends over the aft outdoor seating.

Tiara’s 39 Coupe eases the dilemma of choice between dayboat and cruiser, while giving a nod to changing lifestyle choices on the water.

SPECIFICATIONS
LOA: 40’10”
Beam: 13’3″
Draft: 3’4″
Bridge Clearance: 13′
Displacement: 23,290 lbs.
Fuel/Water: 300/100 gals.
Power: Twin Volvo IPS 500
Cruise/Top Speed: 30.1/40.3 mph
Range: 272 nm @ cruise
MSRP: $703,704 (base); $769,299 (model reviewed)

CONTACTS:
Tiara Yachts
725 E 40th Street
Holland, MI 49423
(616) 392-7163
tiarayachts.com

Apex Marine
2550 S Bayshore Dr, Suite 104
Coconut Grove, FL 33133
(305) 858-9700
sales@apexmarine.co

Southern Boating, By Alan Wendt, January 2016

At Ease: Celebrate Mardi Gras

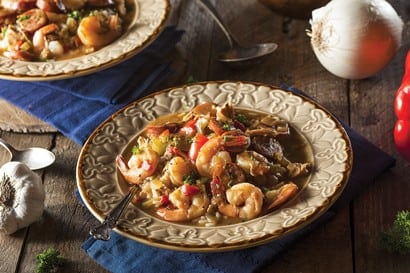
Celebrate Mardi Gras with an easy menu to make in your galley. Serve an old school daiquiri and Cajun Meatballs to start, a lively salad featuring the traditional purple, green and gold colors of Mardi Gras, a luscious gumbo with rice, and some sweet fresh fruit dipped in sour cream. All recipes serve four.

Chicken, Shrimp and Sausage Gumbo

Roux:
2 tbsp. butter or oil
2 tbsp. flour
Holy Trinity:
2 stalks celery chopped
2 green peppers, chopped
1 onion chopped
2 garlic cloves chopped
Gumbo:
Dash of Tabasco sauce
Dash of dried thyme and cayenne pepper
3 tomatoes chopped or 1 lb. canned diced tomatoes
2 cups water or chicken broth
1 cup fresh, frozen or canned okra, chopped (optional) or 1 tbsp. file powder (the okra or file powder will thicken the sauce)
1 lb. shrimp, peeled and cleaned
1 lb. Andouille smoked sausage or other smoked sausage, sliced
1 lb. cooked chicken, chopped
Salt and pepper to taste

Melt butter or oil in a large soup pot, and reduce heat to medium-low. Stir in flour, and keep stirring until the mixture (called a roux) is a light to medium brown color, about 5-8 minutes. Add celery, onion, peppers, and garlic; cook until soft, about 6 minutes. Add Tabasco, thyme, cayenne, tomatoes, and water; cook another 5 minutes. Add Andouille and okra. Bring to a boil over high heat. Reduce heat to medium and stir occasionally until gumbo thickens, about 20 minutes. If you are not using okra, mix 1 tablespoon file powder with 1/4 cup hot gumbo stock then add to pot. Add shrimp and chicken and cook for 5 minutes or until shrimp is pink. Season with salt and pepper. Serve on rice with extra hot sauce on the side.

Old School Daiquiri
8 oz. rum
8 tbsp. lime juice
4 tsp. sugar

Mix sugar thoroughly with lime, add rum, shake, and pour over ice.

Spicy Cajun Meatballs
2 lbs. small meatballs (frozen cooked*)
Spicy Sauce:
1/4 cup butter
1/2 cup ketchup
1/2 cup barbecue sauce
3 tbsp. sugar
1 tbsp. vinegar
1 tsp. Creole mustard (or yellow mustard mixed with Zatarain’s or Emeril’s Creole seasoning)
Dash each of Worcestershire sauce and hot sauce
1/4 tsp. salt (or more to taste)

In a 14-inch sauté pan, whisk together melted butter with all sauce ingredients and bring to simmer. Place meatballs into sauce and cook 15–20 minutes. Transfer to bowl and serve warm with toothpicks.

Mardi Gras Salad
1 large head romaine lettuce
1 cup purple cabbage
1/2 red onion
1 yellow bell pepper
1 cup yellow tomatoes
Dressing:
2 tablespoons grainy mustard
3 tablespoons vinegar
1/2 cup oil
Salt and pepper to taste.

Chop salad vegetables, place in salad bowl and set aside. For dressing, blend mustard and vinegar and slowly whisk in oil, then season with salt and pepper.

Strawberries Dipped in Cream and Sugar
1 quart of whole strawberries, leaves attached, washed
1 cup sour cream
1 cup brown sugar

Put each ingredient in a separate bowl. Hold strawberry by its leaves, dip in sour cream, and then dip in sugar. Enjoy!

Setting the Mood for your Mardi Gras Celebration

Decorate in traditional Mardi Gras colors—green, representing faith; gold symbolizing power; and purple denoting justice. If the weather cooperates, have cocktails under the stars. Trim the boat in fairy lights or Christmas tree lights in a mix of colors—red, blue, yellow, and green are perfect for Mardi Gras and if they flash on and off, even better! Or light a few votive candles in colorful holders (purple, gold, green!) and have a few lanterns on buffet tables to make it easy for guests to see what they are eating. If you have the party indoors, dim your lights and decorate in colorful string lights shaped like chile peppers, flowers, Japanese lanterns or cylindrical accordion shades in Mardi Gras colors! Go to your local party store to find a wide range of lights.

Sprinkle tables with Mardi Gras beads and doubloons like the ones that are tossed to the crowds from the parade floats in New Orleans or place a gold, green or purple runner on your table. Hang decorated Mardi Gras masks, beads, streamers, or pirate-themed-booty in Mardi Gras colors. Wear beads, colorful feather boas and glittery hats! Hang a Mardi Gras flag—your guests will know they’re at the right place when they see the crisp purple, green, and gold hanging at from your boat!

Select and have ready at least 2 hours worth of Cajun or New Orleans jazz music such as:
Bayou Deluxe: The Best Of Michael Doucet & Beausoleil; Best of Cajun: Traditional Songs; Best of Zachary Richard, or traditional New Orleans jazz music – such as clarinetists, Pete Fountain.

Cajun Meatballs

1/2 lb ground beef
1/2 lb ground pork
1/4 cup minced onions
1/4 cup minced celery
1/4 cup minced red bell peppers
1 tbsp. minced garlic
2 eggs
salt and cracked black pepper to taste
pinch of thyme
pinch of basil
Louisiana hot sauce to taste
3/4 cup Italian bread crumbs
1/4 cup oil

In a large mixing bowl, combine meats, onions, celery, bell peppers, garlic and eggs. Blend all ingredients well with your hands. Season to taste using salt, pepper, thyme, basil, and hot sauce. Continue to mix until seasonings are well blended. Mix in bread crumbs. Shape mixture into 1-inch meatballs and sauté in oil until nicely browned.

Southern Boating, By Lori Ross, February 2016

Exit mobile version