

Install a Solar Panel on Your Boat
Sunbathers delight! Here’s how to install a solar panel on your boat.
It’s no wonder solar panels are such a popular way to “green up” a vessel’s energy plan. They’re noiseless, have no moving parts and provide free electricity for years with minimal maintenance. Here’s how to outfit your boat to soak up some sun and install a solar panel on your boat.
Usage
Most boats can benefit from solar power. Smaller craft (whether at a slip, mooring or on a trailer) can keep their batteries topped off without the need for shoreside power.
Larger vessels can use solar power to supplement or even replace other onboard charging sources to reduce or eliminate the need to run engines or generators.
Types of solar panels
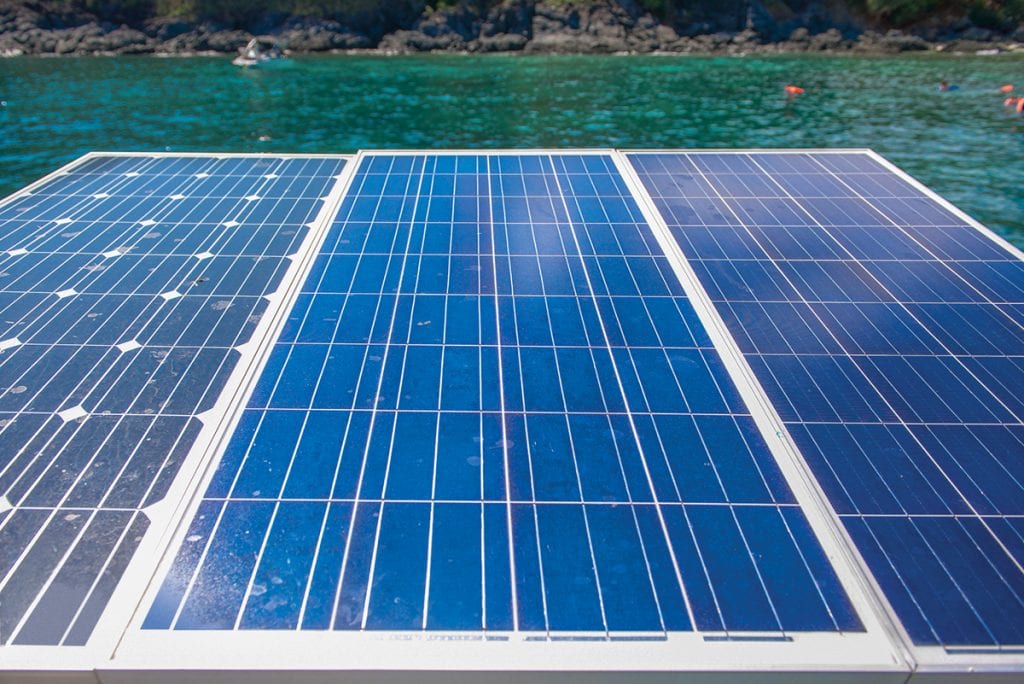
The three main types of solar panels are monocrystalline, polycrystalline and amorphous (or thin-film) technology. Each uses photovoltaic cells (small silicon semiconductor devices) to convert sunlight into electricity. Monocrystalline panels are the oldest type. They feature thin slices of crystal silicon housed in a rigid, aluminum frame and covered with tempered, shatterproof glass. They’re the most efficient (around 17 percent) and have the highest electrical output per area, but are also the most expensive.
Polycrystalline cells are sliced from a cast silicon block and have a shattered glass appearance. Built in much the same way as monocrystalline panels, they’re rectangular and give the panel a tiled look. Their life span is similar to monocrystalline panels and while their conversion efficiency is lower (14 percent), they’re less expensive.
Amorphous panels, aka thin film photovoltaic cells (TFPV), are made by placing a thin film of active silicon on a solid or flexible backing, such as stainless or aluminum sheeting, depending on whether the panel is to be rigid-framed and glass-fronted or flexible. Amorphous panels are the least expensive of the three types; however, their efficiency is about eight percent or roughly half that of the monocrystalline type. However, in instances of newer panels that built with three-layer construction techniques, the effect is less apparent. Each layer absorbs different colors of the solar spectrum so the panel will deliver more power longer each day and during low-light conditions than the other two types.
Planning the system
While factors such as cost, mounting options, and output are important, a successful installation depends on knowing what you want the system to accomplish. Is the goal to float-charge a battery or supplement an overall vessel energy plan? Answering these questions up front will help you decide the type, size and number of panels required.
To better understand the process, let’s walk through the basic steps to determine the power requirements and other considerations for a single solar panel installation. This is a simple example, but are the same steps for more complicated installations.

To start, the daily self-discharge rate for a wet-cell battery is roughly one percent, meaning that your 100-amp hour battery requires one amp every 24 hours to maintain the status quo. Assuming your anchor light operates 10 hours each night and draws 50 milliamps per hour of operation, multiply the current draw (50 milliamps) by hours of daily operation (10) to reach a daily energy expenditure of .5 amps.
This means your solar panel will have to meet a minimum daily energy tab of 1.5 amps (one amp to address the battery self-discharge rate plus the .5 amps draw of your anchor light).
Mounting
The next step is to figure out the panel size and the best mounting location. Solar
panels should be installed in a spot where they don’t interfere with the boat’s while underway. Ideally, the installation will be adjustable so it allows you to rotate or turn panels toward the sun periodically throughout the day (which can increase power generation by up to 40 percent). Panel output ratings are based on ideal conditions, e.g., 90-degree orientation to bright sunlight, no shadowing, optimal temperatures, and no load attached.
For the real world, assume a panel will produce roughly half its advertised wattage in amp-hours per day when actively aimed at the sun (otherwise, it’ll be around 30 percent).
Popular mounting locations for fixed panels include cabin tops, stern rails, atop dinghy davits, radar arches, and Bimini tops (with some flexible panels being sewn right into the
canvas). Rollable, marine-grade panels can mount in a variety of locations using their corner grommets and are easy to remove and store.
Slightly raise any large, ridged, deck-mounted panels. This lets air circulate beneath because higher temperatures increase resistance and decrease cell output. Installations in warmer climates may require panels with a higher maximum output to compensate for this. Our example panel will be a horizontal, fixed-mount installation. A 10-watt panel should contribute between 3 and 5 amp hours per day. You’ll need at least 13 volts to fully charge your 12-volt battery. As most solar cells generate at least 0.45 volts, you’ll want a panel with at least 33 cells which should provide around 14.85 volts.
Real World
Keep in mind that’s the minimum needed and may not be enough once you factor in a few cloudy days. Most panels are designed to generate between 15 and 20 volts to overcome
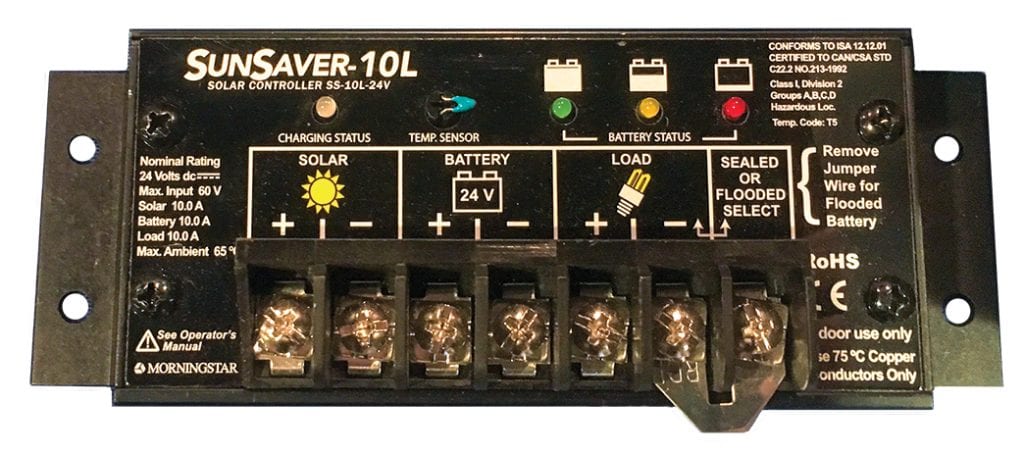
conditions like clouds or inherent electrical resistance. While this higher voltage lets you make up for less electrically productive days, it also means you’ll want to install a charge
controller (voltage regulator) to avoid battery damage due to overcharging.
By Frank Lanier, Southern Boating May 2019