Inboard Cooling System Maintenance Must-Knows
Flush your inboard system.
In an earlier issue, we discussed the need to flush outboard motors (to clean out the raw water and mineral deposits that remain in the engine block water jacket). This type of cooling is known as open-loop cooling. Inboard engines usually have antifreeze in the engine block; this is termed closed-loop cooling. An inboard engine still has raw-water cooling concerns but not usually in the engine block. So how do you flush your inboard cooling system? Inboard cooling system maintenance starts with understanding the system itself.
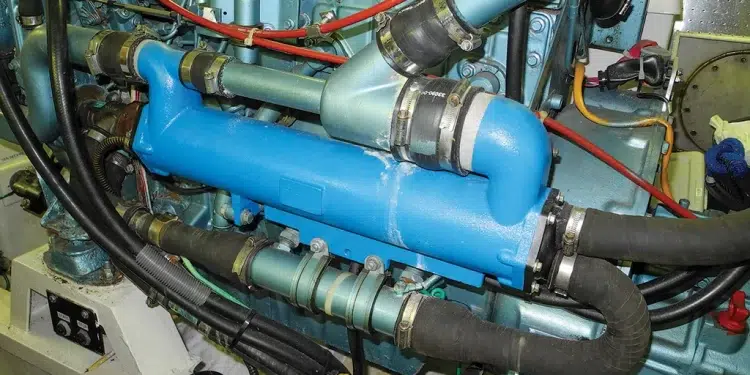
Most inboard engines are marinized automotive or industrial engines that use antifreeze in the engine block water jacket. Just like your car, that antifreeze needs to be cooled. But this time, cooling occurs via a raw-water-cooled heat exchanger.
A marinized engine will use a tube in shell heat exchanger to cool the antifreeze with raw water running through the tubes and antifreeze circulating in the shell around the tubes. Think of a water-cooled tubular radiator. The easiest way to determine if your engine is closed-loop cooling is to search for a radiator cap that will contain the antifreeze coolant.
Raw-water Heat Exchangers
There are other hot items in addition to your engine block that need to be cooled, and they do NOT use antifreeze. Some of these include oil and fuel coolers, transmission, and hot air coolers after the turbocharger. These are usually cooled with a raw-water heat exchanger. So maintenance is important to prolong the life of your engine’s cooling system.
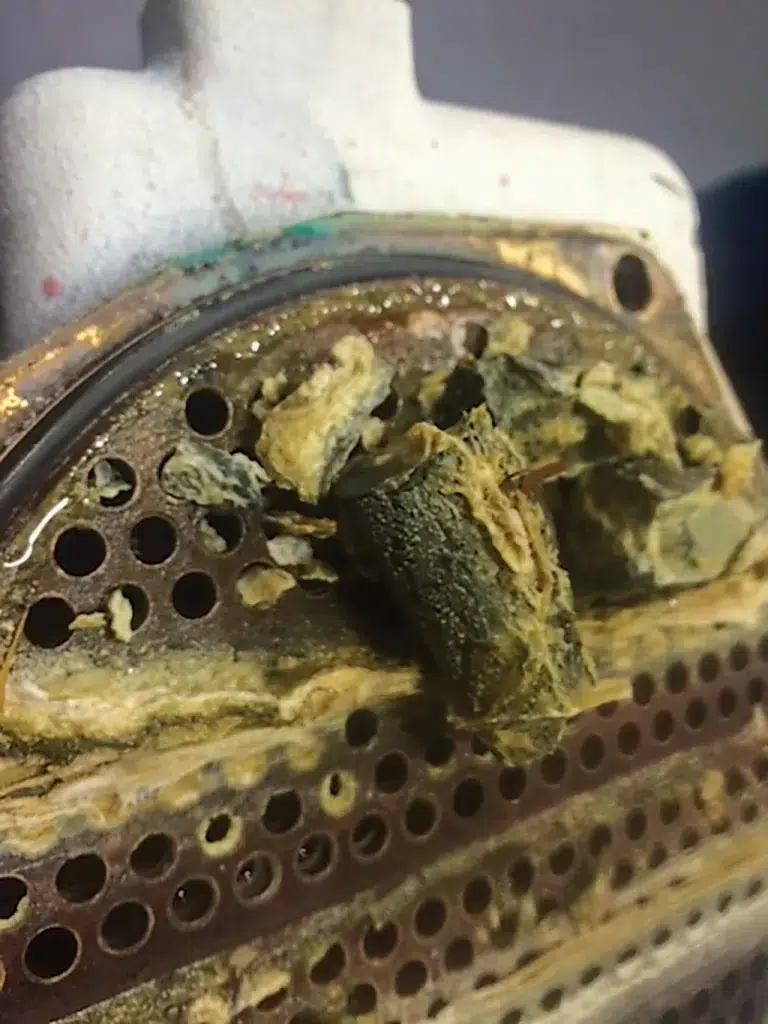
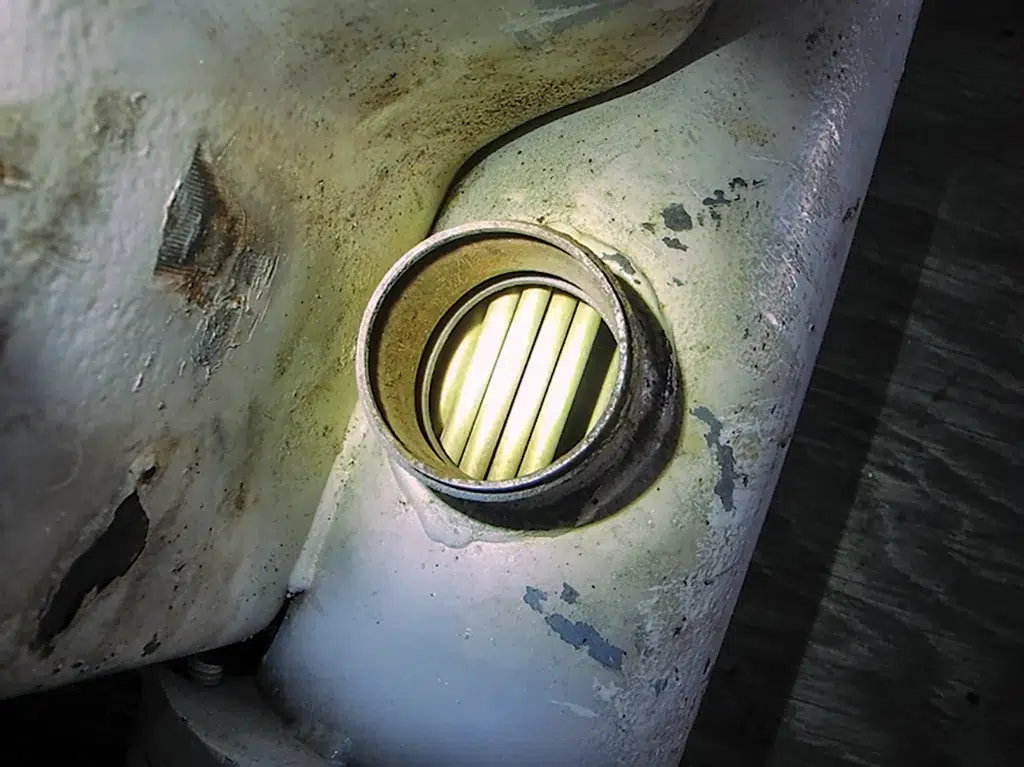
Sea life can corrode and foul the tubing bundle inside the heat exchanger, restricting water flow and cooling efficiency. All these coolers (aka heat exchangers) usually are made of cupronickel, a copper alloy that also needs periodic cleansing to clear out contaminants, sea life, and salt crystals. Worst-case scenario is the tubing welds (brazing) may have pinhole leaks and allow raw water to enter the loop it is cooling.
A DIY boat owner project may be something to consider, but there are a few steps. Close the seacock—one per engine—before you remove the end cap or raw-water hoses from the different heat exchangers. A simple visual inspection can help you decide the next step. Our photos include evidence of extreme marine growth. If you see crusty critters reducing the internal diameter of the tubing, then you have work to do.
Subscribe For Regular DIY Articles
DIY Inboard Cooling System Maintenance: Step-by-Step Guide
First Time Jitters? Ask For Help
If you are not comfortable doing this DIY project for the first time by yourself, consider hiring a mechanic that agrees to have you watch or help. But here are the basics:
A rodding out may be the first step to improve cooling efficiency. Purchase an aluminum or brass welding rod from a hardware store. You can easily push the rod in one end and out the other to scrape out the growth. Be sure to use a soft metal rod and be gentle with the force required to push out the debris. Your next step may be to use a flushing chemical.
The best practice is to remove the heat exchangers and send them out to a marine radiator shop. The technicians will acid boil, clean, pressure test, paint, and return the exchangers for you to reinstall. Then you can start your scheduled preventive maintenance flushing schedule based on a certified clean heat exchanger system.
To Flush or Not to Flush
If you’d like to do this yourself, reassemble the heat exchangers using new gaskets and hose clamps where needed. To flush this, you need a simple bucket of a marine growth chemical remover such as Barnacle Buster. The cleaner can be recirculated through the engine heat exchanger system by using a small bilge pump in a bucket. Be sure that the engine sea cock is still closed, disconnect the raw-water pump discharge outlet, and connect the cleaner solution to that hose. Disconnect the last hose in the system and allow the fluid discharge to return to the bucket to be recirculated through the system. How much product or how long depends on the fouling of your engine’s heat exchangers and exposure to elements of raw water.
Keep a service log dating the pencil zinc inspections in the heat exchanger. The pencil zinc will help protect the tubing bundle. Not all heat exchangers have pencil zincs, but the bigger engines should have them on the antifreeze heat exchanger and, possibly, the transmission and turbo after-cooler heat exchanger.
Inboard Cooling System Maintenance Expert Tip: Eye Spy…Every Time
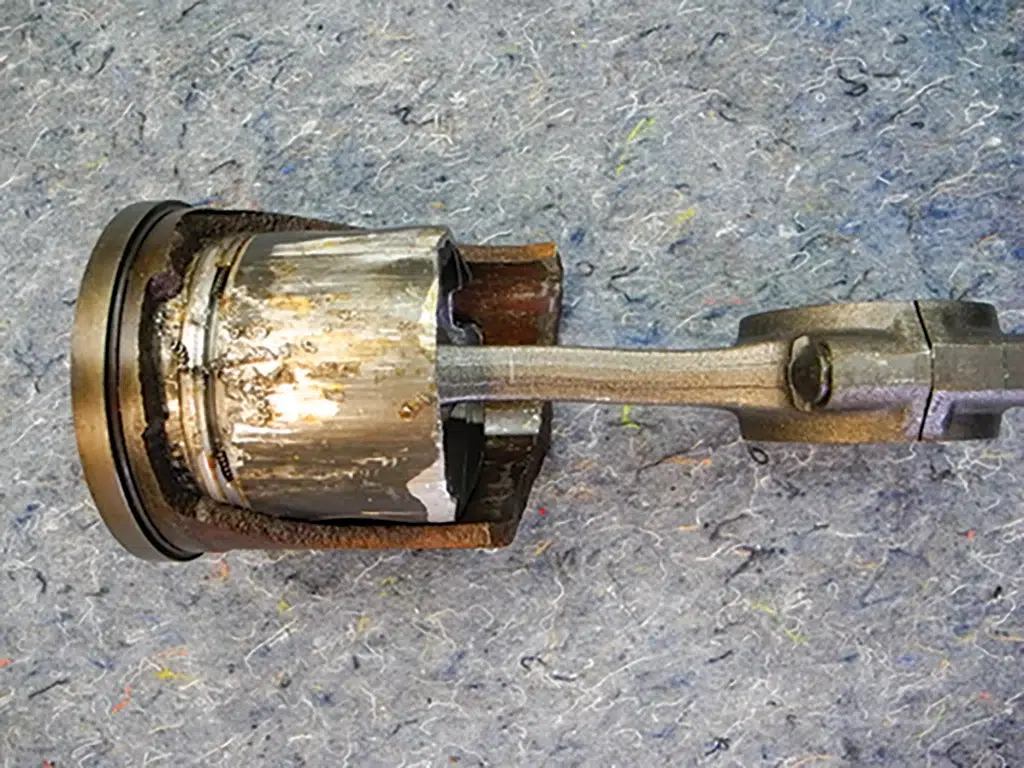
Visual inspection every time you check engine fluids offers a simple troubleshooting of raw-water leakage. Notice if the antifreeze is overflowing from the radiator cap. When your crankcase oil has turned a chocolate milk color, raw water has leaked in. If your transmission fluid looks like a strawberry milkshake, water got in there, too. Finally, when the engine stops or will not start because there is water on top of the piston, a catastrophic failure known as hydro lock has occurred. Hydro lock is the most severe and may bend the piston connecting rod, crankshaft, or blow out the side of the engine block.
Preventive inboard cooling system maintenance will make your life easier. Remember, owner visual inspections create the best results for your closed-loop cooling system—every time.
-by Capt. Chris Caldwell


